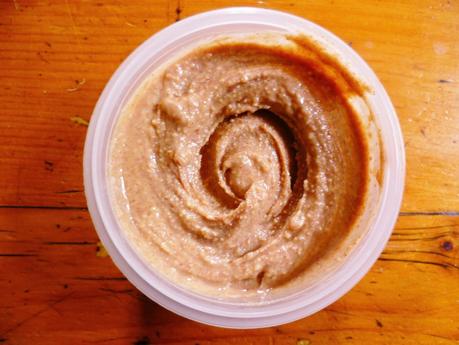
peanut butter
A few weeks ago a friend came to stay for the weekend. Normally I try to have a few things in that I know that my guests will like. But horror of horror when we toddled home after a night of gentle carousing, I only had half of the components for his favorite midnight snack – a Marmite and peanut butter sarnie.”“You’re a cook” he said challengingly. “Make some peanut butter. It can’t be that hard.”
While I wasn’t really in the mood for operating machinery that consisted of very sharp blades in my merry state, it turned out that making nut butter really is incredibly easy. In fact, it seems a little embarrassing posting a recipe. All you really need are peanuts and a good food processor or spice grinder. Of course there are a few things that you can add to your nut butter, so think of this as less of a recipe and more of a series of suggestions.
I have to say that the homemade version is infinitely superior in flavor to shop-bought peanut butter, and can be made in just a matter of minutes. It will store well in the fridge too.
ingredients:
500g raw peanuts
vegetable oil (optional)
2 tsp salt
1 tbsp runny honey (optional)
directions:
- Preheat the oven to 180C / Gas Mark 4.
- Lay the nuts out evenly on a lined baking tray.
- Heat in the oven for 10 minutes, shaking the tray after 5 minutes. After 10 minutes the nuts should be lightly toasted, although they may take longer. However, if it looks as if they are cooking more quickly, then take them out of the oven. You really don't want burned nuts! Transfer to a plate and leave to cool.
- Place your nuts in a food processor and process in short bursts.
- For the first 10 to 20 seconds or so, your nuts will just look like ordinary ground nuts. You need to persevere.
- After another 20 seconds or so, some of the natural oil within the nuts is released. The finely ground nuts will start to stick to the side of the food processor as well as clump together. You'll need to switch off the processor and scrape down the sides.
- After 90 seconds you should get something that looked like a clump of nut paste. But you still need to keep on going.
- After 180 seconds (yup 2 and a half minutes) the mixture begins to look shiny, like peanut butter should. It was still very thick, so I added 4 teaspoons of safflower oil to loosen the mixture. It was now smooth and creamy.
- Since I had used raw peanuts, I added 2 teaspoons of salt as well as 1 tablespoon of runny honey to the mixture.
- The peanut butter will store well in an airtight container in the fridge for about 3 weeks to 1 month.
tips:
- If you prefer a chunkier texture, then add another 100g of whole peanuts to smooth butter and give a quick whizz.
- I sweetened my butter with honey, but you could use a little brown sugar or maple syrup.
- I actually prefer almond or cashew nut butter to peanut butter. Many nuts and seeds can be ground into a paste, so it is worth experimenting.
- Don't bother removing the peanut skins, as they just add a little more color to the finished butter.

