I've been deep in gluten-free sourdough land for a while now. It started with my classic gluten-free sourdough loaf, then extended into sourdough pizza, sourdough crackers, sourdough focaccia...until I was feeding my starters all the time and constantly making bread and its friends. I even started a gluten-free sourdough Facebook group, where we share tips and tricks and advice! It's been a blast because sourdough is a deeeeep rabbit hole, and it's fun to have friends down there with you!
But one thing I've been asked about a lot is how people can make amazing gluten-free bread without needing to maintain a sourdough starter. Not everyone has the patience to get one going or keep it maintained, and I totally get that. Sourdough is a process and it can take planning to get perfect loaves. So, it became clear we needed a traditional yeasted gluten-free bread!
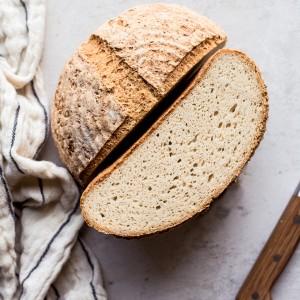
...and I am OH SO happy to introduce you to her!!! This homemade gluten-free bread boule is a winner. She's light and fluffy, with a nice crumb, NO gumminess that sometimes accompanies gluten-free bread, and the best part? You can have this bread DONE in about three and a half hours. Then you just have to deal with the hard part - waiting for it to cool! Now let's get into the details.
How do you activate dry yeast?
I use Bob's Red Mill active dry yeast for this recipe. This bread recipe has been developed to use an active dry yeast, as opposed to instant yeast. You could try using instant yeast in this recipe, but I have not tried it, so experiment at your own risk!
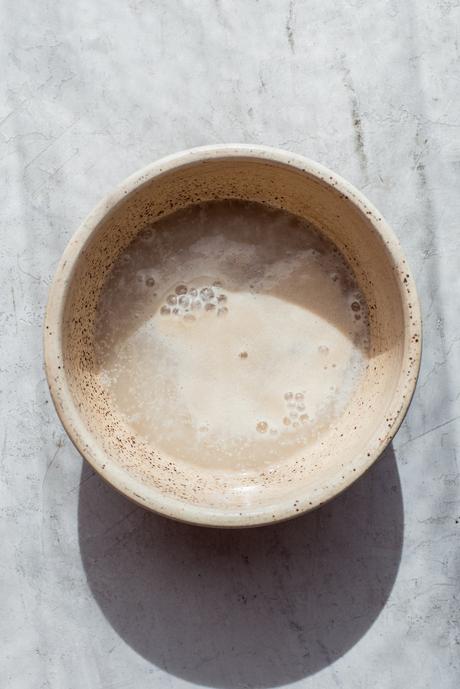
To activate active dry yeast, you'll mix it with warm water (100-110℉) and some sugar. For this recipe, I used maple syrup. You'll do a quick stir to combine, and then let it sit for 10 to 15 minutes. In that time, you should see it start to bubble, and then it will get nice and foamy on top. If this doesn't happen, retry with new yeast and water. If the yeast doesn't get foamy and bubbly, it means it isn't active and it won't help your bread rise.
What's the difference between active dry yeast and instant yeast? Active dry yeast must be activated by warm water before use, usually along with some kind of sugar to help feed the yeast and get it nice and bubbly. Instant yeast is mixed directly into the dry ingredients and is activated when the dough is mixed together. I find it easier to troubleshoot with active dry yeast because if your instant yeast doesn't activate, you need to restart the whole recipe.


How long does this gluten-free bread take to make?
One of my favorite things about this recipe is that it can be done in about three and a half hours, start to finish!! That is way quicker than sourdough, so this is a perfect last-minute bread recipe when you want some bread to eat that day! And of that three and a half hours, probably only about 30ish minutes (if even) is active time. The rest of it is rising and baking time!
What ingredients do you need to make gluten-free bread?
A note: I don't share any volume measurements for this bread, because I find it's so much easier and more accurate to use weight. Please get a baking scale if you'll be doing bread baking with any kind of regularity - it will make things much easier and more accurate! Plus, less messy measuring cups :)- Active Dry Yeast: this provides our lift for the recipe and gives us a nice, fluffy loaf!
- Maple Syrup, Honey, or Sugar: most of the sugar is actually "eaten" by the yeast and helps your bread rise - this won't add any sweetness to the bread.
- Filtered Water: filtered or distilled is important! Hard water can inhibit the rise of your bread.
- Psyllium Husk: our magic ingredient! It helps replace the gluten and adds structure and elasticity to the loaf. More details on this ingredient below!
- Olive Oil: olive oil helps soften the crust and adds to the flavor.
- Potato Starch: make sure you seek out the white, powdery potato starch, not potato flour!
- Tapioca or Arrowroot Flour: interchangeable with tapioca or arrowroot starch, these add lightness and fluffiness to the bread.
- Sorghum Flour: this has a light, sweet, mild flavor that works incredibly well in this bread.
- Brown Rice Flour: more of a whole-grain kind of flour, but still lends for a light and fluffy bread loaf. Can be switched out with white rice flour, or another whole-grain flour if you're avoiding rice.
- Quinoa Flour: I love the light fluffy texture quinoa flour brings to the table, but too much can add a slightly bitter taste, so I keep the amount on the smaller side.
- Sea Salt: for flavor, of course!
All of the yeast, flours, and starches that I use are from Bob's Red Mill, one of my all-time favorite brands for all things flour and baking supplies! I love how many organic options they have, how widely available their products are, and that so many of their flours are certified gluten-free. I highly recommend their products for this recipe (and all of my recipes) for great results! They can be found in most grocery stores, as well as on Amazon and many other online retailers.
Can I switch the flours? Yes, you can switch and substitute the whole grain flours (brown rice, sorghum, and quinoa) for each other and for other whole grain flours (buckwheat, millet, white rice, teff, etc.) if you want to experiment. Each has its own properties and flavors, but it can be super fun to experiment here and see which combination makes for your favorite loaf.
What is psyllium husk? Can I replace it?
Psyllium husk is our gluten for this bread: it provides the binding properties and elasticity that help make the dough easy to work with, knead, and shape. It gives the structure and support for the bread to rise, as well. Psyllium is a form of fiber that is derived from the husks of plantain seeds. It has a lot of health and digestive benefits, but it's the gelling, fiber-filled aspects of the plant that we're after!
From my experiments: you need psyllium husk for good gluten-free bread. For my bread recipes, I wouldn't try to replace it. It makes the dough workable, so it doesn't squish all over the place. It's also what makes your bread chewy and stretchy.
NOTE: psyllium husk and psyllium husk powder are different. You want the full husk. I usually find it in the supplement area of most grocery stores, and you can also find it for sale online.
How do you make gluten-free bread?
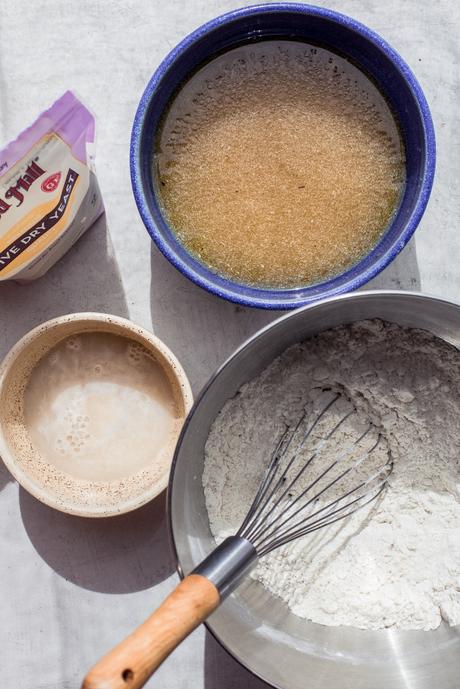
- Activate the yeast. Combine the yeast with the sweetener and warm water. Let it hang out to activate for about 10 minutes.
- Make the psyllium gel. Mix together the psyllium, olive oil, and water. Whisk and let it set for a few minutes until thickened and gel-like.
- Mix together your dry ingredients. In a large mixing bowl or the bowl of a stand mixer, mix all of your flours, starches, and salt. Whisk to combine.
- Combine everything and form into a dough. I mix everything in my stand mixer with the dough hook, but you can also do this by hand. If mixing by hand, I like to use a dough whisk to get it combined. Then, turn it out onto the countertop and use my hands to knead the rest of the flour in.
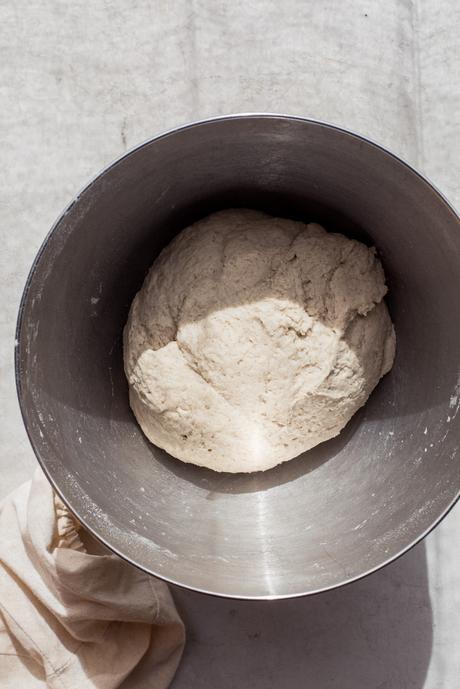
- Bulk ferment the dough for 1 hour. I leave it in the mixing bowl, covered with a clean tea towel, to rise for one hour. It should double in size (or just about) and before light and fluffy.
- Re-knead and shape the dough. After the bulk ferment, you'll knock the air out of the dough and knead it into your desired shape/shapes. Then, you'll place it in the or loaf pan for the final proof.
- Rise, score, and bake! Let the loaf rise for one more hour, and preheat the oven to 425℉ while it rises. Once the bread has risen, score it with a knife or lame (flipping it out of the banneton onto parchment, or a silicone sling if baking in a Dutch oven). Then, place into your baking vessel. Bake for 1 hour and 15 minutes, removing the lid for the last 15 if baking in a Dutch oven.
- Cool completely. This is definitely the hardest part, but you really need to let the loaf cool completely so the inside can set. I usually try to let it cool overnight. You definitely want it to be fully cool to the touch before cutting into your loaf.
- Slice and eat! Definitely the best part :)
What is a bulk ferment? A bulk ferment is when you let the bread dough rise after mixing the dough together, but before you shape it and let it do its final rise in the banneton or loaf pan, depending on how you'll be baking your loaf. For this recipe, we only do the bulk ferment for one hour. This step can be stepped, but it definitely helps develop the flavor of the bread. This step can also be extended in the refrigerator. If you want to do more than one loaf, you'd also let the dough all rise together here, and then you'd divide it into smaller loaves for the next rise.
I hope this helps you make some amazing gluten-free bread! Please drop a comment below the recipe card if you have any questions, concerns, or need help troubleshooting! I'm happy to help your figure out what's going on because I'm on a mission for everyone to have amazing gluten-free bread!
Sending lots of yeasty love your way. Happy baking!

Homemade Gluten-Free Bread
- Author: Rachel Conners
- Yield: 1 loaf, about 10 slices 1x
- Diet: Gluten Free
