The Ultimate Guide To Painting Radiators
Painting a radiator isn’t like painting your walls or your skirting boards you know; there’s more to it than that.
Get painting your radiator wrong and you could be looking at loads of unsightly air bubbles and the prospect of having to splash a fair bit of cash on getting it sorted again.
So if you’ve ever asked yourself: “how do I paint a radiator?” then get ready to learn how to do it with this simple step-by-step Best Heating guide – Here’s how to paint a radiator!
Why Paint A Radiator?

In many cases (and I shouldn’t really tell you this) it can sometimes make more sense to paint your radiator than replace it with a shiny new designer one – don’t tell my boss I told you that.
But it’s true – you can give your old radiators a second chance at life with a tidy up and a quick lick of paint. Painting radiators can often make better financial sense than buying new ones and it’s fun to do if you get it right – so here’s how to paint your radiator the right way.
What Do I Need To Paint A Radiator?
Before you dive right in with the brush and the paint pot, it’s important to make a couple of simple preparations.
Firstly, make sure that the radiator is completely cold before you start and that it isn’t going to come on half way through painting it. You don’t want it to get warm again until all of the paint has completely dried, so it’s important to isolate the radiator.
In an ideal world you’d probably want to paint your radiator before it goes on the wall, or take an existing one off before you paint it – if you would prefer to do this, check out our video on ‘removing a radiator’ for help on how to get it off the wall.
Clean the radiator and remove any dust or grease that may have built up over the years – even in the cleanest of homes, you’ll be surprised just how much dust can build up in a radiator.
After wiping it down and cleaning it, dry the radiator off and rub it down gently with fine or medium grade sandpaper to create a slightly rough surface for the paint to stick to – a FEPA grit of around P100 should do the job.
Top Tip – Pay close attention to any rust spots on your radiator and be sure to remove these with a stiff brush and apply some rust stripper.
After cleaning up any rust spots and sanding the radiator down, dust it clean and vacuum the surface. In addition to this, to ensure a clean and well-prepared surface you could wipe it over with a damp cloth to remove any fine dust particles, just remember to dry your radiator off properly with a dry cloth afterwards.
And finally, before you unleash the paintbrush, put down some dust sheets to catch any drips and use masking tape to mask off any nearby areas that you don’t want to get paint on.
Do I Need To Use A Primer Before I Paint My Radiator?
Yes, you will need to use a specialist radiator primer before you begin painting to ensure that any rusted or bare areas of the radiator surface are protected, and to give a sound base for any additional coats of paint to adhere to.
If your radiator has a couple of rusty spots it’s definitely a good idea to use an anti-corrosive primer as this will help to prevent the rust from getting any worse and doing some serious damage to your radiator.
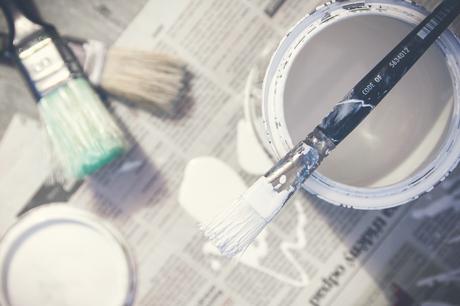
When it comes to applying your primer, you can use a normal everyday paintbrush, or it may be worth investing in a specially angled radiator brush to get into any awkward nooks and crannies.
What Paint Should I Use To Paint My Radiator?
Don’t even consider using normal everyday paints on radiators (unless you have an overcoat) – they aren’t heat resistant, can give off a smell and will begin to lose color over time.
There are few good options for painting your radiator, just choose which one is most convenient and suitable for your needs.
Radiator Paint
We would strongly advise that you use radiator paint if you are planning on painting your radiator white, as other paints will become discoloured and go yellow over time.
Clear Radiator Overcoat
I know I advised against it not even 2 minutes ago, but using a clear radiator overcoat will allow you to paint your radiator with a normal everyday emulsion. Choose your colour, paint your radiator and then apply the clear overcoat on top to give your radiator a protective coating.
Spray Paint
Although this is one you may want to completely remove your radiator for, spray painting can be a good option that almost always guarantees a neat and tidy finish.
There are a number of spray paints that are specially formulated just for use on radiators, and there are variety of available colours too.
If you intend to use spray paint whilst the radiator is still on the wall, you’ll need to make sure you take extra precautions to protect the surrounding area really well, as spray paint can easily drift and is often quite difficult to direct.
Remember – With all paints, you should wear a protective mask and make sure that your room is well-ventilated. If you are choosing the spray paint option gloves are also a good idea, as spray will drip from the nozzle and can be very difficult to remove from the skin.
Here’s How To Paint Your Radiator
Now you have made all the required preparations, you are about ready to apply the top coat of paint to your radiator.
Make sure that any primer you have used is nice and dry before you begin and be sure to open any windows and doors for proper ventilation.
With the primer nice and dry, give your radiator one last wipe over to clear off any remaining dust.

If you are using a tin of paint (not spray), make sure you give the tin a vigorous shake before opening it up and – once you’ve got the lid off – use a suitable stick to give the paint a good mix.
Apply the paint to the radiator as you would if you were painting a wall. To get the very best results, you need to keep a ‘wet edge’ going, being sure to not apply the paint too thickly as this will cause runs.
You can do this by painting the top and bottom of your radiator first and then continue with a couple of flutes (the indented parts) at a time.
Repeat the process all the way along the radiator from one end to the other. This helps because you are only painting a small area at a time, meaning you can brush the next section without leaving any (annoying) brush marks in the previous sections – this is the wet edge that you need to keep in order to ensure a clean and professional finish.
As mentioned before, if you are struggling with some sections, an angled radiator brush will help when trying to paint those hard to reach areas.
It’s usually a good idea to apply two top coats of paint and if this is the case when you’re painting your radiator, be sure to leave at least 24 hours (if not longer) before applying that second coat.
Once you’ve applied your second (and final) coat of paint, make sure that it is completely dry before turning your radiator back on again – it’s probably a good idea to leave it for at least a day or even two before doing so.
Finally, sit down, put your feet up and admire your work – you’ve just painted a radiator!

So You’ve Just Painted A Radiator
When you finally turn your radiator back on you can expect there to be strong smell coming from it. Don’t worry though, this is just the paint drying and should go away after a couple of days.
Just be sure to keep your windows open for a while and the smell should dissipate when the paint is fully cured.
Things To Remember When Painting A Radiator
- Be sure that the radiator you intend on painting is turned off.
- Always wash and dry the radiator before adding paint.
- Always use a primer before painting.
- Ensure that the room is well ventilated and cover any furniture, carpets or anything else well to avoid damage.
- Keep a ‘wet edge’ to avoid unsightly brush marks.
- Allow to dry for at least 24 hours before applying a second coat of paint.
- When completed leave the radiator off for a day or two before turning back on.
- There will be a smell for a few days, this is normal, keep the room ventilated.
And remember, if all else fails – or you just can’t be bothered painting your radiator – Best Heating stock one of the largest ranges of designer radiators, heated towel rails and accessories available online.
Let us know how you’ve got on painting your radiators below and don’t forget to say “HI!” on Facebook and Twitter and check out our design ideas on Pinterest.
Good luck!
Stay Safe & Happy Heating.


