
Harvested flowering branches from the felled redbud tree.
We had a beautiful but problematic redbud tree in our backyard. It had been poorly planted too close to the neighboring yard, and our neighbors gently complained every now and again about a large branch extending over their fence. Several of the tree’s largest branches had been damaged in an ice storm and were dying. The Gent was constantly irritated by its dropping seedpods, which clogged the blades of his push mower. Finally, the tree blocked precious sunshine needed by my herb and vegetable garden. Clearly, the tree needed to come down. When visiting some friends in Maine last summer, the Gent and I learned that it’s possible to home grow mushrooms on stacked logs in a shady part of the yard, a garage, or even a cool, dark basement. Since we love exotic mushrooms and cook with them frequently, I decided to give mushroom “gardening” a try using our freshly hewn redbud. Here’s how I did it.

Step 1: Cutting the Logs
I recruited an enthusiastic, chainsaw-wielding friend to help me cut down the tree. By “help,” I mean he cut the tree down while I stood out of the way shouting encouragement. (I did get a lesson in how to use the chainsaw, and sawed one log, though.) We cut two logs approximately 4 feet long and 5-6″ in diameter to use for the basement “mushroom farm.”
Step 2: Briefly Aging the Logs
I set the logs aside in the garage for two weeks to allow the tree’s natural fungicides to dissipate. The ideal logs for growing mushrooms have been aged for no less than two weeks, and no more than six months. Older cut wood will have lost too much moisture and sugar to sustain the best mushroom growth.
Step 3: Ordering the Mushroom Spawn Plugs
Our true mushroom love is the shiitake mushroom, but shiitakes prefer oak, so the Gent and I took the advice of the folks at Fungi Perfecti and decided to try their aggressive, easy-to-grow strain of Pearl Oyster mushrooms instead. If you’re considering growing your own mushrooms, I highly recommend calling the customer service line at Fungi Perfecti. It’s a family-run business started by a mycologist, and it’s clear that these folks are passionate about mushroom growing. I had a great phone conversation with a charming and knowledgeable staffer who helped me decide what kind of mushroom spawn to purchase and gave me valuable advice about how to approach the process. The spawn plugs come in packages of 100 (the perfect amount for my two, 4-foot-long logs) or 1,000. However, the spawn plugs don’t keep well for longer than a few months, so you should order just as many as you plan to use at a given time.
After my spawn plugs arrived in the mail, I followed Fungi Perfecti’s advice and let the package rest in a cool, dark place for a week so it could recover from its journey before I started inoculating the logs.
Step 4: Inoculating the Logs
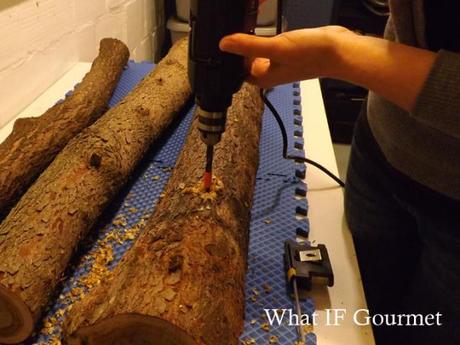
I drilled 5/16″ holes approximately 3″ apart in a diamond pattern over the top three-quarters of the logs’ circumference. Each log was able to accommodate about 50 holes.
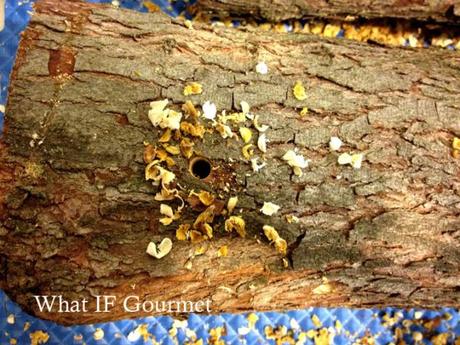
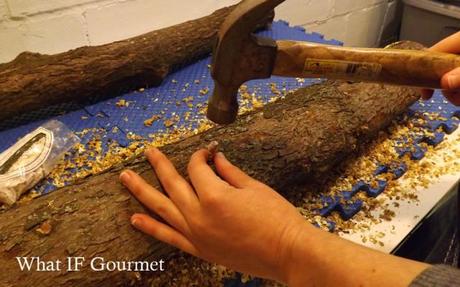
I then washed my hands to be sure they were clean, and set a spawn plug into each hole, tapping it gently in place with a hammer.
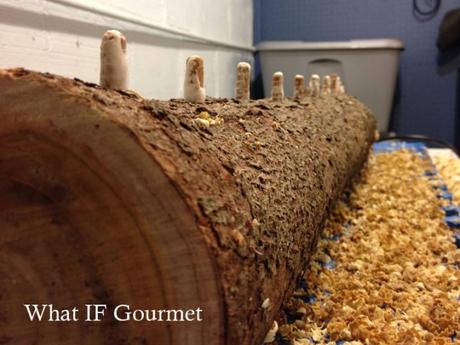
Once all of the holes had been filled, I melted some food-grade beeswax in a small pot and used a small chip brush to cover each plug with a bit of wax. I also brushed the cut ends of the logs with a layer of wax, to help the logs retain moisture over the coming months.
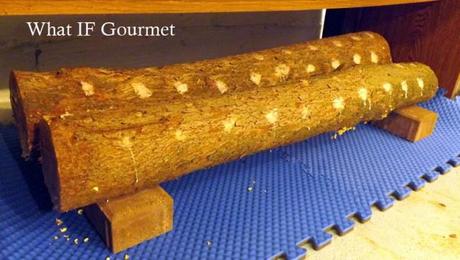
Finally, I rested the logs on top of a couple of bricks underneath a table, and draped the table with a dark drop-cloth to protect it from light and help hold in moisture.
Step 5: Waiting…
Now comes the hard part: waiting six to nine months for the mushroom spores to fully penetrate the logs. I’ll mist the logs with water weekly so the spores have enough moisture to survive and thrive. Once the logs are ready, I will “initiate” them by saturating them with water, and after that they should start fruiting.
In the meantime, I’ll have to buy my oyster mushrooms. Here’s a simple but delicious way to enjoy them.

A simple dinner: oyster mushroom and scallion omelet with chilled sake.
Oyster Mushroom and Scallion Omelet
1 Tbsp grapeseed oil
1/2 lb oyster mushrooms, sliced
3-4 scallions, sliced
sake or mirin
3 eggs
2 tsp gluten-free soy sauce
Beat the eggs and 2 tsp gluten-free soy sauce in a small bowl and set aside.
Heat the oil in a 10-inch or 12-inch skillet (depending on how thin you prefer your omelet) over medium heat. When the oil is hot, add the mushrooms and scallions and saute for 1-2 minutes. Add a splash of sake or mirin and cook until the liquid has evaporated. Pour the beaten egg mixture over the mushroom mixture and lower the heat. Cook for about 5 minutes, or until egg is cooked all the way through. Slide omelet onto a large plate and serve. Serves 1-2.
