"You've been prolific lately on your blog," said our friend and dinner companion, Belinda, last night. She's right, there's a fair bit of gardening going on here, right in the middle of winter.
Midwinter, while the plants are growing very slowly or even having a snooze, is an ideal time for major projects such as moving plants to another spot in the garden, or minor projects such as repotting them.
Fortunately for my aching back, there were no plants to transplant, but there were some pots in need of attention, and repotting. And happily for this blog, each presented its own different little problem to solve.
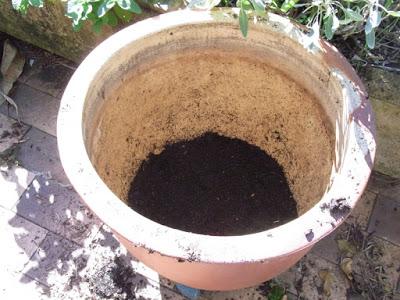
Soil level sinking in the pot: this is the most common potted plant problem. Over time, the potting mix seems to "shrink" in the pot, as the gap between the rim of the pot and the top of the potting mix grows. For my potted Turkish fig, this gap had grown to about 4 inches (10cm), but the potting mix itself was just a year old.

So the big trick with topping up the potting mix is to add the new mix to the bottom of the pot. Don't add it to the top.
Why? Just under the surface of the soil, each potted plant has a layer of fine roots which soak up food and water, and smothering this layer with a few inches of new potting mix will not be good for the plant's health at all, as it will cut off a vital food supply. So, measure how much you need to raise the soil level, pull the plant out of the pot, add that same depth of mix to the bottom of the pot, and replace the plant.
(That's easier said than done, of course. Removing plants from pots can be very hard if the plant has been there for years, or if the pot doesn't have straight-ish sides. One tip is to water the pot very very well, leave it for half an hour, then try again. Good luck!).

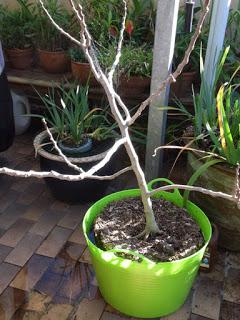
An extra thing I do for all my repotted bigger plants is to soak them while they are out of their pot. Plastic trugs are fab for this (for Australian readers, you can get them at Bunnings in the section which sells laundry baskets and other plastic storage items). I add the pot to the trug, fill with water then add in a few capfuls of Seasol Super Soil Wetter, which is a mixture of wetting agent and Seasol. If your potting mix looks very dry, this stuff is very good at making it not only wet again, but also able to absorb moisture when you next have to water it. Think of it as a gentle, healthy tonic. Leave your plant to soak in it for at least 15 minutes, up to half an hour if you like.
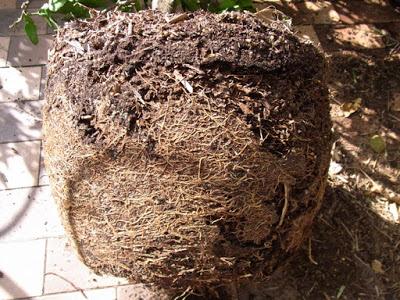
Generally grumpy plant not responding to kindness: this is what was happening with our potted Thai lime. I was really nice to it (I thought) but its leaves looked crappy and its fruit crop was wimpy. When you have a pot plant that is generally unwell, it's time to remove the plant from the pot and have a look at what's happening out of sight. Whether it's white curl grubs eating the roots (a very common problem) or ants (another common problem), or super dry potting mix super soggy mix, you'll soon spot the trouble.
And this what I found: an ant civilization. Not just a nest but a whole city of the little things. I could swear I could see ant apartments, ant bars and hear ant jazz music playing. It was all my fault.
Super dry soil was the cause of it all, the ideal conditions for ants to go to work. Despite what I thought was pretty diligent watering, the soil had gone dry at its lower levels, and water I applied via the hose just rushed by without wetting a thing.

This is beginning to sound like an ad, but I added the whole rootball to the trug filled with Seasol Super Soil Wetter and left it to soak for half an hour. Don't worry, it won't drown, but the ants will! Meanwhile, I put on my Vlad the Destroyer hat and cleaned the lime tree's pot with a scrubbing brush so it was ant-free, and cleaned under the pot, too, which was thriving with ants and a layer of finely crumbly, sandy potting mix detritus.
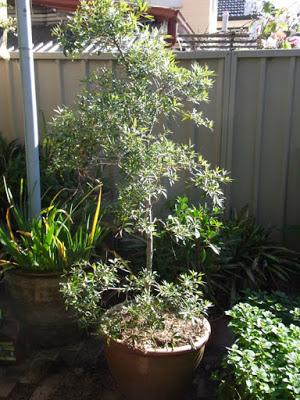
AND ... as the fine roots around the edge look a bit pot-bound, I also use a fine knife to cut several vertical slits all the way round, to tease out the roots a bit and encourage them to grow a bit more.Upgrading to a bigger pot: this was the easiest assignment of the three jobs. The NSW Christmas Bush was perfectly happy and had put on its best, longest lasting display ever last year. We just felt it was getting a bit too big for its current pot, so we had another pot spare which was one size larger (just a few inches bigger in height, and width).

There's just a few important little things to remember with a job like this:
1. Upsize gradually. Don't repot into a giant pot, just move to the next size larger.
2. Use a specialised native potting mix for natives. Normal potting mixes for other plants contain too much fertiliser and the wrong type of fertiliser and can actually harm a native plant. Native potting mix isn't hard to find (mine was made by Omsocote, sold at Bunnings).3. After repotting, top up potted plants with some mulch. I just use the same ordinary sugar cane mulch that I use in the rest of the garden, and it's very effective at suppressing weeds in the pot. Those weeds which do appear are easier to pull out and control, too.
There's a fair bit more that I could say about keeping potted plants happy, but I'll save that for a later posting, probably in spring.
