Setup Guide for BuddyPress Installation with Demo Data
Using Fresh WordPress Installation
Step 1- Install BuddyPress Plugin
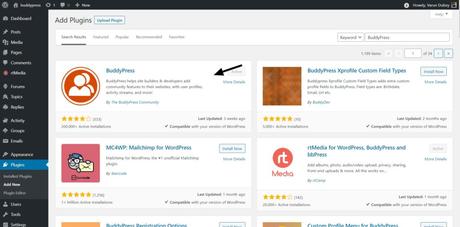
With fresh install of WordPress, member registration is disabled by default you can enable it at Setting — General
Step 2- Enable registration
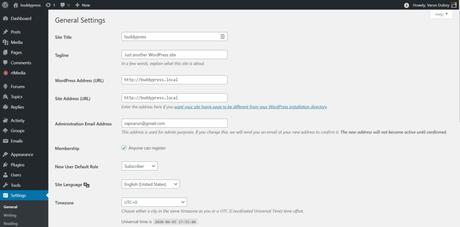
To allow member registration, you will have to enable registration option from WordPress options
You can find them at Setting >> General
Step 3- Enable all components
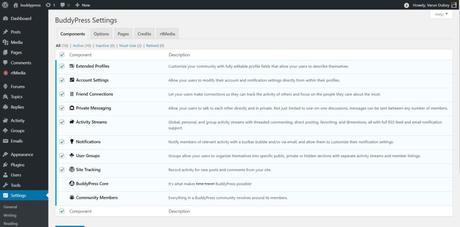
BuddyPress have multiple features, which can be enabled or disabled, by default few features are disabled, you will have to enable them
You can find the setting for them inside the WordPress Dashboard at Setting >> BuddyPress >> Components
Step 4- Page Mapping BuddyPress
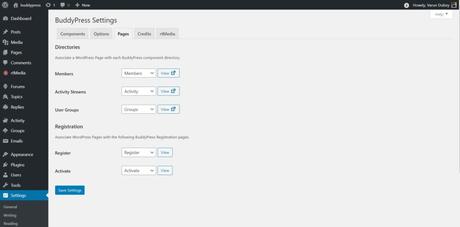
at Setting — BuddyPress — Options
Step 5- Install BuddyX Theme
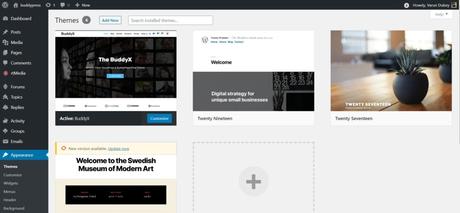
You can download BuddyPress Free theme – BuddyX and upload it at Appearance >> Themes >> Add New
BuddyX will help you build up online social community websites using pre-built layouts without any coding knowledge. Our theme is easy to manage, cross-browser compatible, mobile-friendly, fast loading, and is suitable for all types of community.
Step 6- Create the Main Menu and User Menu
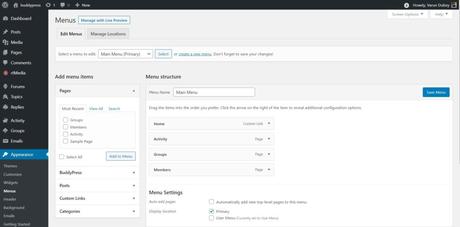
BuddyX Theme has two menu location one for primary header menu and Second to setup user menu as a drop-down option
Appearance >> Menu
Step 7- Install BuddyPress Default Data plugin
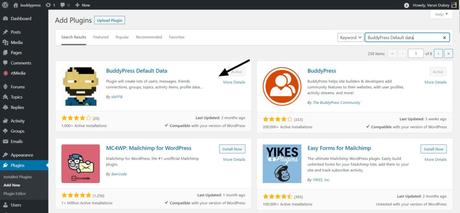
for populating some dummy content which can be easily deleted with BuddyPress Default Data plugin options
Step 8- All Done, you are good to go 🙂 Checkout BuddyPress Demos.
