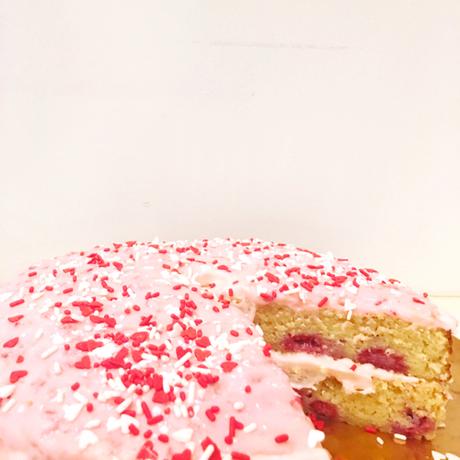

Photo by Marni Elyse Katz/StyleCarrot
I don’t celebrate Valentine’s Day and I don’t love to bake. So why did I sign up on to share a recipe for a Valentine’s Day dessert when Wayfair asked if I’d like to participate in its “Baked With Love” campaign? I’m not sure!
I love to eat dessert (though technically I’m on a diet). I can’t resist a raspberry (allowed on the diet!) or I suppose, the chance to use pink frosting and heart sprinkles. And Wayfair’s Valentine’s Day bakeware is pretty darn cute.
So after spending this glorious snow day day drinking with my love at Saltie Girl, I spent the evening baking this raspberry lemon layer cake. It’s delicious, but don’t worry, I ate only one small piece. The rest is for the kids.
Raspberry Lemon Layer Cake
cake ingredients
- 2 sticks butter, room temperature
- 2 cups granulated sugar
- 1/4 cup light brown sugar, packed
- 3/4 teaspoon lemon extract
- 1 teaspoon vanilla extract
- 4 large eggs, room temperature
- 2 1/2 cups cake flour
- 1 tablespoon baking powder
- 1/2 teaspoon baking soda
- 1/2 teaspoon salt
- 1/2 cup whole milk
- 1/2 cup sour cream
- 1/2 cup fresh squeezed lemon juice
- 2 1/2 cups fresh raspberries
- 2 tablespoons all-purpose flour
frosting ingredients
- 8 oz. block of cream cheese, room temperature
- 1 stick unsalted butter, room temperature
- 3 1/2 cups confectioners’ sugar
- 2 tablespoons fresh lemon juice
- 1/4 teaspoon lemon extract
- pinch of salt
- Red food coloring
- 1/2 cup raspberries
Directions for cake:
- Preheat oven to 350°F. Generously grease the sides and bottoms of two 9-inch pans with non-stick cooking spray. Line the bottom of each pan with a round of parchment paper and spray again.
- In a large bowl combine butter, both sugars, lemon extract, and vanilla extract. Beat on medium speed for 5 minutes, scraping sides of the bowl as needed, until light and fluffy.
- Add eggs, one at a time, beating well after each addition. Set aside.
- In a separate bowl, whisk together cake flour, baking powder, baking soda and salt, mixing well to evenly combine. Add the dry mixture into the wet ingredients and mix on low-speed until everything is just barely combined. (You should still see some lumps and dry streaks. If you over mix the cake will be dry and dense.)
- Add milk, sour cream, and lemon juice. Use a rubber spatula to fold the ingredients into the mixture, stirring until everything is incorporated. Again, do not to over mix. Set aside.
- In another bowl, gently toss the raspberries with 2 tablespoons of all-purpose flour. (This prevents the berries from sinking to the bottom of the pan while baking.) Add the raspberries and any remaining flour, to the batter. Fold in by hand, using a rubber spatula, until just combined. (Don’t over mix.)
- Divide the batter evenly into the prepared pans. Bake for 30-35 minutes, or until the tops are firm and slightly golden, and a toothpick inserted in the center comes out clean, or with moist crumbs.
- Allow the cakes to cool in the pans for 10 minutes before gently running a knife around the edges to loosen them, and turn out onto a cooling rack to cool completely.
- While the cakes cool, make the frosting.
Directions for frosting:
- In a large bowl beat cream cheese and butter on medium-speed for 3 minutes until light and fluffy. Reduce speed to low and gradually add confectioners’ sugar. Add lemon juice, lemon extract, and salt; beat until combined. Increase the speed back to medium and mix about 2 minutes until creamy. Add a few drops of red food coloring and beat on high for about a minute. Add fresh raspberries and beat for another minute until blended.
- Frost when the cakes have completely cooled. Decorate with abandon.
- The frosted cake will stay fresh, covered and stored in the refrigerator, for 3 days. Take it out of the fridge an hour or two before serving so it can come to room temperature.
The recipe was adapted with love from Baker By Nature.

