Enabling windows 8 .Net Framework 3.5 might look difficult to activate in a lay mans view. It might also look too easy to activate if you are that techie kind. But no matter where the situation falls, we are going to see how we can simplify the process. I believe that thousands of people who’d want to know how to active theirs or don’t you think? 

Wait! Are you trying to enable the windows 8 .Net Framework but can’t because you just don’t know how? Keep your mind at rest because today, I am going to share with you how you can simply enable yours the best way. So are you ready?
Before I go ahead, I know that many of us are still using the windows 7 OS because it’s flexible and easy. But have you tried using the windows 8 OS?
Windows 8 Framework activation: Why do we need it?
We have so many reasons why we need the dot Net Framework but to name just two most important reasons…
There are some applications that needs the .Net Framework to run
Aspiring App developer need it
In one way or another, you might also need it

How do I activate it?
Here are the steps to Activate Your Windows 8 .Net Framework 3.5, 3.0 and 2.5

Before we go further – First, either insert your windows 8 DVD or mount windows 8 iso image or your recovery folder. Have you done that?
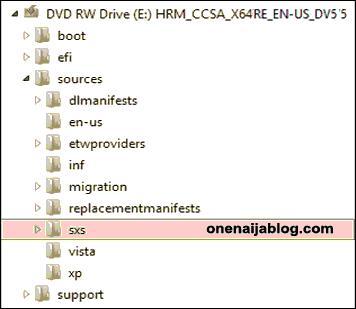
Now, let’s see if the “sxs” folder is present in our CD by going to your drive where your windows 8 disk is (Drive E) and click to explore it.
In the explore folder, click “Sources” and check if you’ll see the “sxs” folder… is it there? See image below to know what exactly i am talking about

Now let’s go to the main show…
With “administrative privilege”, open your “cmd” Program… are you there? If not, click on your search box to take you there.
Now, type the below command…
Dism.exe/online/enable-feature/featurename:NetFX3/All/Source:E:sourcessxs/LimitAccess
Have you typed the above command? Now hit the Enter key.
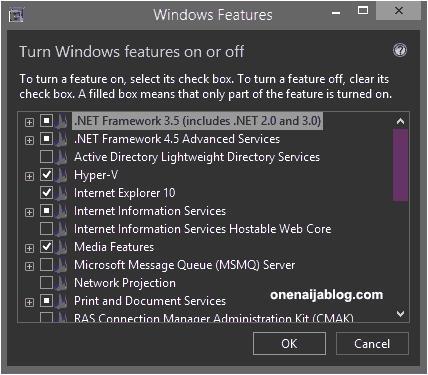
Wait… wait… wait… and voila! You have successfully installed your .Net Framework. Now you can see it in your windows feature that it is active. See the activation image below.

Note: in this part of the line “Source:E:sourcessxs”, you can change it to where your windows 8 folder/iso is. Hope you understand?
I want this post to be the most simple and short tutorial I have ever done, so it will be easy to read and follow the steps

Over to you:
Have you turned your windows 8 .Net Framework on? Was it this method you use? If not, how did you activate your? We would like to hear from you using the comment box below.
Do you have comment, questions or thoughts you’d love to share with us? Please do, by using the comment box below. Remember that your comments, questions and thoughts are highly welcome and much appreciated.
Be social
Please do share the post with your friends because I am sure that many who use the windows 8 would love to read this. And before you leave, do not forget to subscribe to our feed for your latest update on the go
Don't Miss Any Post Again. Subscribe To Our Feed And Be Updated
Enter your email address below:
Powered by OnenaijaBlog

