Whelping can be a daunting prospect; however it normally occurs without any problems. The key to a smooth whelping is preparation so that you know what to expect and what to do if things start going wrong.
(Check out Prenatal Care for Dogs)
Whelping Checklist
- A torch to keep a close eye on your pregnant dog should she need to use the toilet
- Clean towels
- Spare newspaper and garbage bags
- Thermometer
- Notebook and pen to monitor temperature changes
- Disinfectant
- Latex gloves
- A box containing a hot-water bottle covered in a towel
- Phone and vet’s number
Signs of Whelping
As you approach your pregnant dog’s delivery date it becomes vital to keep a close eye on her. Individual pregnant dogs vary drastically in their behavior but there are some telltale signs which you should look out for to alert you to the fact that whelping is imminent.
Approximately 24 hours before your pregnant dog starts whelping she is likely to become restless because of the discomfort she will feel as her uterus prepares to expel the puppies. At this stage your pregnant dog is also likely to refuse food. This is not something to worry about as she will more than make up for her lack of appetite once she has delivered all of her puppies.

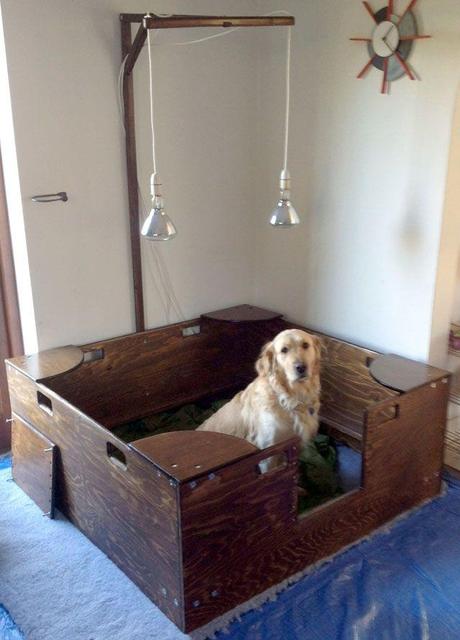
Sample whelping box.
*
You may well notice your pregnant dog begin to pant very deeply and also start to scratch and dig at the bedding of the whelping box. This behavior originates from an instinctive desire to build a nest and should be encouraged by providing newspaper for her to rip up.
One of the most reliable indications that whelping will occur within the next 24 hours is a drop in body temperature of about 1 degree Celsius. For this reason, getting your pregnant dog used to having her temperature taken on a daily basis is good planning throughout her pregnancy. Immediately prior to whelping beginning, strings of mucus will appear from the pregnant dog’s vulva as the cervical plug that has protected the developing puppies from infection disintegrates.
The Whelping Process
Your pregnant dog will be visibly calm just before the arrival of the first puppy and you should be able to see the muscles around her abdomen contracts as she makes efforts to push the first puppy out. Initially you will probably only be able to see the black, fluid0filled amniotic sac, containing the puppy, appear at the vulva. Allow the bitch to stand or lie down as he prefers, but be ready to catch the puppy if it looks like it’s going to drop some distance to the floor or over the side of the whelping box. If you see the puppy born with its rear end or back feet first, don’t be alarmed as this is quite usual.

Be with your pregnant dog every step of the way.
*
Normally your dog will remove the amniotic sac instinctively and begin licking the puppy to stimulate breathing. Ideally she should be left to do this herself; it is only advisable to intervene if she appears to be ignoring the puppy completely. Don’t be alarmed if she starts nibbling at the puppy’s stomach – she is simply severing the umbilical cord and should be allowed to do so.
Once the puppy has been passed, the placenta associated with that puppy should follow. This is a good source of energy and nutrients and poses no health risks, so the bitch can eat it if she chooses. However, it is important that you count the placentas as they are passed to ensure none have been retained once whelping has finished.
The period of time to wait until the next puppy is passed can vary greatly. During that time, the puppies that have already been born should be encouraged to suckle and their mother urged to tend them. Take care that she doesn’t inadvertently step on any of the puppies when giving birth to the next. If she becomes agitated, remove the puppies to a box containing a towel-covered hot-water bottle until the next puppy is born. If some time has passed, the mother appears relaxed and she is attentive to her puppies, the whelping process is over.
* image credit

