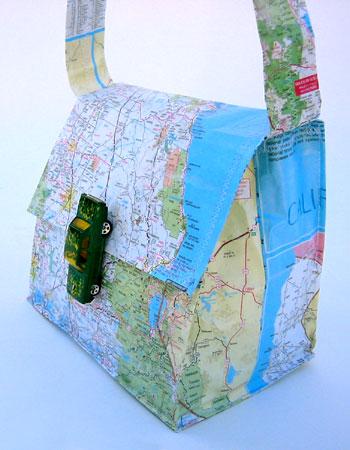
I just found this DIY on Sonya Style, I would love to make it... if only I could cut op one of my maps :(

What You'll Need:
One map
Roll of Clear Contact Paper
Rolling Pin
Cardboard (for the bottom)
Sewing Machine
One Hot Little Car!
Glue Gun
Velcro
Directions:
1. Take your map and the clear contact paper. Stick the contact paper to matching sides to as much surface area as possible. One side at a time and roll all air bubbles out with a rolling pin.
2. Measure 14 inches wide and cut the side off. There will be 4 inches of laminated map left for the strap. Cut the excess map off that is not laminated.
3. Fold the bottom of your map over so that the back piece is about 6 inches longer than the top. Sew the seam on the side and push the corner inward to create a box-like structure at the bottom. Cut a piece of cardboard to match, cover it with laminated map paper and glue to the inside bottom of the bag.
4. Sew the bottom of each side on the horizontal so that the triangles are inward facing and continue the line on the front and back of the bottom of the purse for continuity.
5. Fold the overlapping flap over the front and see how much excess is on either side. Fold the excess over, sew down and glue the soft side of Velcro, one piece to each inside corner of the flap. Figure out the corresponding points on the body of the purse and glue the bristle-y side of the Velcro to two points on the body.
6. Take your excess laminated piece and fold in half. Fold the outer edges in about a quarter of an inch so that there are no raw edges showing. Sew a zig-zag line the length. Attach each end of the strap to each side of the bag.
7. Get a Hot Rod Car and glue to the front center of the flap.

