This little piece of jewelry is perfect for the fleeting summer/warm (we live in hope) autumn ahead of us. I think I’ll be wearing mine a lot over my summer holiday. It’s dainty but has presence. It takes 15 minutes (maybe even less), and of course you can add your little “touche” with different colours, using different chains etc. When I have a little more time, I might get on and make one entirely out of beads, but this is the prefect quickie to start off with and test the waters.

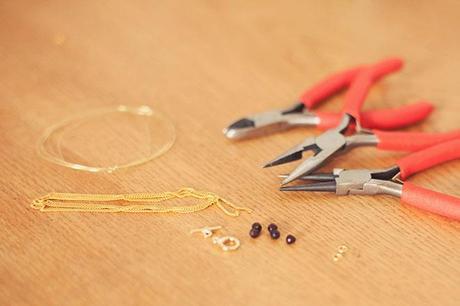
1. You will need : Beads, wire, chain and a clasp, two jump rings. Round nose pliers, a second pair of pliers (chain, flat or bent nosed) and some cutting pliers.

2. The ring part : cut the chain to the desired length and connect the first bead at the joint sliding the chain onto the wire, then using the wrapped loop technique. Here is a great tutorial for the wrapped loop technique. It takes a few tries but this is the best technique for this kind of project as it is very secure and won’t break if you clap too much, jokes, you know what I mean.
3. Connect the spacers of chain again sliding the chain onto the wire and using the wrapped loop technique. Repeat this step until all chain is attached.
4. Using the jump rings attach the clasp to the chain. Make sure you open the jump ring correctly by pivoting the ring open, and not opening it in a u form. Follow these instructions here if you need some help.

That’s it you’re done! Simples! (Thank you to my cat-in-law for modelling,.)
What do you think? If you have any questions don’t hesitate to ask me in the comments below!
