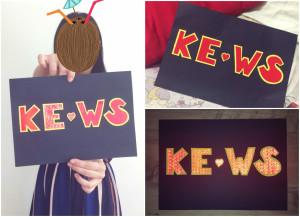
It has been a long while since we show off any DIY stuff, so we thought why not right! Courtesy of kgoodsonline today we will be learning how to make your own fan board. Cheap and easy!
Some of you may think that fan boards are only for sending off/ seeing idols at airports or for waving during concerts. Do you know you can actually do that for your friends and loved ones too?
I have embedded a "fast-forwarded" video which you all can use it to make your own. On top of that I have a pictorial form step-by-step guide (slightly more steps) to help you folks out there :D (Just in case it is too fast, or you actually need more information!)
I have added in some of my personal tips if it helps. If you are really bad in art and craft and is still struggling after all the tips, you can always contact kgoodsonline and they will be more than happy to help you make one! :D

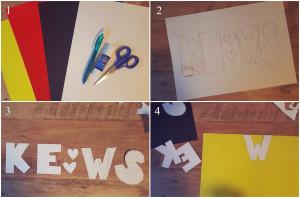
Step 1: Prepare the materials - Coloured Paper (x2) , Reflective Paper (x1), Tracing Paper (x1), Scissors (x1), Glue (x1), Pencil (x1)
Step 2: Trace out wordings you want (Please note you may need to do some measurements to make sure the size of your letterings are aligned!) - You may use a stencil if you are really bad at drawing like me or print out a font using the computer (Cheap stencil tips)!
Step 3: Cut out the Stencils
Step 4: Trace them on the base layer and cut them!

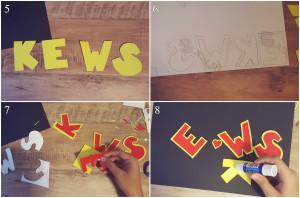
Step 5: Cut out the base layer
Step 6: Trace the outline (smaller version) on the reflective layer - You can either trim it or if you are really bad at it. You can draw a smaller version or just print out a smaller size stencil from the computer
Step 7 - Compare the sizes first before pasting them together.
Step 8 - Glue the final product together.
I hope you have fun trying out this art piece on your own!
