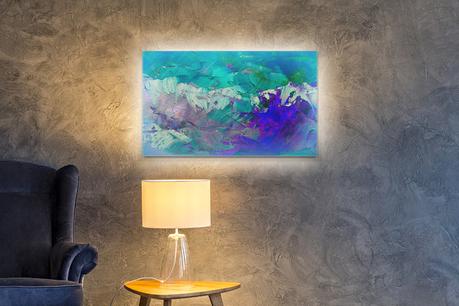
Get your creative juices flowing and add the perfect touch to your home with this DIY canvas light. It's simple and fun to make, and you can personalise it anyway you like. Whether you want to add your favourite quote or place your lights strategically to light up a city skyline, it's time to brighten up your room with some unique Wall-Art.
Things You'll Need:- Blank canvas (round, square, big or small, whichever you prefer)
- Acrylic paints (they dry quickly)
- Brush or sponge (or hands... whatever you like to paint with)
- Masking tape
- Precision knife
- Pencil
- Craft supplies for decorating (optional)
- Black marker (optional)
Step 1
To protect your workspace from spills, put some newspaper or an old towel down first and place your canvas on top. You can paint the background however you like, for instance using one bold colour, thicker brush strokes to add some texture, or recreating your favourite landscape.
To add a shimmery effect, recreate a starry sky, or just give the canvas some wow factor, you can use craft supplies such as glitter or stars.
If you like the idea of adding your favourite quote from a book or film, make sure the paint is completely dry and then lightly write the quote out in pencil. To give your writing more of a calligraphy look, slant your letters and try making all your downstrokes slightly thicker than the rest. Once you're happy with it, trace over your writing with a permanent marker.
Acrylic paint dries quickly, but don't rush to the next step before the canvas is completely dry. Enjoy a cup of tea - or two - whilst you wait, and remember that thicker layers will take a little longer to dry.
Step 2
Once it's completely dry, turn the canvas over and use a pencil to mark where you'd like the lights to go. Using a similar spacing to the bulbs on your LED strand should make this process easier.
Using a precision knife, carefully cut a small hole where you've marked in pencil. Push each light through the hole just enough so that the bulb pokes through on the other side, but not so much that the lights hang out. Secure the lights in place on the back using masking tape.
Step 3
Hang your canvas on the wall, plug the lights in, and enjoy having made something special for your home. Your canvas will also look great propped up on a bookshelf or on top of a dresser.
If you'd rather not have the cord hanging out of the canvas, you can use battery-operated LEDs instead and use tape to secure the switch on the back. These also come with built-in timers, which are really handy as you won't need to move the canvas every time you want to switch the lights on.
Final Thoughts
Don't worry too much about your artistic skills. Once your LEDs light up the canvas with a warm glow it will look stunning. When you've got the hang of making them, they're a great idea for personal, thoughtful gifts.
About The Author
Callum Mundine is the co-owner of LED World (with his brother Simon). They are an Australian based lighting design firm with offices in Sydney. One of his hobbies is adapting his knowledge of lighting into fun projects like this one. Find out more about him by visiting here.
