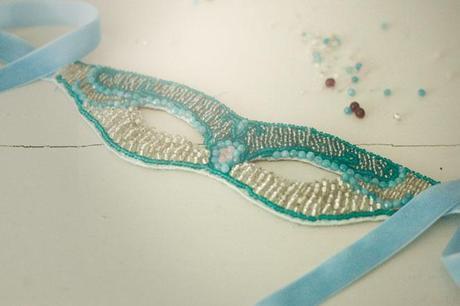
 This week’s DIY is very much inspired by the ever approaching 31st of October. I wanted to make something for halloween that had a real presence, that was fairly adult and still fun. So I came up with this mask, which personally I shall be using as a super hero mask. Any suggestions are welcome for the name of said hero as I have not thought that far yet! I need something funny…
You can take this fairly long DIY as inspiration and make it a lot easier. This particular method took a long time because I used tiny beads (the long thin ones are the best for this) and I hand stitched every bead. Of course you can use glue instead, if you do I recommend “Hi-tack trim it” if you want to make something quick. As far as I have seen it sticks beads really well to fabric, just wait 24 hours after and you’re good to go!
Making the DIY Beaded Masquerade Mask

1. You will need : A base : either leather or felt, ribbon, a pair of scissors, a marker, beads, a needle and thread and a mask pattern.
2. Mark the pattern onto the base.

3. If you are hand stitching trace the pattern with a line of beads, as it is the outside line each and every bead needs to be sewn on individually, so that the mask can take any knocks. I recommend sewing the bead on then coming back around and passing the needle back through the bead, so you pass twice through each bead with the needle.
4. Fill in the mask, depending on your design and the weight of the bead you don’t have to stitch every individual bead. You can make a line and coming back on yourself reinforce the stitch with a few stitches at a ninety degree angle to the original line of beads.

5. As an optional step you can sew on a lining, I glued mine on with “hi-tack” glue, placing the ribbon inbetween the two layers and then stitched around the edges using a double running stitch.
6. Cut away the excess fabric and trim off any threads, tie any lose knots and you’re done!
I hope this inspired you for your halloween costumes!
