
 The grown up version is inspired by the high end design I love with smaller mirrors radiating around the edges.
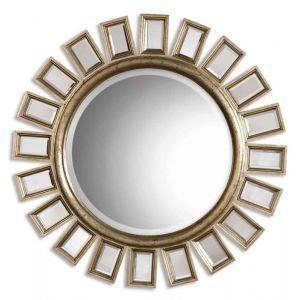 Image from Diva at Home
The Materials
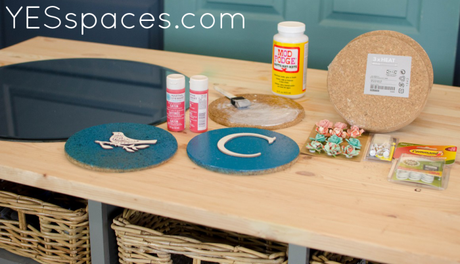 Cork Mirror Materials
Tween Diva Mirror
- 1 IKEA Kolja Mirror
- 5 packages of 3X Heat cork rounds from IKEA
- Acrylic paint in the color of your choice, I used a coral
- Mod Podge
- Disposable foam 1″ brush (or any brush of your choosing)
- Small nails or Command Adhesive velcro strips
- Small wood initials or decorative elements as desired
- Metal thumbtacks
- Decorative paper flowers or item of your choice to customize thumb tacks (gems? buttons? typewriter buttons?)
- Picture hanging wire
- Glue gun and glue
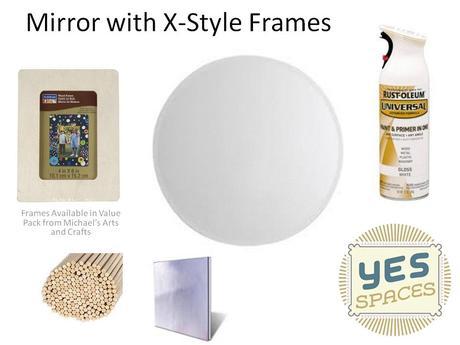
X-Style Frame Mirror
- 1 IKEA Kolja Mirror
- 9′ of 1/8″ wooden dowels (I bought 3 dowels each 3′ long)
- 11 4×6 wood frames (I purchased Art Minds in value packs at Michael’s)
- 3 sheets of Silver foil scrapbook paper ( or if you’re a big spender 11 4×6 mirrors – if you find a discount source for these let me know!)
- White primer
- High Gloss White paint (or color of your choice)
- Fine grade sand paper
- Glue gun and glue
The Process
Watch the video first, these instructions are meant to help you remember the order or answer any additional question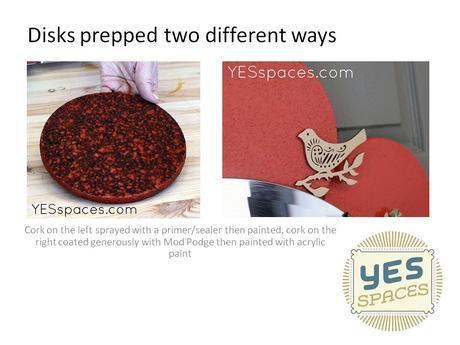 Tween Diva Mirror
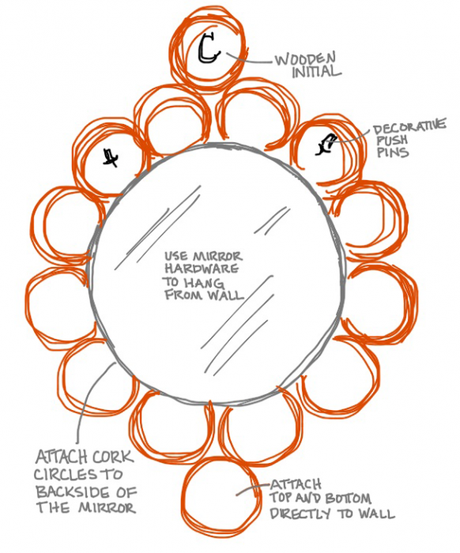
- Use Mod Podge to coat the cork disks before paintingWhen dry, paint disks with acrylic paint
- Put clips on mirror and using the hole on the back wire the clips together to give yourself a way to hang the mirror on the wall
- Lay mirror on a large flat surface and arrange corks evenly around the mirror to your satisfaction, saving two to go above and below
- Glue the corks onto the back side of the mirror, the beveled edge adds a nice detail so no need to hide it
- Hang the mirror on the wall
- Paint wooden decorative pieces white
- Glue initial to one of the extra cork disks
- Using small nails or the Command strips hang the two remaining disks above and below the mirror as shown in the drawing
- Once in place add any extra decorative elements you like
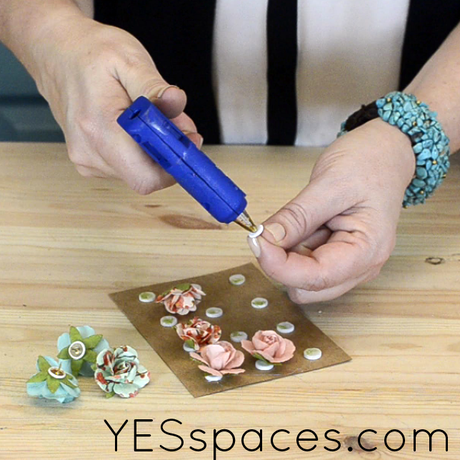
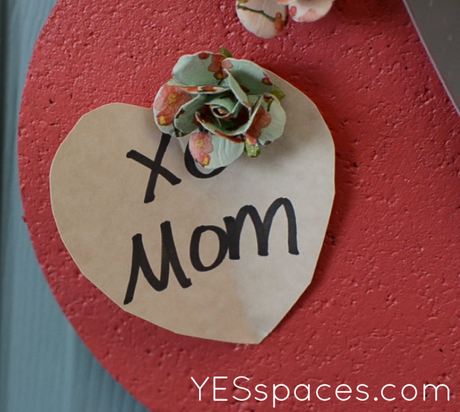
- Glue paper flowers to thumb tacks
X-Style Frame Mirror
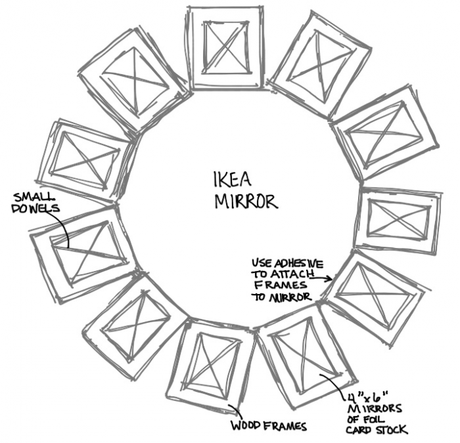
- Sand wood frames and dowels lightly
- Prime all wood
- Sand lightly again
- Paint frames and dowels with at least two coats of high gloss paint, sanding in between coats if necessary
- Cut wood dowels to length, diagonally across the frame (scissors will do the job)
- Glue dowels into place with just a dot of glue in each corner, remove any excess glue
- If needed give one final coat of paint to each assembled frame
- Cut silver foil paper to size and insert into frames
- Space frames evenly around mirror and glue them in place
- Use IKEA hanging pieces that come with the mirror
Watch the video if you are confused about any part of this process, or comment and I will respond!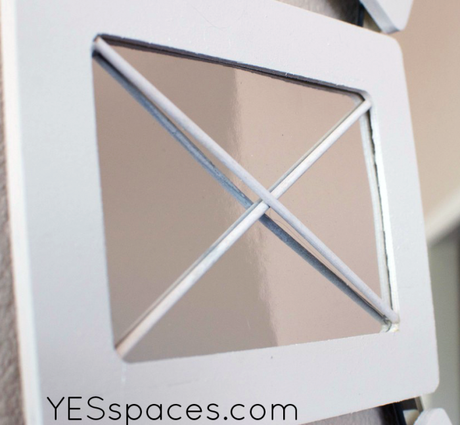
The Outcome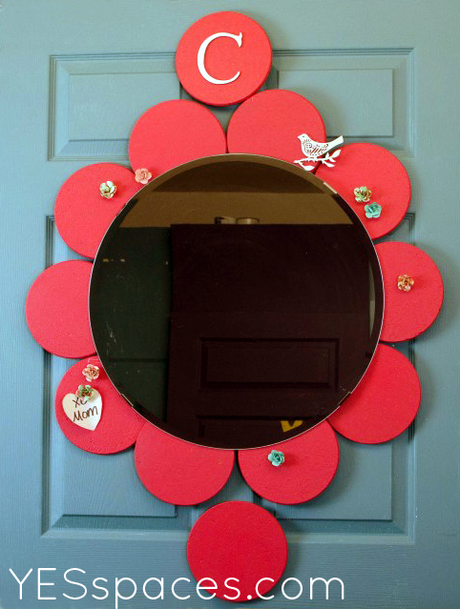 I love the bright color and whimsey of this interactive mirror for your daughters room! And the exact same mirror looks completely different all dressed up.
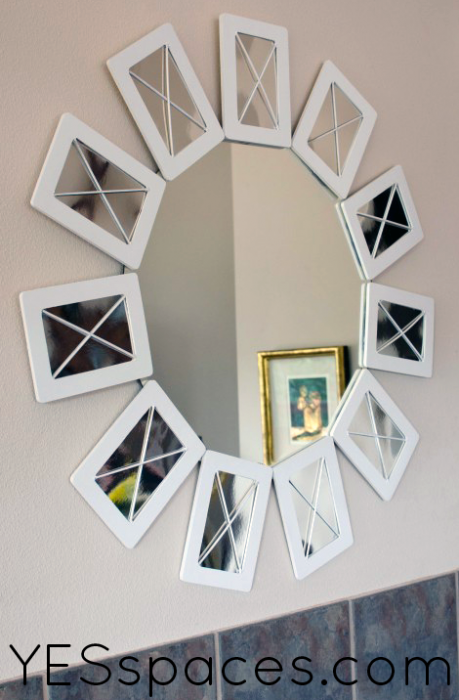
Hmmm….how many more ways could I redesign this mirror?
The Budget – Tween Diva Mirror
$14.99 – IKEA Kolja Mirror
$14.95 - 5 packages of 3X Heat cork rounds from IKEA @ $2.99 each
$1,98 – Acrylic paint
$7.67 - Mod Podge
$0.49 – Disposable foam 1″ brush
$2.68- Initial and one decorative item a $1.29 each
$1.99- Metal thumbtacks
$2.00 -Decorative paper flowers
$3.09- Picture hanging wire
$0.00 – I had the glue gun
TOTAL: $48.86
The Budget – Art Center
$14.99 – IKEA Kolja Mirror
$14.95 - 5 packages of 3X Heat cork rounds from IKEA @ $2.99 each
$11.00-11 4×6 wood frames
$5.97- 3 sheets of Silver foil scrapbook paper @$1.99 each
$3.79- Gloss white spray paint
$0.00 – I had the foam brush, glue gun and sand paper
TOTAL: $5o.70
 These are projects 11 & 12: we are adding new videos to our YES Spaces DIY page regularly this year until we reach 52! Based on your input we have directions and when needed measurements and plans here for you as well. So be sure to subscribe here and over on YouTube so you don’t miss anything!
If you want to dress up your home contact YES Spaces today! I would love to talk to you about your family and your space!
Visit our YES Spaces DIY channel to see videos of other family friendly projects!
Connect with us on Facebook for the “How To” behind some of today’s most popular design ideas!
View our Pinterest Boards for my curated design inspiration! Watch our MESS to YES Home Makeover!

