This is a common scenario.
We are working in a company with many software developers and every developer is using the IDE of his preference.
So let's say that we are working on the same web application but we want to be able to deploy the application from the command line without the need of knowing how to setup an application server inside a specific IDE.
For this purpose a well known maven plugin can offer us a great solution.
The plugin is called Tomcat Maven Plugin.
First I must say that I am using a Mac.
The easiest way to run Tomcat on Mac is by using The Homebrew package manager.
Homebrew is an excellent package manager that installs a specific application for you in a local folder and you can be sure that no application installation procedure will mess up again your files and your system settings.
The installation of Homebrew can be done from the terminal command and it is this line:
ruby -e "$(curl -fsSL https://raw.githubusercontent.com/Homebrew/install/master/install)"After that to install the latest version of Tomcat ( Tomcat 8.0.15) we have just to give the following command on the Mac OS Terminal:
brew install TomcatWith the above procedure Homebrew installs Tomcat at /usr/local/Cellar directory.
Now create a symlink so that you can more easily run Tomcat:
sudo ln -s /usr/local/Cellar/tomcat/7.0.39/libexec /Library/TomcatNow change the /Library/Tomcat folder ownership by using your system username (hint: you can find it before the $ symbol in command terminal) with this code, so that this folder becomes writable :
sudo chown -R bolshchikov /Library/TomcatThen we execute the following command to make all the tomcat scripts (like startup.sh and shutdown.sh) executable:
sudo chmod +x /Library/Tomcat/bin/*.shNow we can start tomcat by issuing the following command:
/Library/Tomcat/bin/startup.shNow that we have our application server running we can run a maven command to create a project:
mvn archetype:generate -DgroupId={package-name} -DartifactId={project-name} -DarchetypeArtifactId=maven-archetype-webapp -DinteractiveMode=falseFor our project I will use com.skiabox.webapps as the package-name and TheWebApp1 as the name of our project.
So the command that I give is the following:
mvn archetype:generate -DgroupId=com.skiabox.webapps -DartifactId=TheWebApp1 -DarchetypeArtifactId=maven-archetype-webapp -DinteractiveMode=falseYou can create a project from an existing list of maven archetypes that many companies have already created for you.
For example to see the list of maven archetypes that Apache has created check this link.
The next step is to open the maven project we have just created using our favorite IDE.
In my case this IDE is IntelliJ Idea 14 Ultimate from Jetbrains.
To open an existing maven project using IntelliJ Idea the only thing you have to do is open the project's pom.xml file.
So we use File -> Open and we choose TheWebApp1 folder.
That is what we see at this point (I have opened the pom.xml file of the project):
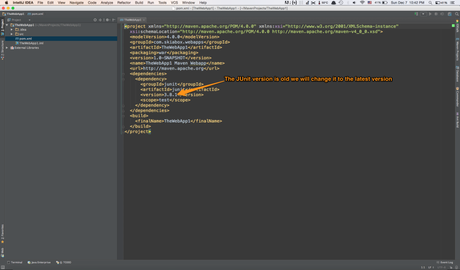
We change the JUnit version so that it is the latest version 4.11 and we click Enable Auto-Import when this message appearing inside IntelliJ Idea IDE.
This way IntelliJ Idea is auto importing a new version of a project as soon as we change the version number of it in the pom.xml file.
We also add another useful dependency that our project will use since we will create a servlet using only java coding.
The dependency that we should add is the following
<dependency>
   <groupId>javax.servlet</groupId>
   <artifactId>javax.servlet-api</artifactId>
   <version>3.1.0</version>
   <scope>provided</scope>
</dependency>
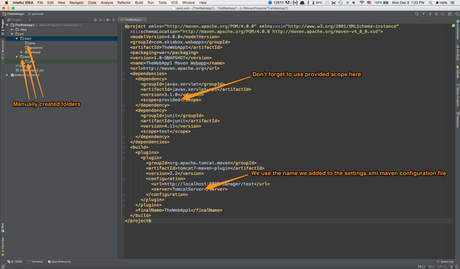
Check that the scope is provided since our application server (Tomcat) should provide these libraries.
The next step is to add some users to our Tomcat Server installation.
So we edit the /Library/Tomcat/conf/settings.xml file and we add these lines (some of them may already exist) between the opening and closing tomcat-users tag:
<role rolename="manager"/>
<role rolename="admin"/>
<role rolename="manager-gui"/>
<role rolename="manager-script"/>
<user username="admin" password="admin" roles="admin,manager,manager-gui,manager-script"/>
We should at this stage inform maven that we have a tomcat server running so first we go to maven home directory by using the following :
cd $M2_HOME/confThe set of the environment variable M2_HOME has become more complicated at Mac OS Yosemite so you ca use this link to create a login script that sets this variable properly.
There we edit the settings.xml file and we add these lines inside the servers tag:
<server>
  <id>TomcatServer</id>
  <username>admin</username>
  <password>admin</password>
</server>
Now it is safe to add the Tomcat Maven Plugin details to our pom file.
We can also add manually the main/java and test/java directories since they are not created by our archetype.
Of course we can create our own archetype if we want but maybe this is a topic for another article I will do in the future.
The image of our project after all these modifications is the following:
The only thing that is left is to create an application.
We will create a simple java servlet just for the purpose of this article but in real production situations you will almost never use java code for a servlet since you can use the jsp format to create the presentation layer of your application.
So we create now a servlet file called HelloWorld.java inside src/main/java/gui (we created the package gui)
Here is the code:
package gui;

import javax.servlet.ServletException;
import javax.servlet.annotation.WebServlet;
import javax.servlet.http.HttpServlet;
import javax.servlet.http.HttpServletRequest;
import javax.servlet.http.HttpServletResponse;
import java.io.IOException;
import java.io.PrintWriter;

@WebServlet(name = "HelloWorld")
public class HelloWorld extends HttpServlet {
    protected void doPost(HttpServletRequest request, HttpServletResponse response) throws ServletException, IOException {

    }

    protected void doGet(HttpServletRequest request, HttpServletResponse response) throws ServletException, IOException {
        PrintWriter out = response.getWriter();

        out.println("<html>");
        out.println("<b>Hello World</b>");
        out.println("</html>");
    }
}
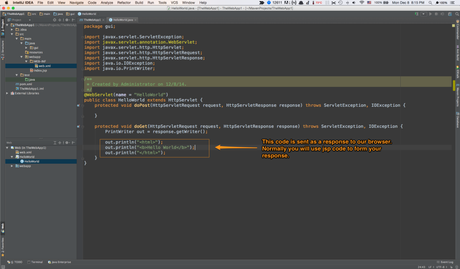
And here is an image from our IDE with this code:
We are nearly complete.
Start the tomcat server if you have not already done that like this :
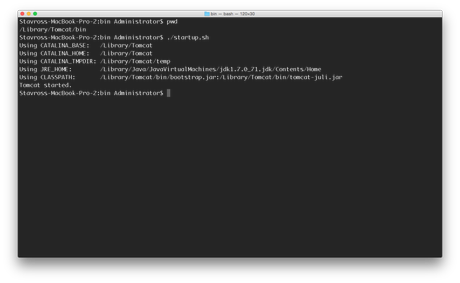
Then change directory and go to the folder that contains our maven project and execute the deploy goal of our Tomcat Maven Plugin like this :
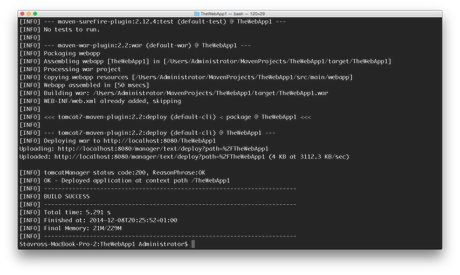
cd MavenProjects/TheWebApp1mvn tomcat7:deployThis plugin is made for Tomcat v7 but it works perfectly fine with our Tomcat v8.
At this point if you follow all the previous steps, you will get a build success result like this:
Of course we can test that our application is running by opening the following url of our application to any browser:
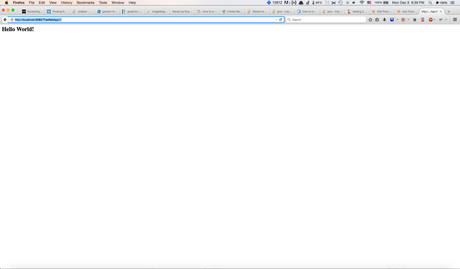
http://localhost:8080/TheWebApp1/By using this url we get this result :
