In this month's Creativity 521 posts, I will be sharing with you some ideas from the party and hopefully they might come in handy for you some day too! Today, we'll be showing you how we did a very simple DIY Pull String Pinata in just 2 hours!
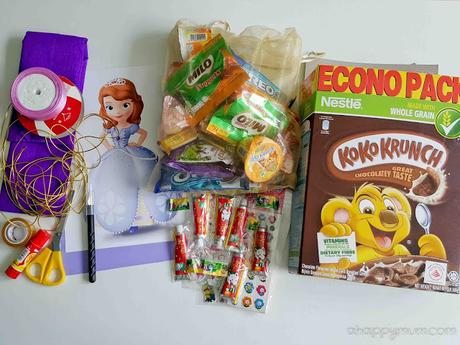
Materials we used:
- Empty cereal box
- Crepe paper
- Ribbons
- Craft knife
- Scissors
- Glue stick
- Sticky tape
- String
- Coloured paper
- Printed picture of Sofia
- Treats (candy, small toys, stickers etc)
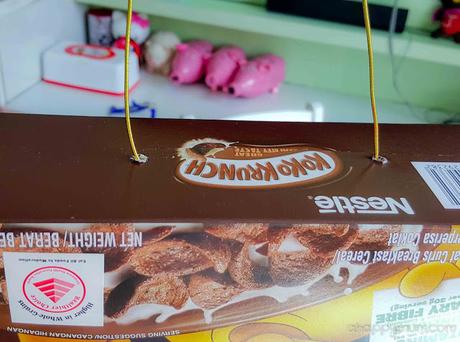
Firstly, poke two holes at the top of your pinata and insert the string. Knot it on the inside of the box and make sure it is sturdy.
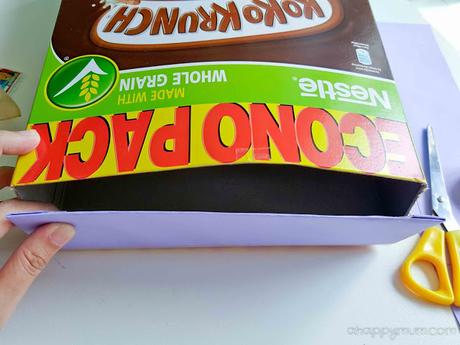
For the bottom of the pinata, cut open the entire flap and use a piece of coloured paper to wrap it up. This will make it stronger and looks neater too. Do match the color of your paper to your party theme if you can.
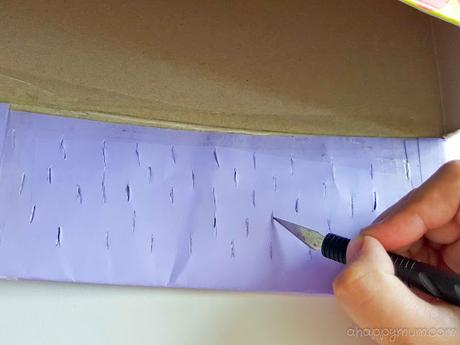
Next, I actually found this quite fun - using a craft knife to make slits on the flap! The total number of slits depends on your preference. I was hoping that the kids would not be able to open the pinata tooooo quickly and I did over 40 slits for 12 children who were going to play the game.
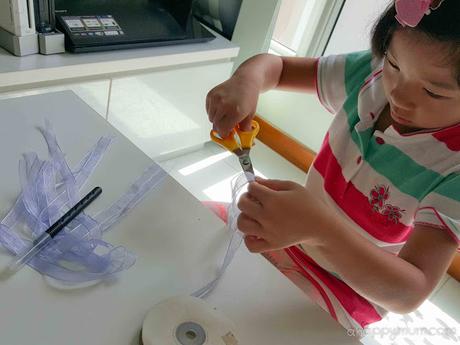
Have your child help to measure and cut out the ribbons which do not have to be exactly the same length, just approximately. You can use different types or colours of ribbons for variety too.
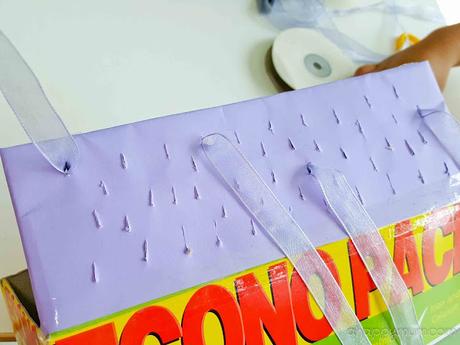
After that, insert one piece of ribbon in every slit, leaving 2 to 3 inches of the ribbon inside the box and the rest of it dangling outside.
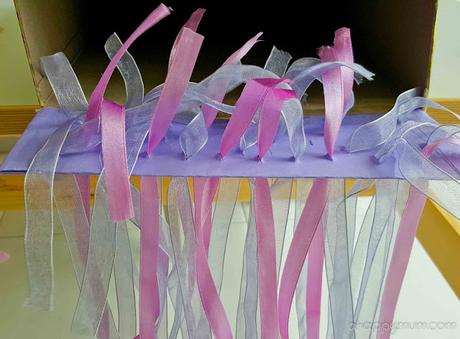
Keep going until the bottom of your pinata looks something like the above. Make sure that you do not leave out any slit.
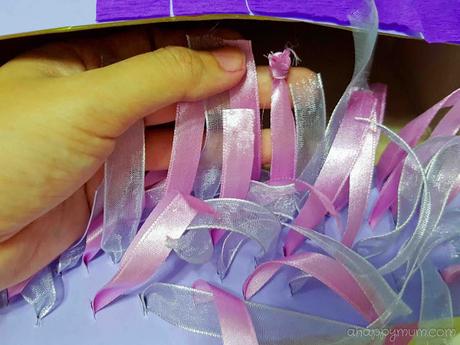
Choose one of the ribbons which will be the 'winning' string and knot it several times at the end which will be hidden inside the box. Yes, you get it, right? So, only this ribbon will eventually open up the box whereas the rest will just fall off when pulled. To make sure that happens during the game, check that your slit is small enough to hold the ribbon in place yet big enough for it to be pulled through.
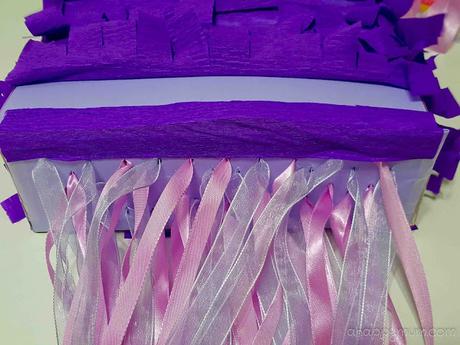
Next, it's time to seal the box! Put in the treats and try not to make the box too heavy or it might not hold. To close the flap, I used a strip of crepe paper and taped it to the box along the long edges. If you are worried that the treats might fall out, then you can reinforce it by adding two small pieces of sticky tape at the sides of the flap. However, do try to make sure that the box can be opened when the right string is pulled or you might have to manually open it during the game.
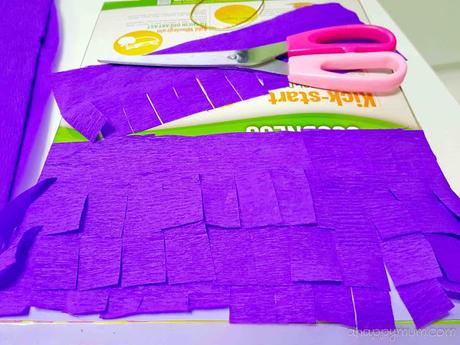
Time to jazz up the box! We used rectangular pieces of purple crepe paper to dress up our cereal box. To make it nicer, fringe one long edge of the crepe paper and put glue along the top to stick it to the box. Continue all the way until the whole box is wrapped up.
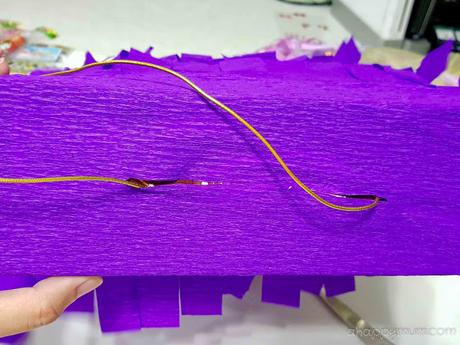
For the top of the box, cut a bigger, rectangular piece of crepe paper and make a slit at the center so that the string can fit inside. Fringe along the entire edge and glue the whole piece of crepe paper onto the box.
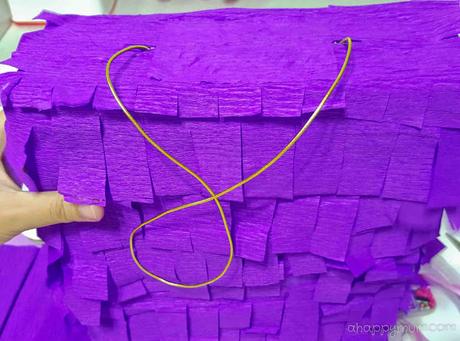
Lastly, use a small piece of crepe paper to cover up the slit as seen above. Cut out a picture according to your party theme, glue it onto one side of the box and we are done!
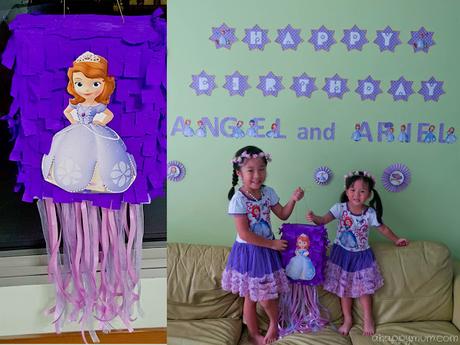
Ta-dah! Presenting to you our very first Pull String Pinata! Since it is DIY and didn't cost us much, it didn't feel like a waste when we had to throw it away afterwards. Most importantly, it made a fun game and brought much joy to the kids, so I was grateful that we decided to make it on the night before the party! Yippie! Till more party updates!
For more DIY tutorials and craft inspiration, visit my gallery here.
******
 <a href="http://www.ahappymum.com/search/label/Creativity%20521"><img src="https://lh5.googleusercontent.com/-FA3rgSeuQWo/T_K49p08YZI/AAAAAAAAJTY/AxV0r9kjU_c/s150/Creativity%2520521%2520button.jpg" alt="new button" width="125" height="125" /></a>
To fellow bloggers who have a fun craft session, DIY tip or creative idea to share, come join in the party! Highlight and press Ctrl + C to copy my button above, include it in your post/sidebar and add your link below. I will be hosting Creativity 521 on the 5th and 21st of every month, do hop over for more inspiration. Remember: The sky's the limit when it comes to creativity!


