Creating a Driftwood Finish with Paint
I used this technique for creating a driftwood finish with paint, which I confess I garnered from another website some time ago and unfortunately, I do not remember where. But, I do remember the process and it worked quite well for me in getting that driftwood look.
I started with just two different driftwood-like colors of flat, water-based latex paint, plus a small amount of basic black and white artist’s acrylic. The black and white were just from small tubes of acrylic paint I had on hand for painting on canvas. You will only need a small amount of the white and black so just buy small tubes if you don’t already have some water based latex or acrylics on hand.


Pick the two colors you want from any assorted flat, water-based acrylic grays, beiges, sand or dark creams at the paint store that you feel will give you the colors and shades to mimic a driftwood finish. I chose a quart each of 6236 Grays Harbor and 7642 Pavestone latex flat paint & primer both from Sherwin-Williams’ SuperPaint collection. So now you have Grays Harbor and Pavestone.
But you want to have more colors to work with and in order to achieved additional tints and shades I merely added a little of the white or black to Grays Harbor and Pavestone. Pour a small amount of Grays Harbor into a plastic cup or container and mix in a small amount of white paint to achieve a lighter tint – we now have Grays Harbor Light. Do this again using Pavestone as your base and you will create Pavestone Light.
Now pour some of Grays Harbor and Pavestone in yet two more separate containers and add a small amount of black to each to get a darker shade of Grays Harbor and Pavestone. You now have Grays Harbor Dark and Pavestone Dark and a total of 6 different driftwood colors for creating a driftwood finish. Truthfully, I believe I only used 4 of the colors on my project but you now have lots of different shades and tints to work with and you can create as many as you want using this method of adding varying amounts of white or black to your base driftwood colors.
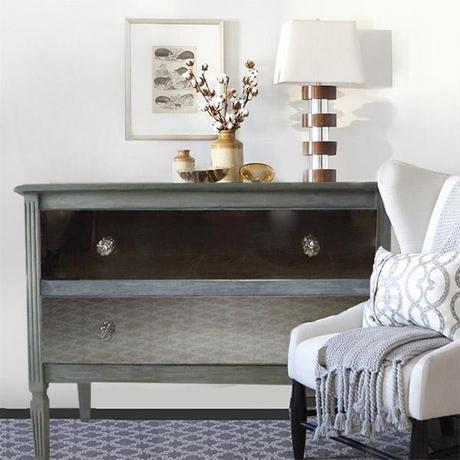
This dresser was originally black with a beautiful antique gold stencil pattern but, while it was once one of my favorite pieces, it no longer suited my new driftwood color scheme and beachy style. I went from British West Indies with its dark woods, burnt orange painted walls and vibrant tropical colors to subdued sand-toned walls and creamy beach theme with driftwood furniture and accessories. In the interim, before I decided on trying a driftwood finish using paint, I had given the dresser a distressed white finish. It was nice but I knew I could do better. I wanted that highly sought after driftwood finish and I also really liked a lot of the mirrored furniture I was seeing. Why not combine a driftwood finish with mirrored drawer fronts?
After mixing my paint colors, the procedure went as follows:
1. First, I used the Grays Harbor and painted the whole piece. Since I had never put any type of finishing product on the piece after I had painted it white, all I needed to do was scruff it up a bit with sandpaper to get some good paint adhesion and paint over the white with the gray.
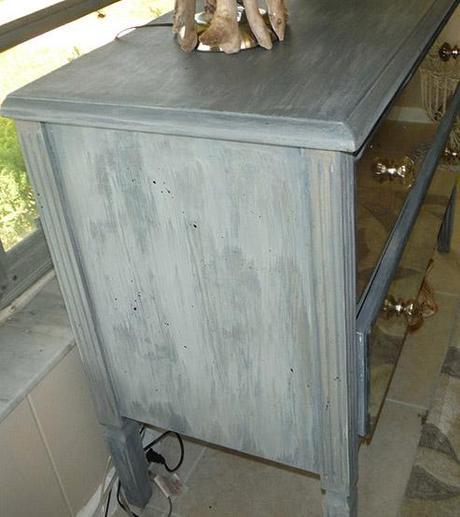
2. Next, I took the darkest gray shade Grays Harbor Dark and made it a glaze by adding equal part water. I used a soft cloth and went over the areas of the legs where you can see the carving so that the darker shade got into the grooves. Don’t let the paint sit – you have to move quickly and wipe off most of the paint that has not settled into the grooves.
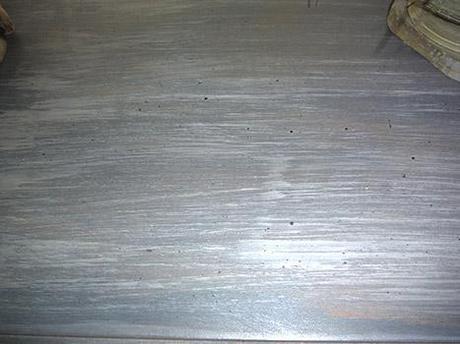
3. I then made a glaze from the Pavestone base color. Again, ½ water and ½ paint to make the glaze. I applied this layer in small areas of the piece with a brush and worked quickly to blend and soften the paint using a soft cloth – taking off quite a bit of the glaze as I went along. I slowly did this to the whole piece.
4. The next layer was the Pavestone Light. Again, I made a glaze of ½ paint and ½ water. I applied this layer using a very dry brush technique and very long brush strokes with a very light hand. I didn’t apply a lot – just a little here and there until I was happy with it.
5. For the final touch, I diluted black paint and a little water and, with a toothbrush and my fingers, I flecked the surfaces of the dresser with just little black specks here and there.
6. When I was done, I used Driftwood Natural Beeswax Wood Butter to give it a nice soft protective finish.
After several attempts at finding just the right knobs, I finally chose mercury glass knobs from Anthropologie.
I couldn’t be happier with how the finish came out and how the final piece looks. But I will note two things. First, as nice as this painted driftwood finish looks – I could have used the Driftwood Weathered Wood Finish and got just as nice if not nicer driftwood finish in a lot less time and without all the paint and cleanup, but, I hadn’t developed the product yet and, in fact, this project inspired me to find an easier alternative; and second, having the mirror put on the dresser fronts may not have been the best idea. While it looks great (I had them done by a local glass and mirror shop), the mirror is very heavy and prone to crack if you put the handles on too tight or if you move the piece a lot like I have. The mirror on two corners has already chipped and cracked. I had really, really wanted antiqued mirror, i.e. smoky, aged and distressed but I could not find any locally so that was disappointing. This piece would have been over the top if I had been able to use antique mirrors as I originally wanted… sigh.


