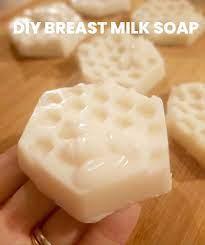
Do you have an abundance of breast milk as a result of breastfeeding? Could you not throw it away? Consider turning that liquid gold into something special and beneficial for your skin: breast milk soap. Soap made from breast milk is a gentle and moisturizing way to get the advantages of breast milk for yourself or a loved one. In this detailed tutorial, we'll show you how to make soap from breast milk from the comfort of your home. Everything you need to know, from choosing the right ingredients to how you might present your finished product, will be discussed in detail. Let's dive in and discover what we must do to transform breast milk into a soothing skin care remedy.
Obtaining Necessary Materials

It's crucial to get everything together before we start manufacturing soap out of breast milk. All you need is listed below.
Breast Milk
Breast milk, the soap's main ingredient, is the basis of this product. Excess breast milk from a breastfeeding mother or father can be used. Milk banks and generous friends are two other options for receiving breast milk for your baby.
Sodium Hydroxide (Lye)
Since it aids in saponification, lye is crucial to the soap-making process. However, lye must be handled with extreme care due to its severe causticity. Work in a well-ventilated location while donning safety gear like gloves and goggles.
Fats And Oils
You need a variety of oils and fats to make a moisturizing and nourishing soap. Cocoa butter, shea butter, olive oil, and coconut oil are all excellent options. These components combine to give the soap its unique feel, foam, and skin-loving qualities.
Optional: Fragrance Or Essential Oils
Breastmilk soap can be scented with fragrance or essential oils if that's what you desire. Pick fragrances that make you happy, and remember to factor in the healing potential of essential oils. Breast milk has a delicate aroma that can be enhanced with essential oils like lavender, chamomile, or calendula.
Optional: Additives And Colourants
Soap additives and colourants can boost the soap's aesthetic appeal and skincare advantages. Soap can be softer and more nourishing using oats, honey, or natural clays. Mica powders and herbal infusions are just a couple of the many all-natural options that can be used as colourants.
You'll need a soap mould to form and cure your breast milk soap. The popularity of silicone moulds can be attributed to their versatility and user-friendliness. Soap bars can be made in any form or size by selecting a mould from the available options.
Measurement And Blending Utensils
Soap will turn out right once the ingredients are measured and mixed thoroughly. Obtain a digital scale, heat-proof mixing containers, thermometers, and mixing implements. Keeping all soap-making equipment in one place is important to prevent contamination.
Making Soap: A Closer Look
Now that we have all the necessary materials let's begin creating breast milk soap. You get the finest results if you follow each step precisely.
Set Up Your Work Area
Get started by making sure your desk is neat. Put everything you need, from ingredients to tools, in one convenient location with plenty of ventilation.
Take Inventory Of Your Materials
Soap production relies heavily on precise measurements. Use a digital scale to precisely measure the quantities of oils, fats, breast milk, and lye.
Make A Lye Solution
Measure the lye and water cautiously to avoid overdosing on either. Always start by adding the lye to the water and stirring until it's completely dissolved. Put the lye in a separate container to cool.
The Oils And Fats Should Be Melted.
Oils and fats should be melted in a microwave or double boiler, then transferred to a heat-safe container. To ensure even melting, stir it every so often. Reduce the brew's temperature to about 100 degrees Fahrenheit (38 degrees Celsius).
Mix The Oils And Lye Solution
The lye solution and the oils can be mixed at about 100 degrees Fahrenheit (38 degrees Celsius). While stirring constantly in one direction, slowly add the lye solution to the oils.
Mix With The Outline
It should be blended with a stick blender until it achieves a consistency known as "trace." Soap batter has reached a trace when it thickens enough to leave a thin trail when drizzled. This process typically takes between 5 and 10 minutes.
Include Scents, Oils, And Supplements.
Fragrance, essential oils, and other additives can be included if desired. Be sure that the soap batter is evenly distributed by stirring it thoroughly.
Put Into Soap Moulds.
Pour the soap batter into the soap mould of your choice slowly and evenly. Tap the mould lightly on the counter to remove any trapped air.
Let The Soap Cure For A While
To keep the soap from melting, put the mould in a cool, dry place and cover it with a cloth or parchment paper. As a result of a chemical reaction known as saponification, the soap will harden and change into soap. Soap curing durations can range from 2 weeks to 6 weeks.
Put That Breast Milk Soap In A Box!

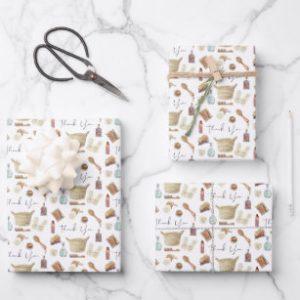
You'll have a few choices when you package your cured breast milk soap. Soap is delicate, so storing it in attractive, well-protected packaging is important. Let's discuss Wrapping Paper For Soap packaging options, concentrating on paper.
Packaging With Kraft Paper
Wrap your breast milk soap in eco-friendly and adaptable kraft paper. It offers great security while maintaining an attractive, rustic appearance. Cut a square of kraft paper just bigger than the soap bar to use as a wrapper. Fold the edges in towards the center and insert the bar. Wrap it with some natural twine or ribbon and secure it with a knot.
Packaging Cardboard
A cardboard sleeve is a great way to display your soap while protecting it from damage. You can either make your sleeves and have them printed or buy some already produced. Put your soap bar inside the sleeve and fasten it with tape or glue.
Soap Box, Corrugated
Use a corrugated soap box if you need a more durable container. Shipping your soap in corrugated cardboard can keep it safe throughout transit and give it a polished look. Find vendors who share your commitment to sustainability by providing recyclable corrugated boxes.
Avoid using non-recyclable materials like plastic, glass, metal, or wood for packaging. It's possible that the container for breast milk soap shouldn't be made of these materials.
Conclusion
Congratulations! You've figured out how to turn your extra breast milk into a pampered and beneficial soap bar. This detailed tutorial lets you make unique breast milk soap at home. Make your Tom soap by collecting the necessary materials, following the soap-making procedure, and playing with different additives and fragrances.
Properly protecting and showcasing your breast milk soap requires thoughtful packaging. To improve the appearance and preserve the quality of your soap, think about using paper for wrapping, such as kraft paper, cardboard sleeves, or corrugated soap boxes.
