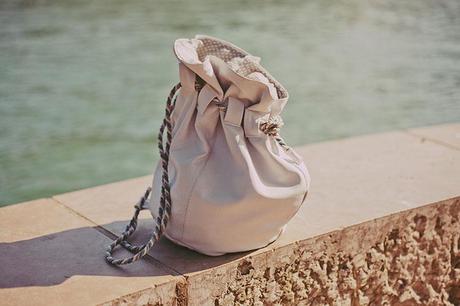

Here’s a really easy nautical inspired sewing project that requires minimal sewing skills and minimal fabric. I made two (so far

The leather one is made out of an old skirt, and because of the way I made the tabs at the top and at the bottom to attach the rope, it is totally interchangeable! It can go from hand bag to back pack in a matter of seconds! Although I’m not sure it would be happy holding a wet towel.. I’m going to show you how to make a fabric beach version, you can really do so many things with it, I really hope you can make something that’s suitable for you and your beach needs…
How to make the DIY drawstring bag


1. You will need : Fabric, interfacing, rope, pins, thread, scissors, an iron and a sewing machine.
2. Cut out the fabric. For this bag you need 1 circle, a large rectangle that matches the circumference of the circle (here’s a useful diameter/circumference calculator) a small rectangle the same length as the large rectangle. For the interfacing you need to cut the circle, if your fabric is thick enough you don’t need any on the sides.


3. Fuse the circle of fabric and the interfacing together.
4. Attach the pockets. Hem one edge of the small rectangle. Attach it to the large rectangle sewing vertical lines at intervals and a horizontal line at the bottom.
5. Attach the edges of the rectangle together. With the right sides facing in stitch a vertical line, leaving 16cm at the top. Iron open the seam.


6. Sew the casing for the rope. Fold the top of the rectangle down by about 8cm. Stitch two horizontal lines about 5 cm from the top of the fold. Finish the edge of the seam with a top stitch. Thread the rope through the casing. I find it is much easier to hook the rope through with the help of a safety-pin attached to the end.
7. Turn the bag inside out, so the right sides are facing in. Pin the bottom circle and the ends of the rope to the edges of the rectangle and sew.
8. Trim off any lose threads and that’s it!


I’d love to see if you have a go! If you have any questions don’t hesitate to ask in the comments below!
