Christmas decorations to make with the lucet - from #LRCrafts - DIY Passion: if you can think it, you can make it by Rici86.
If you have read something about my crafts, I suppose you know that I like working with my lucet. I find it a nice alternative to knitting or crocheting an I-Cord. Well, the tool you choose is a matter of personal preference, since the results can be quite similar.
Since I like the lucet, though, both because of my archaeological research and because I like crafting with the tool, I’m here again to present you something you can make with it for Christmas.
I have a more comprehensive list of possible projects with the lucet, but Christmas is Christmas. I think it’s the moment of the year where most of the crafting efforts concentrate. Don’t you agree?
So, check out a few suggestions for decorations to make. If you are not used to lucetting, you can find my tutorials here on the website or try and make those projects with another method, being it crochet or knit or tricotin.
Lucet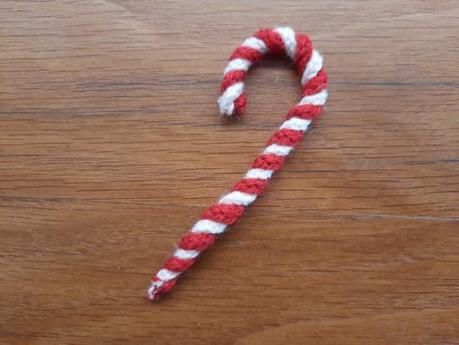
Click for the finished project detailed photos
Before starting
To make those projects, you need for sure a lucet and yarn of your choice, which depends on the single item you want to make.
To give shape to some of the items, you’ll also need metal wire. The thickness depends on how big your decoration will be and how thick is your chosen yarn.
Hot glue may prove handy, either as a substitute for needle and thread or as an additional reinforcement.
For those wanting to hang their decorations, consider incorporating a suspension system.
Familiarity with the basics of lucetting is assumed. If you need a refresher, we’ve got you covered!
Basic lucet tutorialTable of contents
Materials and tools
- Green yarn
- Sewing thread in a matching color
- A sleigh bell or other decorative top element
- A tiny pompom or bead or pearl as a base
- Needle and thread matching your yarn color
- Scissors
- Crochet hook or latch hook
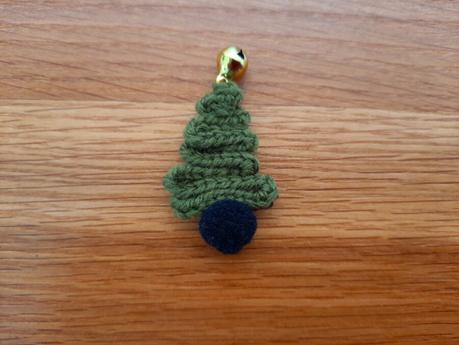
Hanging Christmas tree
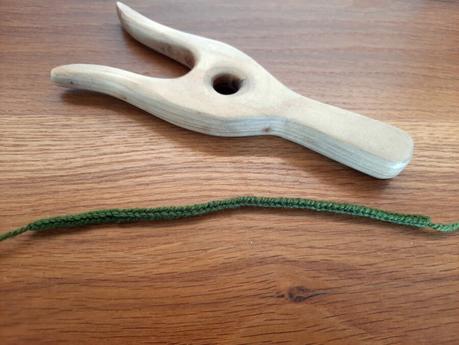
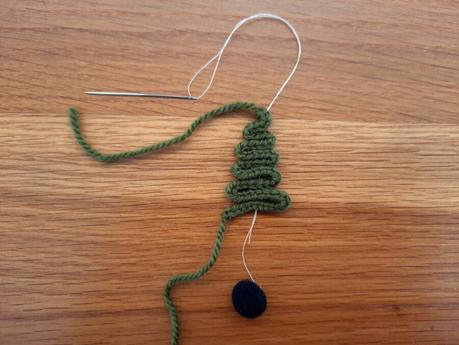
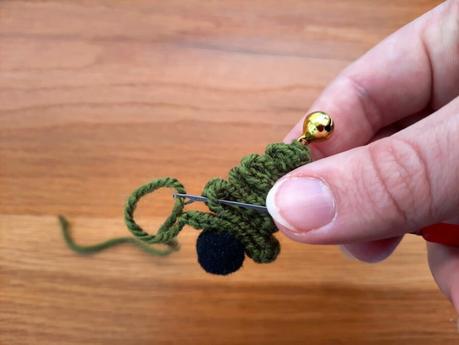
I could literally make dozens of those! To make one hanging Christmas tree you just need one green lucetted cord, a tiny pompon to be the base of the tree and a top element (I chose a tiny sleigh bell).
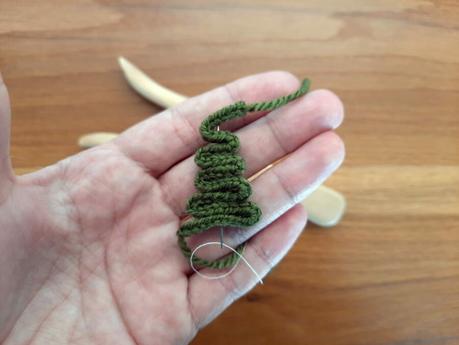
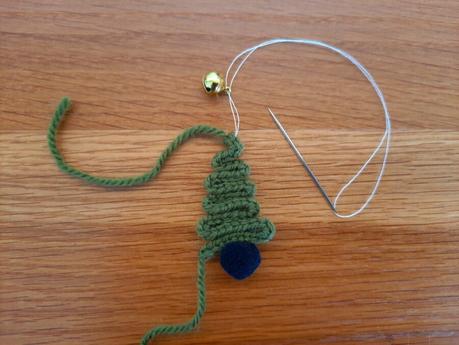
Pick a long needle and a thread matching the color of your cord (I used white for visibility in the photos). Pull the needle inside your pompon and fix it at one end of your thread. Now start making alternating spirals with your lucetted cord. Each spiral should be slightly smaller than the previous one. Connect each spiral to the adjacent one by pulling the needle inside the cord. As you go, you’ll have your needle pulled in the middle of your set of spirals. At the top, make the final spiral small enough for the needle to come directly inside the end of the cord.
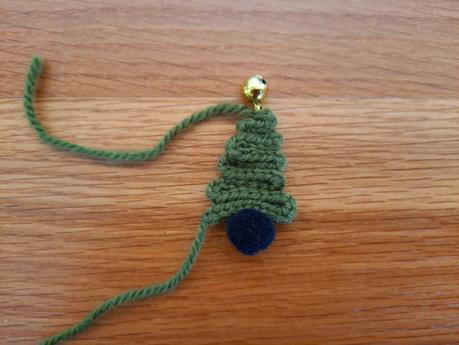
Pull your thread to fix your pompon at the bottom of the tree and fix all the spirals together to the very top. Now pick your chosen top element and fix it at the end of your cord. Fix your thread and cut it.
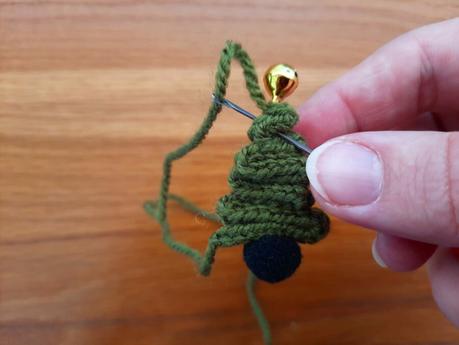
Time to take care of your cord tails. Use the topmost one to make a loop for hanging. Using a crochet hook or a latch hook, pull your tail inside your cord and fix it by hiding a knot between the latest two spirals. For the bottom tail, use the hook to hide it inside the cord by pulling it into the second spiral, securing the cord’s beginning to the tree.
Decoration tips
An addition for bigger trees: as you thread each spiral with your needle, add a bead or pearl after each loop to decorate your tree.
Materials and tools
- Red yarn
- White yarn
- Metal wire
- Pliers
- Scissors (to be used both for yarn and metal wire)
- Crochet hook or latch hook
Candy cane
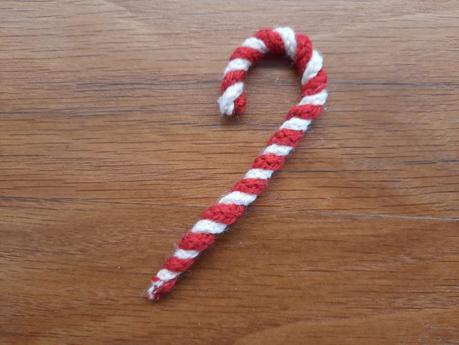
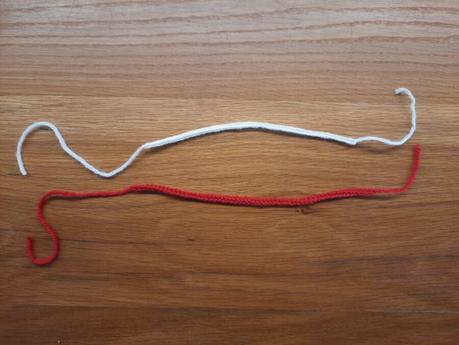
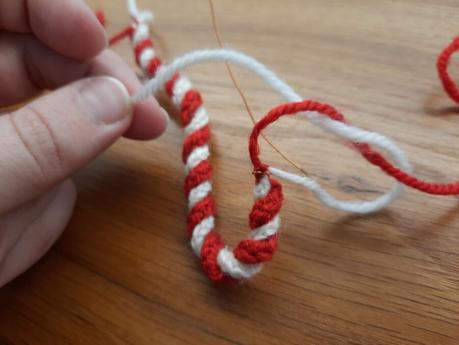
To make a candy cane, you need two lucetted cords the same lenght, one white and one red.
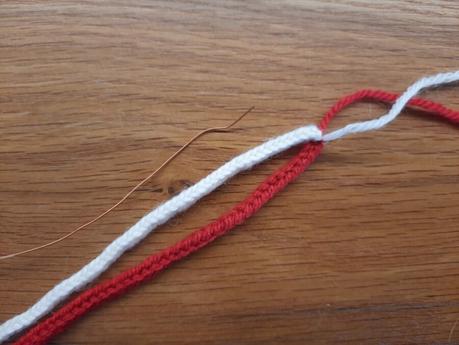
Pick the metal wire and make a small hook at the beginning (or a closed loop, if you feel it’s safer). I prefer not pre-cutting the wire: the lenght needed could vary depending on how loose you twist the lucetted cords.
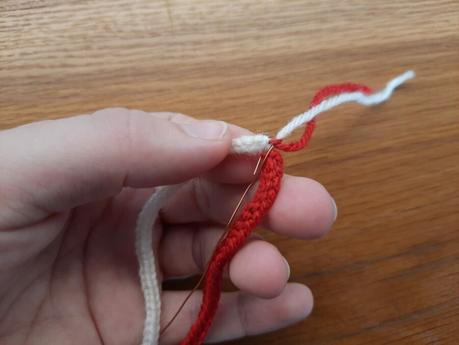
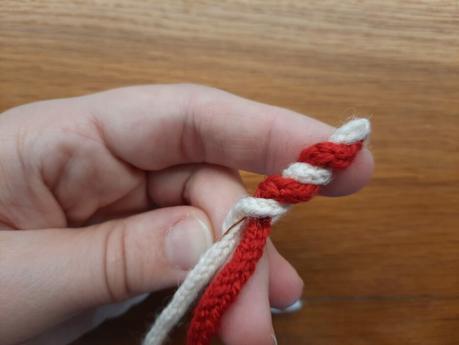
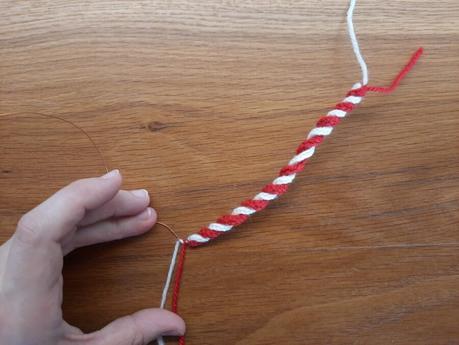
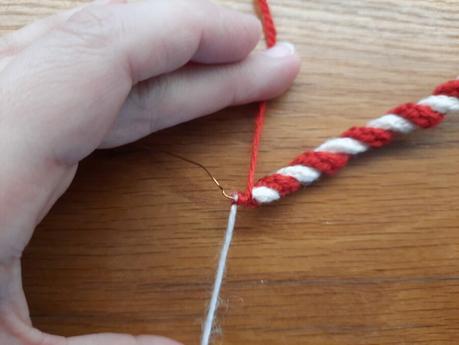
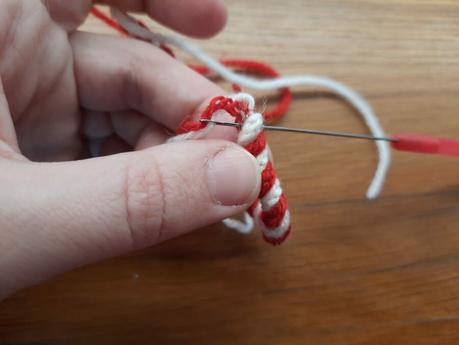
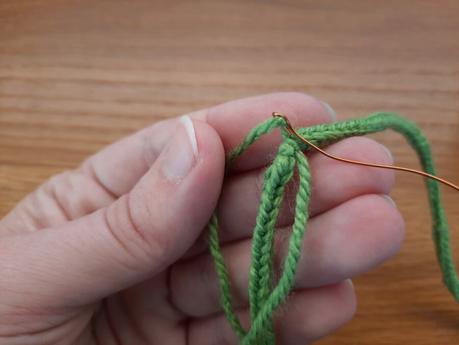
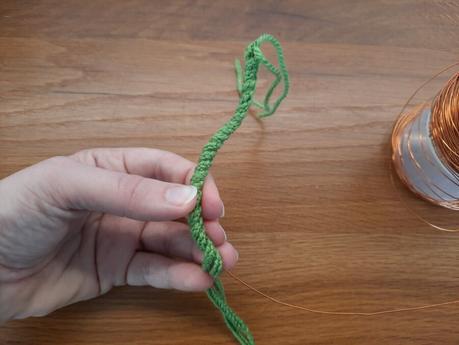
Knot both I-cords around the top of the metal hook or loop. Begin twisting the lucetted cords around the metal wire, ensuring to alternate between the red and white colors. You have the flexibility to choose how tightly you want them to wind, and you can make adjustments as needed.
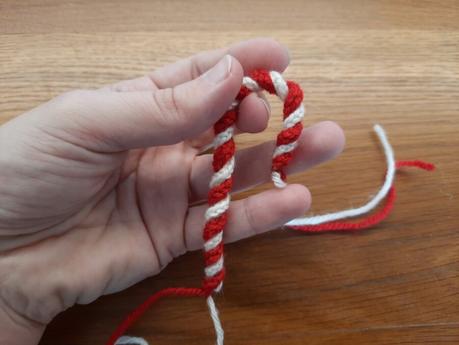
When you approach the end of the cords, shape the composition into the desired candy cane form. You can use pliers to help you in the process, but be careful not to ruin your yarn: I suggest you to wrap your pliers jaws with masking tape. Adjust the twisting as necessary. Finally, knot the cords together securely. Create a loop with the metal wire around the knot, adding a couple of knots to both secure the connection and hide the metal.
Now you’ll have your cane almost finished. I suggest hiding the tails on both ends inside the cords using he latch hook, before trimming away the excess. That was the last step. Enjoy your Christmas decoration!
Materials and tools
- Yarn in the color combination you prefer
- Needle and thread matching your yarn color
- Metal wire
- Pliers
- Scissors
- Crochet hook or latch hook
- A top decoration (bow, pompom, sleigh bell…)
- Other decorations for the finished wreath
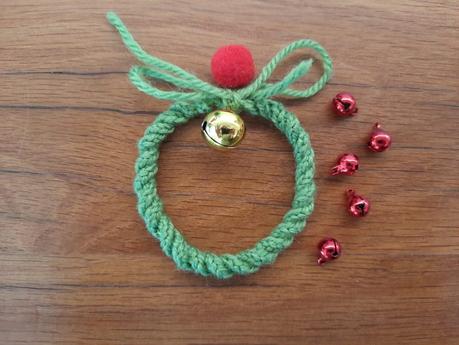
Basic circular festive wreath
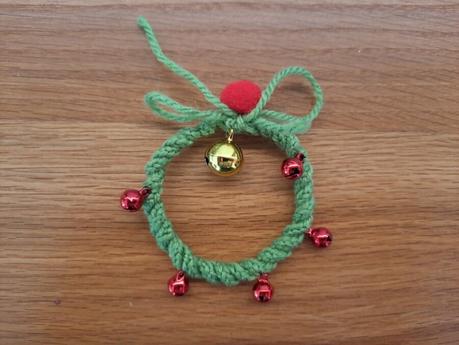
You can make a festive wreath or garland following a process similar to the one used for the candy cane.
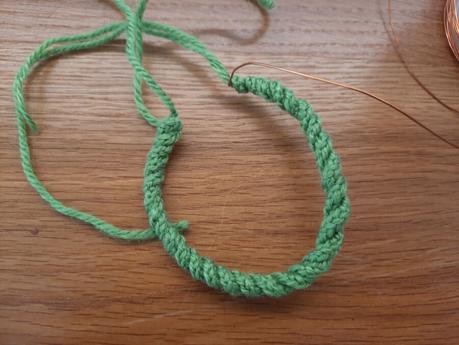
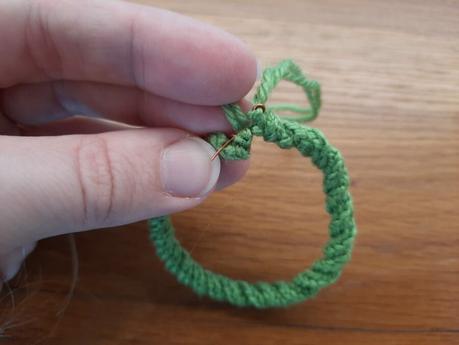
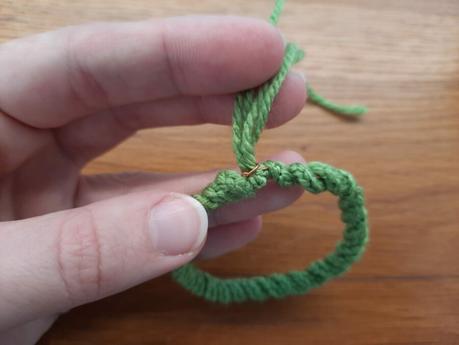
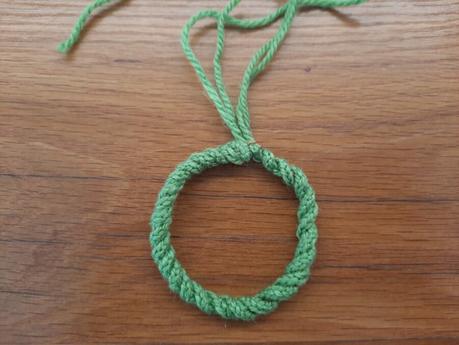
Make two I-cords the same lenght with your lucet, being them the same color or in two matching colors. Make a loop at the beginning of your metal wire and knot both I-cords around it. Now begin twisting the cords around the metal wire. If you are using two different colors, alternate them.
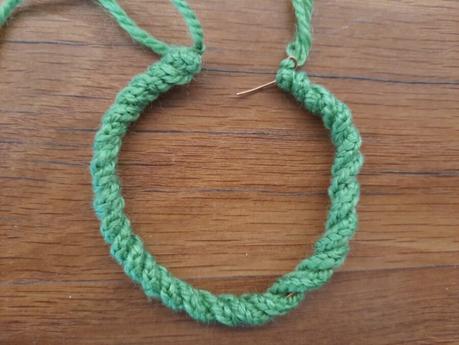
As you reach the end of the cords, give the metal wire a circular shape. Your cords may loosen a bit, so adjust them as needed. If your metal wire is thick and hard to work with, use pliers. I suggest you, though, to wrap your pliers jaws with masking tape, to prevent them from damaging the yarn.
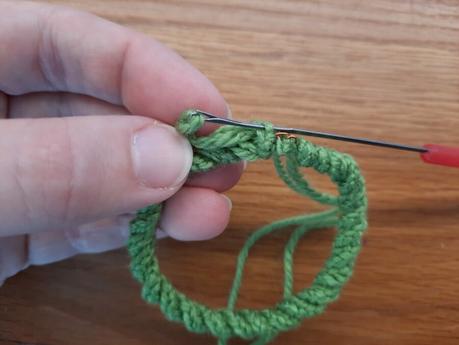
Now make a hook with the end of your metal wire and secure it to the beginning loop. Then, knot the ends of your cord securely together and to the metal hook. Cut away the I-cord tails after securing them inside your cords using a latch hook or crochet hook.
To hide the closing of your wreath, add a decoration: a bow, a sleigh bell, a pompon, a bead… anything you like. You can sew your decoration or attach it with hot glue. The final touch will be adding decorations to your wreath.
Materials and tools
- Yarn in the color combination you prefer
- Scissors
- Crochet hook or latch hook
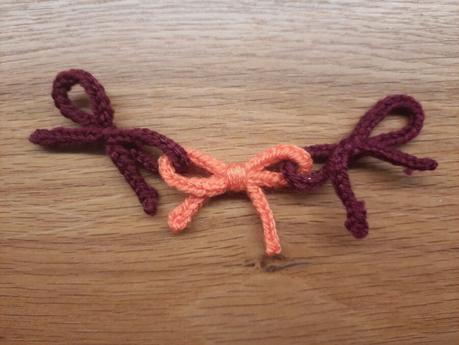
Bows festoon
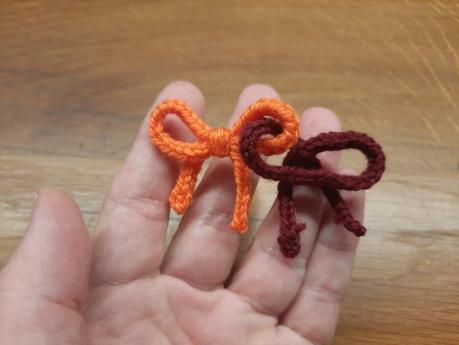
As for garlands or festoons, there’s a lot of variants you could make. One I find super cute is the bows garland. A continuous chain of bows to be hanged wherever you want like a festoon, in all the colors you want.
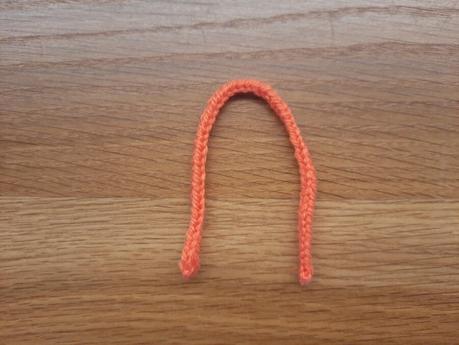
To make it, first you have to lucet several I-cords, all the same lenght. Choose the colors you prefer: you can make each one different or go with just two or three colors.
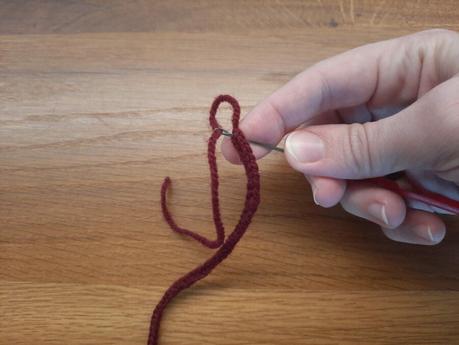
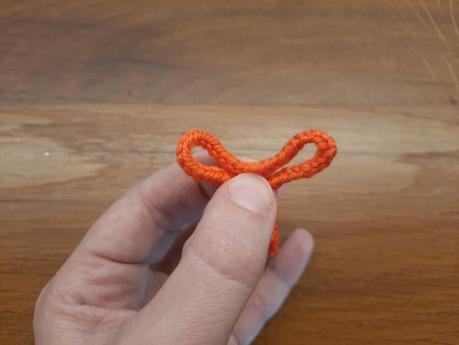
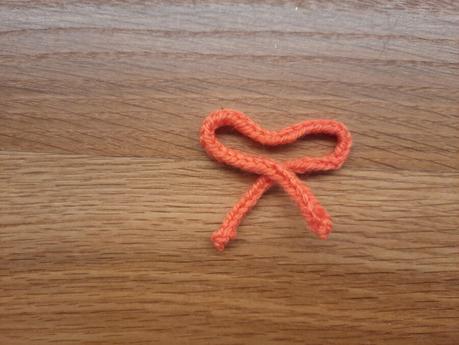
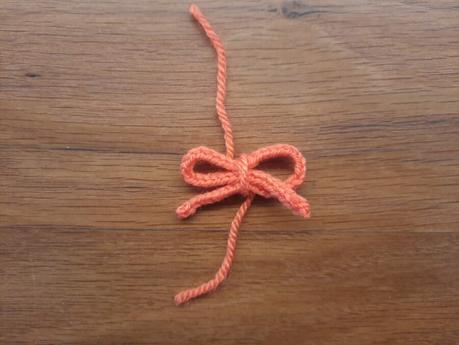
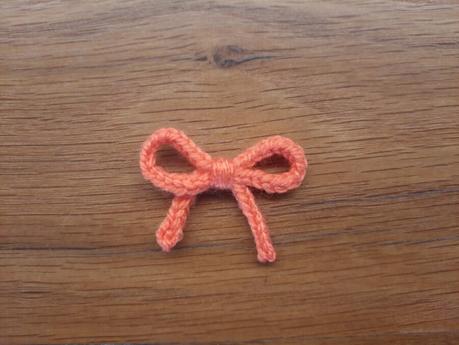
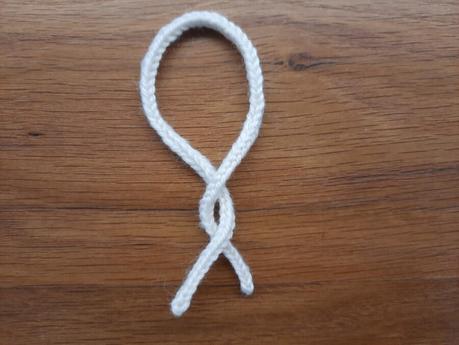
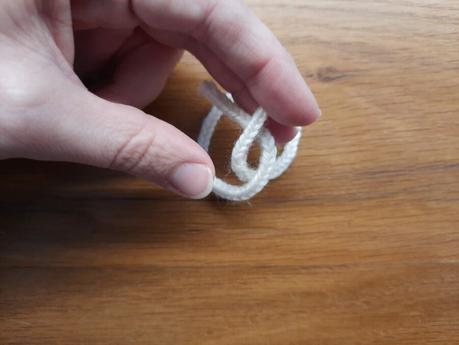
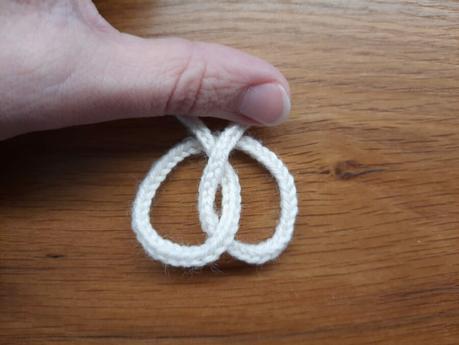
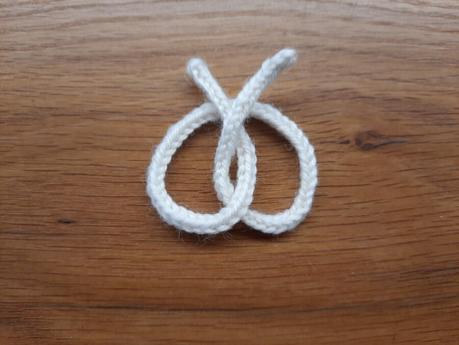
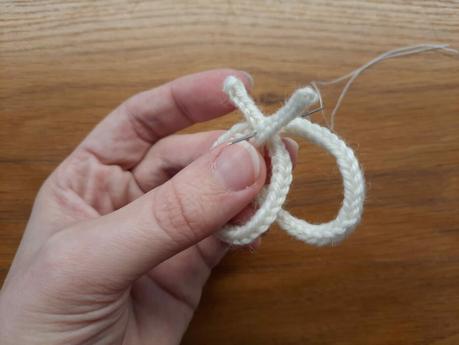
Once you have you cords, hide their tails usign a latch hook or crochet hook and cut away the excess. Now you need to make each bow while attaching them one to the other. Start with making the first bow. Pick the center of your first cord and make two equal loops, one on each side, using just a quarter of lenght for each loop. You’ll have two hanging tails: the left one should go to the right and vice-versa. Fix the middle of your bow wrapping it tightly with yarn (the same color or a contrasting one of your choice). I like to use the excess I cut away from the lucetted cord tails!
As you make the second bow, you need also the first one. The left loop of your new bow will have to enclose the right loop of the first bow. This way you’ll continue adding more and more bows to a chain. I suggest you to lucet the first bows, then begin to build the chain so you can go on making bows and adding them as you check the lenght of your final chain.
Materials and tools
- Yarn in your favorite color
- Scissors
- Pins
- Needle and thread
- Crochet hook or latch hook
- Hot glue (optional)
Pretzel
In my list of projects to make with the lucet, you’ll find a pretzel-shaped magnet. Well, I think ti could also become a cute Christmas decoration to hang.
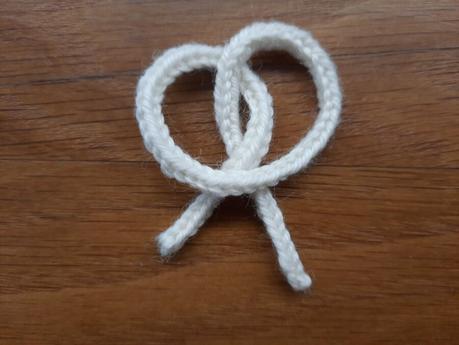
To craft an I-cord pretzel, you’ll require a single lucet cord of the appropriate length. Additionally, have a pillow or cushion and a few pins on hand to assist you in securing the pretzel shape. That’s useful mainly with big pretzels.
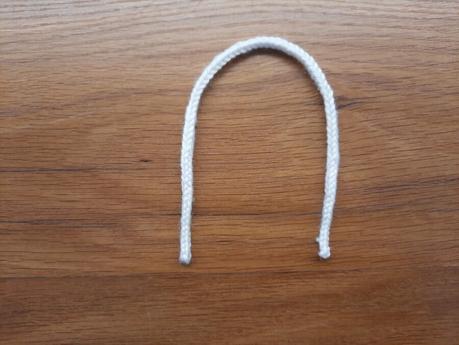
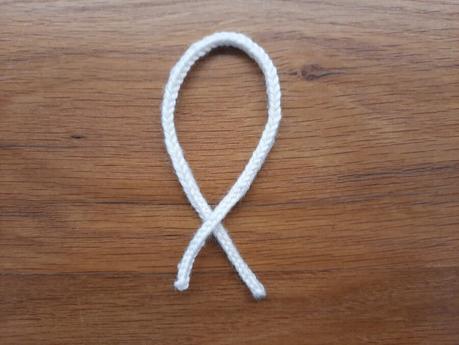
Lay the I-cord horizontally in front of you. Pull the two ends of the cord downward, shaping it into a horseshoe. This basic form will serve as the foundation for your pretzel. Take the left end and twist it over the right end in a clockwise direction, creating a circle at the top of the horseshoe shape. Following this, cross the left end over the right end once more. Lift both ends over and position them at the top of the circle. This series of movements will shape your lucet cord into a delightful pretzel.
To keep the pretzel securely in place during the shaping process, use pins to attach it to your pillow. This ensures that the form you’ve crafted remains intact as you proceed.
Once you are satisfied with the pretzel shape, you have two options to secure it permanently: choose between using a needle and matching-color thread for a traditional finish or employing hot glue for a quick and secure fix.
Feel free to experiment with different cord lengths and embellishments to personalize your creations. You could for example add beads or sequins to suggest salt crystals.
Materials and tools
- Yarn in your favorite color
- Metal wire
- Pliers
- Scissors
- Crochet hook or latch hook
Star (but almost any other shape)
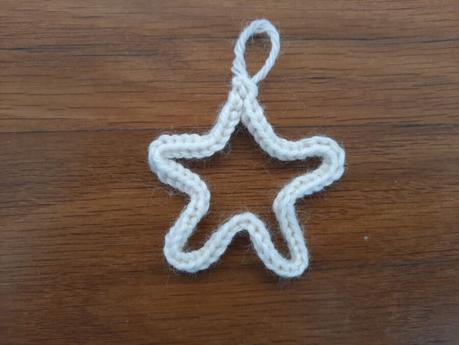
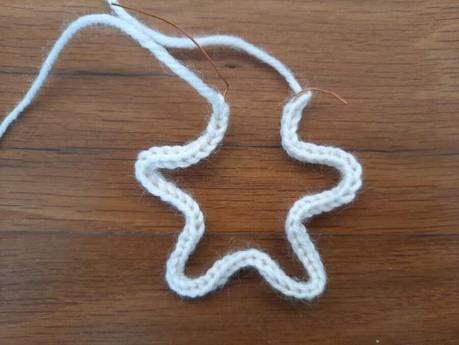
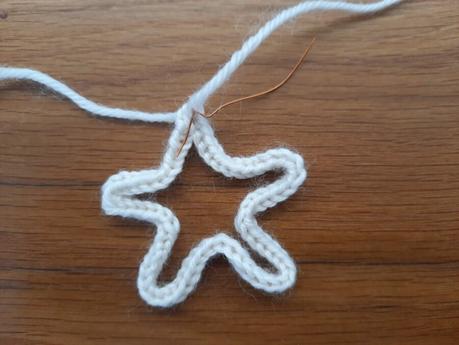
To make a star, you need just one lucetted cord in your favorite shade of yellow (or any other color you find suitable).
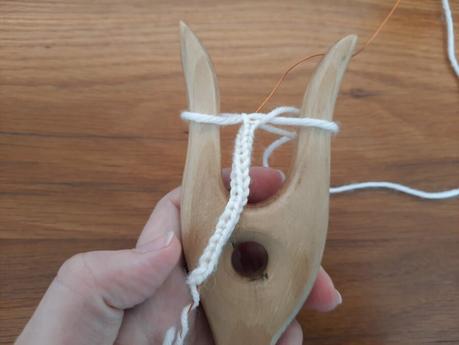
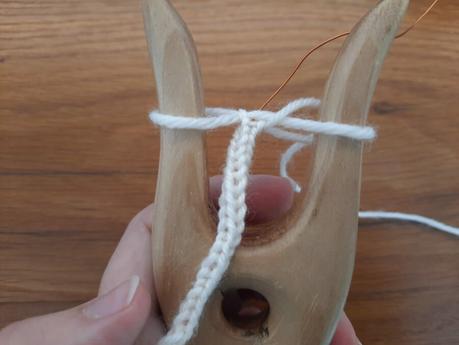
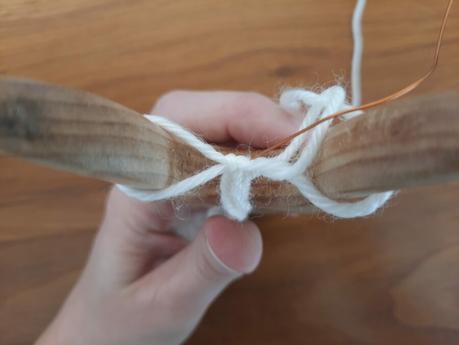
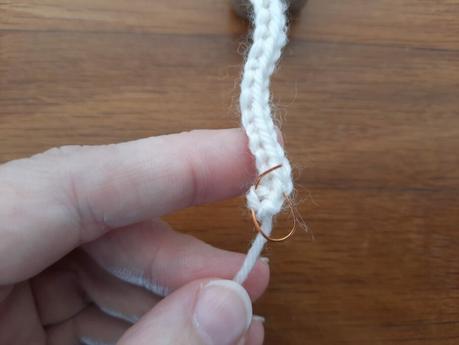
What’s difficult about this, though, is lucetting around your metal wire: since the lucet cord is hollow, you can bury the wire inside it to be able to shape your project any way you like.
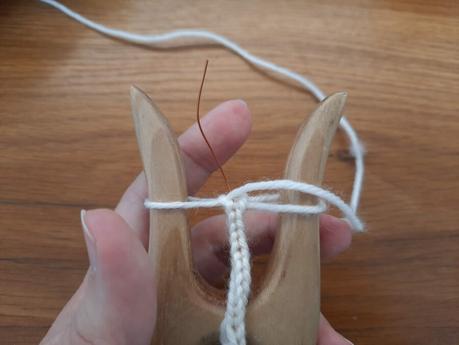
As you lucet your cord, keep the metal wire between the prongs and inside the knots you make with each stitch. When you finish lucetting your cord, before closing and cutting, you can pull gently the metal wire up to reduce the tail. As you do this, make a loop at the beginning of the wire to hook to your first stitch.
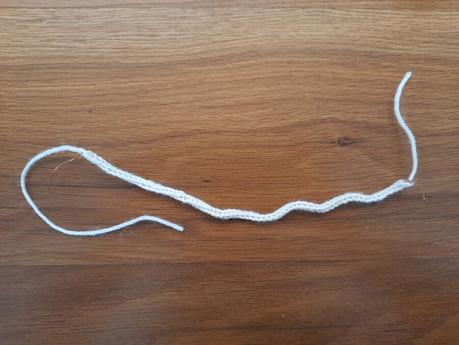
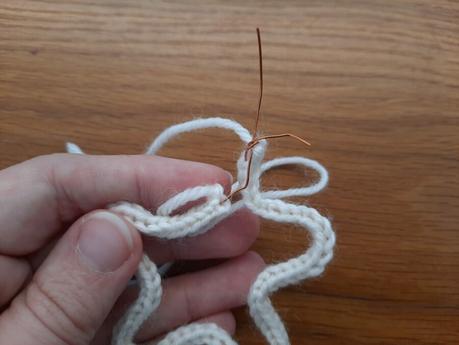
On the other end, as you finish lucetting your cord, cut your metal wire leaving a small tail to hook to the last working stitch. Do not cut away the excess tails yet: they’ll come in handy to close your finished star shape.
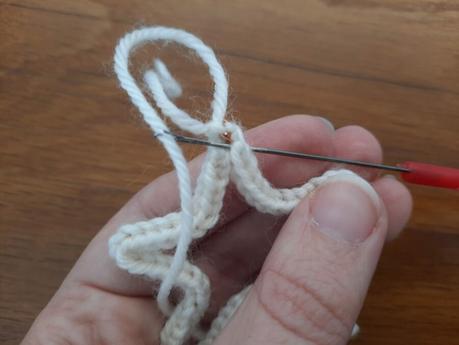
Start giving your star the desired shape, with the help of pliers if needed. As you join the two ends of the I-cord, use the metal wire tail you left to hook the two ends and close the star. You can use the yarn tails to make a loop for hanging, if needed. Hide then the excess yarn inside the lucetted cord using a latch or crochet hook. Trim the excess away from both the yarn tails and metal wire, and your decoration is finished.
And with metal wire inside your I-cord you can make all sort of shapes you like: angels, trees, socks…
I hope you liked my little suggestions for Christmas project to make with the lucet.
Please if you made some of the crafts, share them below in the comments. And if you have other suggestions on new lucet Christmas project, I’d be glad to feature them here. Just drop a comment!
Happy Christmas and happy lucetting!

