Given our travel to Alabama last week, it was a short cooking week last week, and another short week for this one as well. But I managed to sneak in a few good meals, which was especially important given that my Dad was visiting for a few days.
Our dog sitter was kind enough to pick up (and wash/bag) my farm share produce, God bless her, which this week was made up of every shade of green.
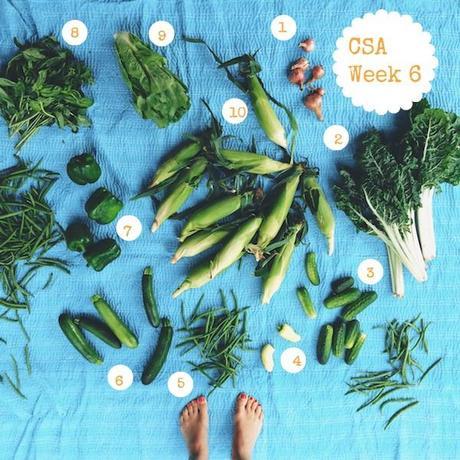
- Shallots
- Swiss chard
- Kirby cucumbers
- Mariachi peppers
- Green beans
- Zucchini
- Green peppers
- Fresh basil
- Romaine lettuce
- Sweet corn
Since we got in on Sunday night and my Dad was set to arrive on Monday afternoon, I didn’t have much shopping or prep time, so most of what I cooked during his visit was from the share and a good scrounge through the refrigerator.
After a travel snafu that got my Dad in a few hours later than planned, we decompressed on the dock with a bottle of rosé and a big platter of deconstructed wedge salad. I’ve seen the Smitten Kitchen version in Deb’s cookbook, and this one comes pretty close with layers of iceberg lettuce stacked and coated in a lemony buttermilk dressing. Although the iceberg lettuce wasn’t from my CSA box, I’d picked it up on a whim at the store thinking that it would be a perfect match for the smoky local bacon from the Ringwood farmer’s market each weekend.
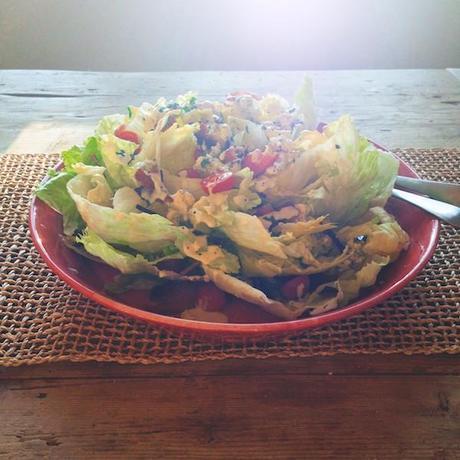
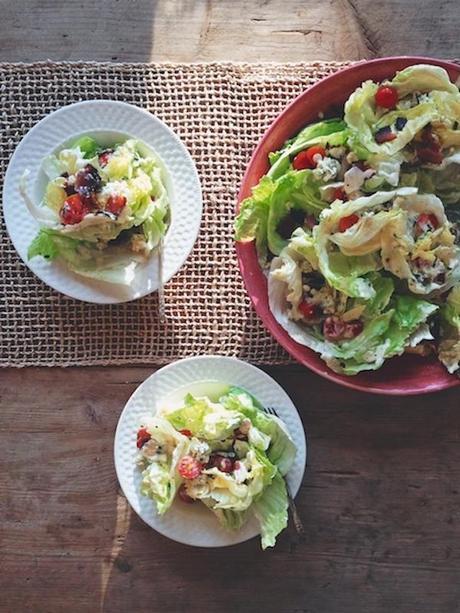
To make the lemony buttermilk iceberg wedge:
Make a 1lb package of bacon using your favorite method. Set aside to cool. While the bacon is cooling, make the lemony buttermilk dressing by mixing 1/3 cup of buttermilk with the juice of a half lemon. Add 2 tablespoons of Greek yogurt for body, season with salt and pepper, and then gradually whisk in 1/3 cup of olive oil to emulsify. Set aside.
Cut the iceberg lettuce into quarters, removing the tougher core, and separating the lettuce into large leaves. Prep the rest of the salad ingredients: Break the bacon into crumbles; dice ½ pint of cherry tomatoes; crumble ¼ lb of blue cheese, slice 2-3 green onions crosswise.
To assemble the salad, layer 1/3 of the iceberg lettuce, and 1/3 of the remaining ingredients on top, ending with the dressing. Complete two more layers like this, ending with the dressing (reserving a few green onions for the top). Sprinkle the salad with the remaining green onions, and give the whole thing a big grinding of black pepper and a pinch of smoked Maldon salt.
My dad always seems to be on a diet so I backed off of the bacon-studded waffle plan and kept him on a steady breakfast/lunch feed of tomatoes and avocados with a squeeze of lime.
But at a certain point, I have to cave and cook real food. I can only see someone consume so much prune juice and Special K.
Starved for a little substance, I made one hell of a dinner with the corn and potatoes from our share, along with one of my favorite dishes of all time: pomegranate chicken, which is lacquered with homemade pomegranate molasses just before serving. If you want the recipe, be sure to track it down in this post.
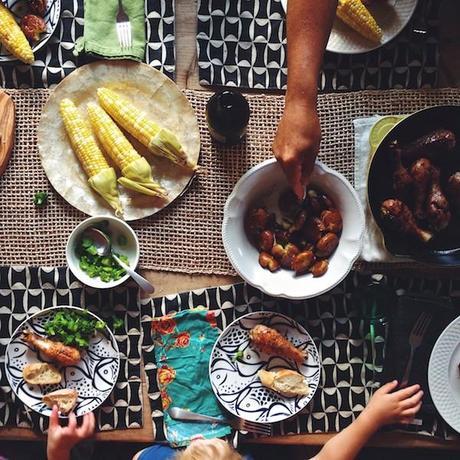
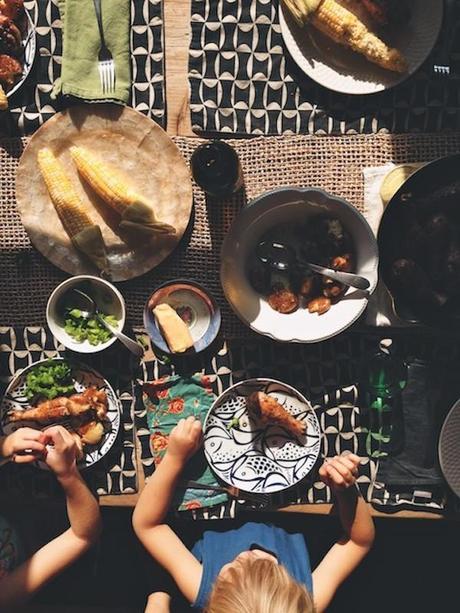
My old neighborhood butcher in Chelsea recommended this preparation for potatoes and I’ve used it a few times since – it’s foolproof, and the best way to get them to that ethereal place where soft and crispy come together in one perfect bite.
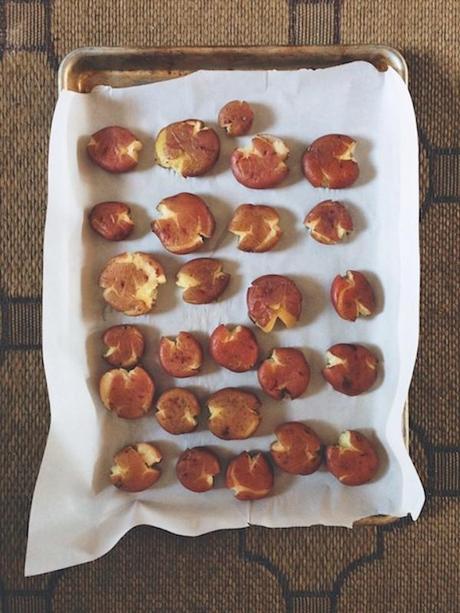
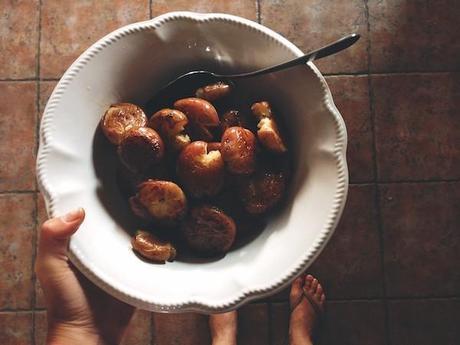
To make the smashed, fried potatoes:
Place 8-10 small-medium sized new potatoes (skin on) into a large pot of salted water and bring to a boil. When boiling, reduce to a simmer and cook for 20-30 minutes until the potatoes can be pierced with a knife. Drain the potatoes, and let cool (this can be done up to a few hours ahead). When ready to finish, bring the oven to 350 degrees, and smash the potatoes lightly with the bottom of a heavy glass. Place the potatoes on a sheet pan, and brush them with olive oil. Bake until crispy, turning halfway through, about 20 minutes total. Alternatively you can fry them on the stove with a little olive oil. When the potatoes are ready to be served, load them into a large bowl and scatter some smoked salt and cracked black pepper over the top.
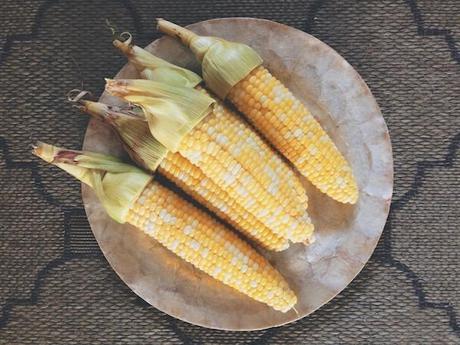
But the best trick this week came from Kasha of Bialas Farms, who, in her weekly newsletter, turned us all onto a method that she uses for corn. You can read about it in her post here, but the gist is that you score the corn at the handle end, then microwave the corn and peel back the husk and silk in one fell swoop. No boiling water, no soaking, no hard-to-peel silk – it all just strips right off. And it’s the only way I’ll be preparing corn from now on – along with Vermont Creamery’s maple butter and a good sprinkling of sea salt.
Feeling just a little bit guilty about stuffing my Dad full of food the night before, we switched back to light meals the next day. For breakfast I made a komatsuna frittata, along with a faux pappardelle made with raw zucchini noodles.
The komatsuna had been sitting in my fridge since Week 4 and remarkably, was still as fresh as the day I picked it up. Hard to believe that vegetables can retain their crispness for several weeks, but as I’ve mentioned before in my CSA posts, it’s a testament to how fresh your food is when you buy it directly from the farm.
I hadn’t cooked with komatsuna before, so with a little Googling, found out that although it’s an Asian green, it has a similar flavor profile as spinach.
One of my favorite ways to use my greens at breakfast is to bake them into a frittata. And the frittata with these komatsuna greens was heavenly – all it needed was a little pecorino and a small wedge is enough to stave off the hunger Gods for a few hours.
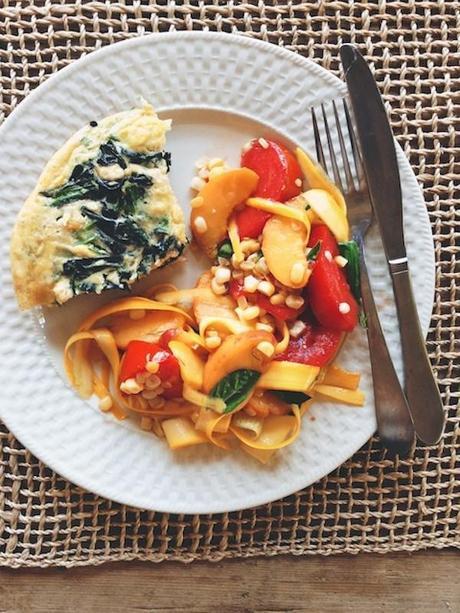
To make the komatsuna frittata:
Wash and dry a large head of komatsuna and chop the leaves and stalks. Sautee in some olive oil, with salt and pepper until wilted, put aside. In a large bowl, whisk 6 eggs, 2 tablespoons of half and half, and when combined, add 1/3 cup of pecorino. Heat a medium nonstick sautee pan on medium-high heat, and add a pat of butter. When melted, add the greens and eggs, stirring for the first few minutes until the bottoms are starting to set. Transfer the pan to a 350 degree oven for 20-25 minutes until puffed and golden, and no longer runny in the middle. Let the frittata rest, and then run a rubber spatula around the edge to loosen, then flip the frittata onto a plate to serve.
And did you see those noodles? I’ve been raving to everyone who’ll listen about that handy little spiralizer that you can pick up on Amazon. Since I bought my first spiralizer a few months ago, I’ve been making zucchini noodles non-stop; they’re the perfect vehicle for all of the extra pesto that I’ve been making this summer.
The problem with raving about the spiralizers is that I’ve been giving them away to anyone who’ll listen. My mom and most recently, our host in Alabama, received them as gifts when I urged them to just keep the ones that I’d brought with my on vacation. (Yes, I travel with kitchen tools, and so does Joy the Baker; if you judge, judge us both). The problem with traveling with tools and giving them away is that you’re left without.
The good news is that necessity, as we all know, is the mother of invention. Forced to make noodles without a spiralizer, I found out that my carrot peeler does a darn good job of making wider noodles. And noodles can be the foundation for just about anything that your CSA sends your way – this dish used fresh corn, tomatoes, peaches, and a little basil.
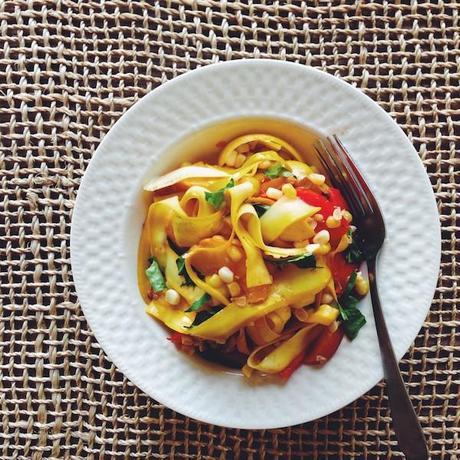
The salads didn’t end there. Buying into a CSA will make a voracious salad eater out of the wimpiest of vegetable consumers – there’s just no way around it. Forced to contend with the mound of vegetables that comes my way each week, I make at least one salad on most days.
Although this doesn’t look particularly inspired – a chopped bowl of veg, including romaine, green beans, radishes, Kirby cucumbers, corn, and a can of rinsed and drained black beans – it’s the foundation of something pretty special…
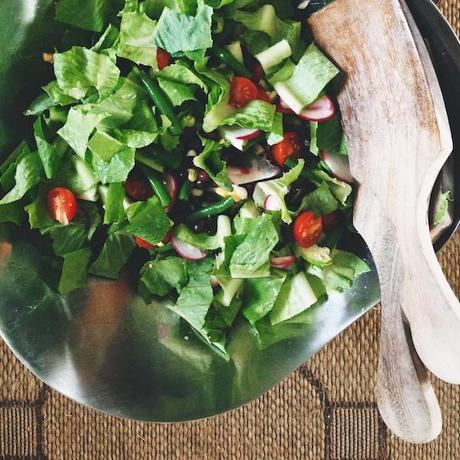
Add a lime, cumin and cilantro vinaigrette and all of a sudden it’s a Mexican-inspired masterpiece with a tart bite that wakes up all of the vegetables, lifting them from the mundane to the sublime. Especially when it’s topped with crumbled Cotija cheese. If you don’t believe me, ask my two girls who devoured it. I wouldn’t normally call any of my dishes “masterpieces” but when you get two kids under the age of 6 to eat two bowls of salad apiece, you have the right to call it anything you want. I think.
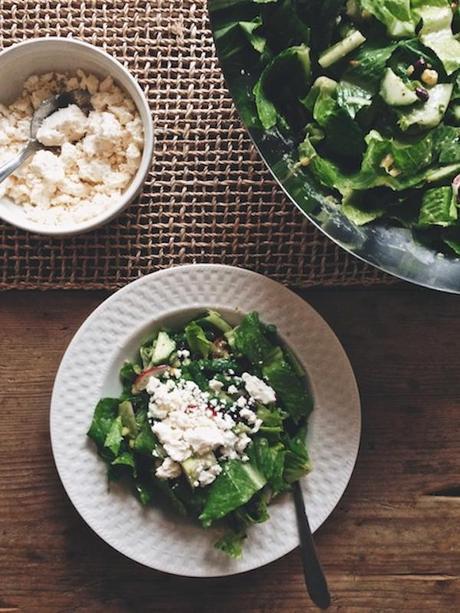
To make the lime, cumin and cilantro vinaigrette:
In a medium bowl, mix 1 teaspoon of ground cumin with 2 tablespoons of Greek yogurt, 2 tablespooons of lime juice, and 2 tablespoons of cilantro pesto (I usually have this prepped and on hand, but if you don’t have the pesto, you could use basil pesto, or just proceed without the pesto, adding chopped cilantro at the end). Season the mixture with salt and pepper, and then in a slow, steady stream, add 1/3 cup of olive oil. This may make more dressing than you need for your salad, and if that’s the case, just cover and refrigerate the remainder for a day or two.
At last my Dad left, and all was once again quiet on the home front. I love company, but after 10 straight days of visits and commotion, I was ready for some downtime.
On our first night alone, we cooked these stuffed peppers using our green peppers from the share, some local grass-fed beef, quinoa, chard, smoked mozzarella and a homemade tomato sauce. I kept the sauce pretty mild knowing that my kids would be eating the peppers, but you can always kick up the spice level a notch.
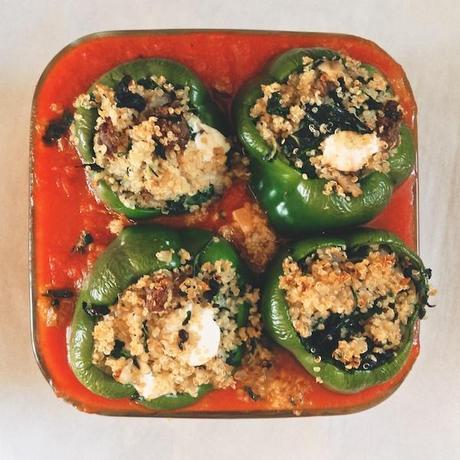
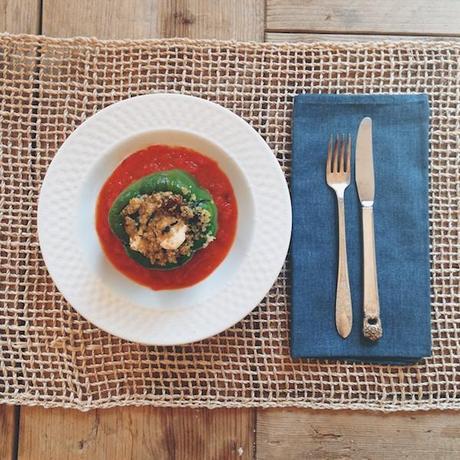
And for the record, they make the prettiest presentation. Response from the kids? “These taste like pizza”. And like the salad, a meal that was initially snubbed, was scarfed.
To make the peppers:
To make the tomato sauce, sautée an onion in a medium-sized pot until golden, and then add a 28 oz can of whole tomatoes + a pinches of garlic salt and chili flakes. Simmer 30-45 mins and then blend with immersion blender. You can make this spicier by adding more chili flakes.
To make the stuffing, sautee two big garlic cloves and two big shallots in some olive oil. When the onions are beginning to soften, add 1 lb of grass fed beef, and some chopped lemon thyme (or other woody herb like thyme or rosemary). Cook the beef until no longer pink, then season with salt & pepper. This makes enough sauce for 4 peppers, but if you’re planning on making 8, double the recipe.
In a large bowl, mix the beef, two cups of cooked quinoa and a head of chard that’s already been blanched, squeezed and chopped. Dice an 8oz ball of smoked mozzarella and add it to the beef mixture. The mixture will stuff 8 peppers, but if you’d like, you can make 4 peppers and then like I did, freeze the remaining half.
Layer the sauce in a casserole dish, then add the stuffed peppers, right side up. Bake 45 mins, serving each bowl with a spoonful of the tomato sauce, and a pepper on top.
Along with the tip for preparing corn, another fun preparation this week was with the Kirby pickles. Kasha mentioned to check out these easy fridge pickles from Smitten Kitchen – and true to form, they couldn’t be easier. There’s no brine- just a scattering of salt and vinegar.
There’s something mind-numbingly enjoyable about slicing large numbers of vegetables on a mandoline, so I was eager to find some time late one evening to just sit, sip wine & slice. And like a true glutton for punishment, I wished at the end of my slicing session that I could have sliced double the cucumbers.
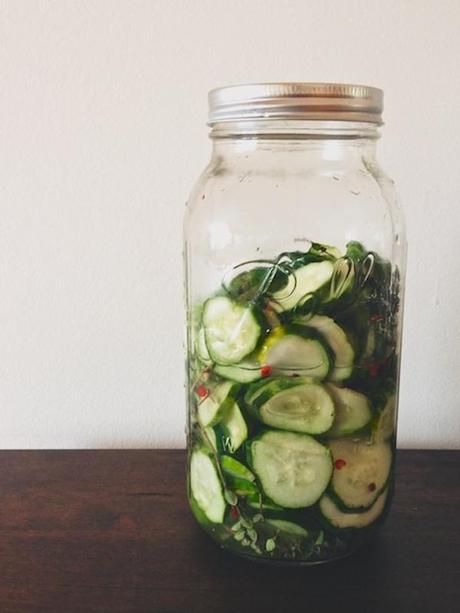
I didn’t follow Deb’s recipe completely. Having no dill on hand, and a ton of Mariachi peppers, I went for a sweet & spicy pickle instead. For color, texture and flavor, I added some lemon thyme and pink peppercorns, and they might just be the best snackable thing in my fridge right now. Fortunately they’ll keep this way for a few weeks (if they last that long).
To make the Mariachi sweet & spicy fridge pickles:
Make a spicy simple syrup with 1 cup of sugar, 1 cup of water, and 2 sliced Mariachi peppers. Bring to a boil, and then let steep for at least 30 minutes. Strain and reserve the liquid. When ready to make the pickles, mix your simple syrup with 1 ½ cups of pickling vinegar. Set aside.
Slice 8 Kirby cucumbers on a mandoline. Layer 1/3 of the cucumbers into a large mason jar, add 1-2 teaspoons of salt (depending on how salty you’d like them), a pinch of whole pink peppercorns, and a few sprigs of lemon thyme (or herb of your choice). Add 2 more layers to use up the rest of the cucumbers.
Pour your pickling liquid (syrup + vinegar mixture) over the cucumbers, close the lid tightly and then give the jar a good shake. Place in the fridge, shaking the jar occasionally to keep the cucumbers bathed in the liquid. The liquid won’t cover the cucumbers all the way, but as the salt works its magic, the cukes will lose some of their water, and will compress into the bottom of the jar. They’ll be ready to eat in an a few hours and will keep in the fridge like this for a few weeks.
And now for the announcement: I mentioned it on the Feed Me Dearly Facebook page last week, and wanted to give you a few more details.
I am partnering with The Fresh 20 in an upcoming event called the Picky Eater Challenge, part of the Family Food Summit.

I’ve been working with The Fresh 20 over the past year to help educate families about healthy eating choices, and their Family Food Summit has been a great way to get our voices heard on a broader scale.
The Fresh 20 has lined up ten family food experts and we’re talking about strategies to curb dinnertime stress. We’ll be sharing personal family cooking experiences, recipes and tips that you can use in your own home. In my podcast specifically, I’ll be talking about introducing new foods at home to your kids. All of this great content is set to go live on the Family Food Summit’s website today, Monday August 4th. My talk will go live on Tuesday August 5th.
The Family Food Summit website has a ton of interactive resources, and will house the ten podcasts, recipes, and printables to make The Picky Eater Challenge fun for the whole family. Additionally there are some great prizes including kitchen gadgets, cookbooks, and kids’ games.
Check out the line up of guest speakers; and I’m happy to have been included with this smart and talented bunch:
Ereka Vetrini – Lifestyle Expert www.beyoutifulmoms.comhttp://www.beyoutifulmoms.com
Jessica Fiorillo – Feed Me Dearly www.feedmedearly.comhttp://www.feedmedearly.com
Tracy Benjamin – Shutterbean www.shutterbean.comhttp://www.shutterbean.com
Laura Fuentes – Momables www.momables.comhttp://www.momables.com
Eve Schaub – Author, A Year of No Sugar www.eveschaub.comhttp://www.eveschaub.com
Jennifer Tyler Lee – Crunch a Color www.crunchacolor.comhttp://www.crunchacolor.com
Tess Masters – The Blender Girl www.healthyblenderrecipies.comhttp://www.healthyblenderrecipies.com
Carolyn Scott – Healthy Voyager www.healthyvoyager.comhttp://www.healthyvoyager.com
Allison Arnett – The Fresh 20 Nutritionist www.thefresh20.comhttp://www.thefresh20.com
Melissa Lanz – The Fresh 20 CEO Live Q&A www.thefresh20.comhttp://www.thefresh20.com
http://www.thefresh20.com
We have answers to your questions about improving your family food culture. So be sure to mark this free online event on your calendar. And sign up to participate by joining the challenge.
The Picky Eater Challenge is sponsored by The Fresh 20. If you’re looking for a great meal plan option, check out thefresh20.com.
That’s this week’s CSA wrap up, stay tuned for Week 7, much more farm-to-table inspiration heading your way….

