I’m in a rut. A dark, dank, no light at the end of the tunnel rut, and it all starts and ends with tomatoes. Other than the token tomato soup that I shared with you last week, I’ve gotten lazy with my tomatoes. Tomato salad, tomato salad, sliced tomatoes and salt (!), tomato salad. These are the confessions of a local food addict.
Box contents:
- Tomatoes
- Acorn Squash
- Zucchini
- Assorted Peppers*
- Beets
- Spinach
- Leeks
- Carrots
- Sweet Corn
- Cippolini Onions
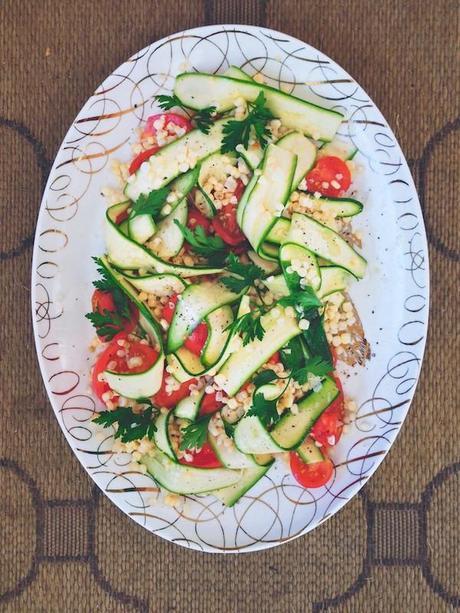
Tomato salad with shaved zucchini, corn and parsley
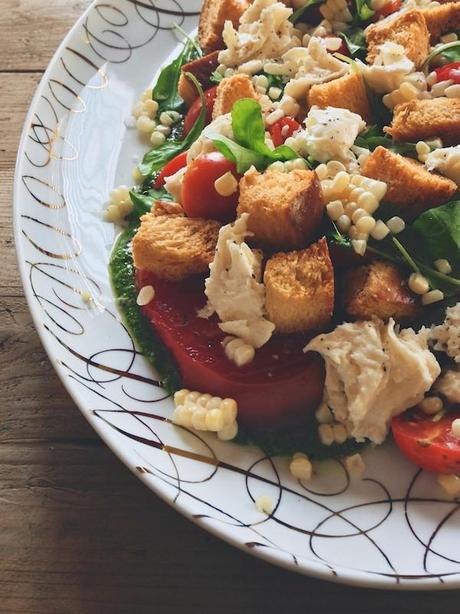
Tomato salad with beet green pesto vinaigrette, corn, arugula, and torn mozzarella
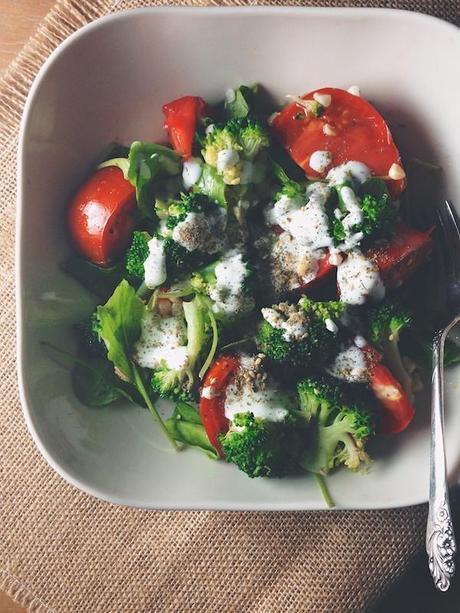
Tomato salad with steamed broccoli, arugula, corn, and lemon yogurt dressing with za’atar
It sounds so ungrateful, because what’s not to love about these gorgeous salads? But I’m over it. I need to branch out. Give me a tart, give me a quiche, give me a flaky buttery crostata. I picked up more tomatoes in my CSA box on Saturday: Mark my word, you will not be seeing any tomato salads next week. As beautiful, health-inducing, and waistline-friendly as they may be, it’s time to pack them up with the sundresses and stow them away until next year.
Although this may seem like stream of consciousness, edit-worthy and destined for the delete button, I’ve left it in here to prove one point: that just because I cook some elaborate meals for our family each week, I still struggle with what to make. I get stuck in old routines, I defer to the dish of least resistance. Come January when a fresh tomato is but a fleck in my distant memory I’ll be full of ideas. This week, I’m running on empty.
Joining a CSA is wildly fun, but you end up getting a set of vegetables that you might not otherwise be in the mood for. Which I guess is a blessing in disguise because it forces me out of my comfort zone, and into the cookbooks that I love to collect and don’t always have time to read. So stay tuned for next week where I’ll hopefully do some creative things with lettuce and tomatoes. That involve neither bacon nor bread.
Let’s talk about the first cookbook that I checked out in detail: David Chang’s “Momofuku”. I’ll be honest, Rodney gifted me this book a few years ago and it went directly to the cookbook shelf to collect dust. I did flip through it briefly and thought to myself: Konbu? Dashi? Not happening.
Although I pride myself in taking risks with ingredients like Chermoula and Black Tahini, when you nudge me East of the Mediterranean, I panic.
Maybe it has to do with that time when I summoned the nerve to walk into an authentic Japanese grocery store in Midtown, saw not a lick of printed English and fled without purchasing my intended bag of Shiro miso.
But on impulse last week, I was shopping for short ribs at Whole Foods’ meat counter and the pork belly was calling to me. I try to buy organic and hormone-free meats whenever I can, and Whole Food always has a great selection. With no intended recipe in my head, I came home and wondered…. “who knows how to cook pork belly?”
“David Chang, that’s who!”
My subconscious is intuitive when it comes to food.
Out came the Momofuku cookbook. I brushed off the dust and flipped through to page 50 for belly directions. An overnight dry brine, and then an hour-long crispy-skin inducing roast at 450 degrees followed by a long slow roast at 250.
I won’t indulge you with any specific descriptions of what happened next but it involved a trail of gleaming fat on my cheek and pieces of charred bacon wedged under my fingernails. Appetizing, I know. But have you ever seen a dog attack a piece of meat when she thinks that nobody is looking?
Fortunately I was able to save most of the belly for other purposes, namely this super delicious pork belly Banh Mi sandwich. I ate it for lunch and then served it to Rodney for dinner that night. His eyes rolled into the back of his head, which I took as a positive sign.

(that was mine from lunch)
(here was his from dinner right before the top layer smooshed everything down into one fantastic porky/salady mess of fabulousness)
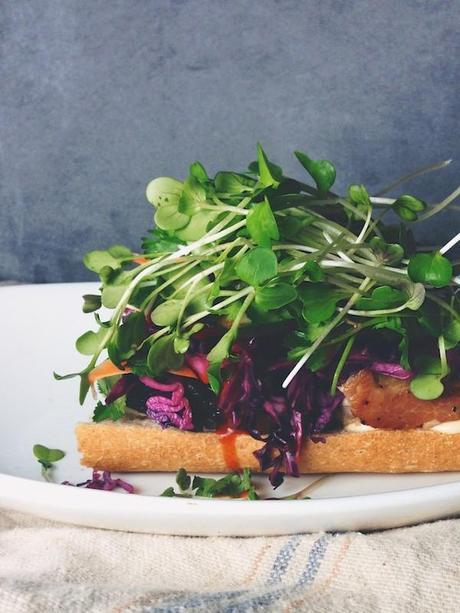
To make the pork belly:
Sprinkle a 2-lb piece of pork belly all over with 2 tablespoons each of salt and sugar, cover and place in the fridge overnight. Nestle the belly in a roasting pan and heat in a high oven (450 degrees) and roast fat side up for an hour. Turn the heat down to 250 degrees, basting occasionally, and continue to cook for another 90 minutes. Let cool, then slice.
To make the pickled cabbage:
While the pork belly is roasting, take a quarter head of red cabbage, core, and then slice thinly. Toss the cabbage in a bowl with 1 tablespoon each of salt and sugar, and 2 tablespoons of rice vinegar. Let the cabbage pickle on the counter, tossing every once in a while.
To make the banh mi:
Split a French bread roll in half, and squeeze a little may on each side (I prefer to use Kewpie mayo, a Japanese brand, but use whatever you have on hand whether it’s Hellman’s or homemade). On one side layer the majority of your vegetable ingredients- the pickled cabbage, sliced cucumbers, shredded carrots, and torn cilantro. Season this side with a touch of salt. On the other side layer your sliced pork belly, sliced radishes, and daikon sprouts (or shredded daikon / more radishes if you don’t have the sprouts available). Season again with a touch of salt. Finish the sandwich by squeezing a touch of lime over the whole thing and adding a few drops of Chili Lime Cholula or Sriracha (even Tabasco will work). Enjoy the best dang sandwich you’ve ever made.
But I didn’t want to stop there because directly opposite the recipe for pork belly was a recipe for pork shoulder which he uses for all kinds of preparations, including ramen.
There was a time when I thought that ramen meant a Cup-o-soup full of dried noodles and super salty broth. Which wasn’t entirely unpleasant (notwithstanding the searing post-consumption MSG headache), but if you’ve had real deal ramen made with pork stock….there’s nothing like it.
The great thing about cooking pork shoulder is that you’re left with a) a mound of perfectly shredded pork meat for our soup and b) a gigantic dinosaur-looking bone which you can use to make the stock.
So that’s what I did – dry-brined the shoulder according to Chang’s directions, and then roasted it at a low temp for close to 8 hours. I used the bone to make a pork stock overnight in the slow cooker, and the next day made ramen. Which isn’t a true replicate of Momofuku’s ramen because I didn’t have all of the ingredients on hand (the konbu, the dried shitakes) but it was my version. Meaning to say a CSA vegetable-doctored Asian/Mediterranean hybrid that sounds weird but was really delicious. Feel free to add whatever vegetables that you have on hand, but my fridge was stocked with plenty of goods from my CSA box, along with some delicate daikon sprouts that I pick up weekly from my local market.

To make the make the pork shoulder for the ramen:
Sprinkle a 3-lb piece of bone-in pork shoulder all over with 2 tablespoons each of salt and sugar, cover and place in the fridge overnight. The next day, pour off any accumulated juices and nestle the meat in a roasting pan. Roast at 250 degrees for 6-8 hours (I found that it didn’t really matter- Because I couldn’t attend to it when it was done cooking, mine probably cooked for 9 hours and was just fine). Let cool slightly, then shred, saving the bone for the stock. Also, save any fat and juices that have accumulated in the bottom of the pan in a mason jar- they’ll help flavor the stock. You can add a tablespoon of water to the pan to help deglaze and remove the stubborn pieces. This will make FAR more pork than you need for the soup, so feel free to use for anything else that you want – enchiladas? tacos? stew?
To make the pork stock:
Place the pork bone into a slow cooker, and add some vegetables – I added a chopped onion, 2 carrots peeled and chopped, 2 chopped stalks of celery, 2 bay leaves, and 5 peppercorns. (This makes a more Mediterranean-flavored stock since I wanted to use a versatile stock for other uses as well). Add 2 quarts of water, and set the slow cooker to low, cooking for 8-12 hours or over night. When the stock is done, strain out the vegetables.
Pull the mason jar of congealed pork fat from the fridge (mmmm, congealed pork fat sounds delicious, doesn’t it?) and scoop off the light-colored fat from the top. You can keep it if you’d like for other purposes- roasting potatoes, etc. Then scoop out the darker brown porky bits that are at the bottom of the jar and stir this into the stock for added richness. If you’re going to use the stock just for ramen, add a few tablespoons of soy sauce for color and added flavor.
To make the ramen:
Assemble your ingredients: I used a combination of sliced radishes, sliced green onions, sliced red cabbage, and daikon sprouts. Make sure that your pork is warm, and have some extra soy sauce and Sriracha on hand.
Cook your noodles in a large pot of salted water. I like to use Somen noodles, but you can use anything you’d like. While the noodles are cooking, cook your eggs to perfectly soft-boiled consistency and follow chef Chang’s recommendations to the letter: bring a pot of water to boil, add your room temp eggs, and then cook for exactly 5 minutes, 10 seconds. I now swear by this method- the eggs come out perfectly cooked. Run under cold water and peel.
When the noodles are done, ladle them into a large, flat bowl, and top with your ingredients- the radishes, cabbage, sprouts, pork, warm shredded pork, and the soft-boiled egg, halved. Season to taste with additional soy sauce and Sriracha.
Now from one cookbook to another: Michael Symon’s “Carnivore”.
I was a Michael Symon fan long before he first appeared on the Food Network as Iron Chef Symon. Michael Ruhlman had written about Chef Symon’s eponymous restaurant “Lola” in the book “The Soul of a Chef”. Ruhlman’s portrayal of Chef Symon was nothing short of infectious, and despite never having been to Cleveland, I immediately developed a legitimate crush on the bald guy with a big laugh and even bigger food.
Michael Symon came out with the book “Carnivore” two years ago, and I bought it immediately, eager to check out his recipes at home. The book has never disappointed, and it was the first resource I checked for some short rib inspiration.
Short ribs are a favorite Fall food, and the temperature doesn’t have to dip more than a few degrees south of 70 before I break out the cast iron Dutch oven. I used Michael Symon’s recipe for red wine-braised veal short ribs, which I swapped for your standard full-grown beef variety and scaled back for a moderate 5 ribs and 1 bottle of wine. (his calls for 4 bottles!)
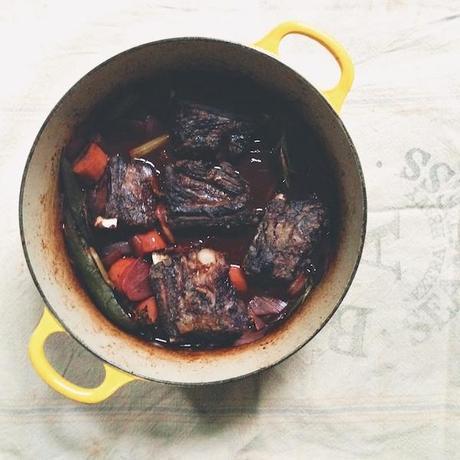
I was intrigued by his use of chili peppers in the braise (I used 1 poblano), which ended up lending a slightly spicy flavor to the red wine sauce. Nothing that the kids couldn’t handle (not that they should have been handling anything with this much red wine) but for a few bites to taste the final product, it was acceptable. Lauren actually loved it and I rationalized that the wine had cooked down enough for her to safely eat her first rib on night, and a second leftover rib the next evening. She’s alive to tell the tale and didn’t wobbily make her way to the bathroom to brush her teeth after consumption, so I think my hypothesis was correct.
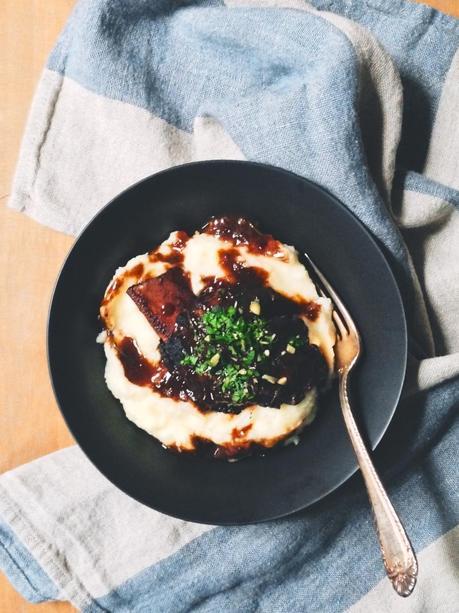
I followed Michael Symon’s recipe almost to the letter but since it’s unavailable online, I found one that’s almost a total replica – the only difference being that I marinated the ribs overnight in the wine and vegetables (+ a poblano pepper), strained out the wine the next day to end up with a) wine, b) meat, and c) vegetables in separate bowls and basically proceeded with this exact recipe from Bon Appetit magazine. The best thing about this recipe? It let me use up all kinds of CSA vegetables – the carrots, the onions, the celery. Cleaning out my vegetable crisper has never been easier.
If you’re inclined to track down the recipe that I used, I highly recommend buying the book “Carnivore” – along with the ribs, it has a ton of inspiring main dishes and sides to satisfy your inner meat chef.
What do you serve with short ribs? Mashed potatoes and creamed spinach from my CSA box of course. There’s no sense in serving a side salad when you’ve already blown your suggested daily caloric intake with one measly rib. I make my mashers with plenty of cream and butter because I don’t like dietary shortcuts. I just don’t eat two helpings, it’s a simple formula that works for me: I feel satiated yet never gut-bustingly full.
The creamed spinach? Let’s discuss this for a minute. I first came across a similar recipe in Food & Wine magazine a few years ago and it’s been on my Thanksgiving table ever since. There’s something about the smell of parsnips cooking that makes me feel so happy and at peace with the world. They smell like honey-nectar-sweet-earthiness incarnate as they roast in the oven. If you haven’t ever tried parsnips, I highly suggest that you run out and get yourself some, give ‘em a rinse, peel, chop and toss in a sautee pan or in the oven and smell the magic in the comfort of your own home.
I use a slightly different approach these days, using butter and honey to accentuate the sweet nuttiness of the parsnips and forgoing the chicken stock for a creamier half and half-based sauce.
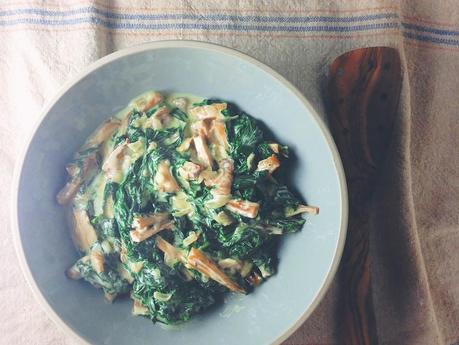
To make the creamed spinach and parsnips:
Clean, peel, and slice your parsnips into 1 inch lengths. Par-cook the parsnips until almost cooked through in either a pot of simmering salted water (approx. 20-30 mins), or a few inches of water in a slow cooker set to high heat (I cooked mine this way and it took approx. 3 hours). When the parsnips are done, lay them in a single layer on a baking sheet and drizzle with a 2 tablespoons each of melted butter and honey. Roast for 30 minutes until starting to get crispy and brown.
While the parsnips are roasting, clean the leaves from a large bunch of spinach and remove the tough stems. Blanch them in salted boiling water and then run under cold water to set the color. Squeeze out the liquid and set aside.
Chop a small onion, and sautee in some olive oil and butter (1 tablespoon each) on medium heat. When becoming translucent, add a tablespoon of flour and cook for another minute. While the flour is cooking down, heat a cup of half and half in the microwave for a minute, and then stir slowly into the onions, whisking frequently to make sure there are no lumps. Cook the cream down for a few minutes until starting to thicken, then add a pinch of nutmeg, salt and pepper, and taste for seasoning. Add your parsnips and spinach, heat through and serve.
Now that we’ve talked about rich, indulgent meat dishes and their equally rich and indulgent vegetable sides, let’s talk about a few lighter vegetarian dishes.
There’s been a trend out there, likely started by the gluten-free and paleo activists out there (whom I fully support – that was not meant to be snide!) to replace starches with vegetable-based substitutes. I’ve been reading about cauliflower rice and curious about how it would taste. As many of you know, cauliflower has had a resurgence of late – people are cutting it into slabs and eating like steak, making the florets into white sauce-like imposters, and this: cauliflower rice to stuff into your favorite burritos or serve as a bed for sliced meat.
With a head of yellow cauliflower left over from our latest mystery food challenge, I decided to have a go at this stuff – ricing it into pieces with the large holes of my box grater. I thought that the yellow color would give it a look similar to Spanish rice.
At this point you have the option of either cooking the cauli rice or leaving it raw. I decided to hybrid my preparation, by nuking it in the microwave for a minute, just to warm it but leaving it somewhat toothsome and full of nutrients.
The nice thing about cauliflower is that, like tofu, it takes to a range of flavors – Indian, Mexican, Italian – whatever you’re serving, this is a great side dish to improvise with similar ingredients.
I decided to keep things simple, adding a few finely-diced figs, chopped parsley, and some good Spanish olive oil plus my favorite smoked Maldon salt and ground black pepper.
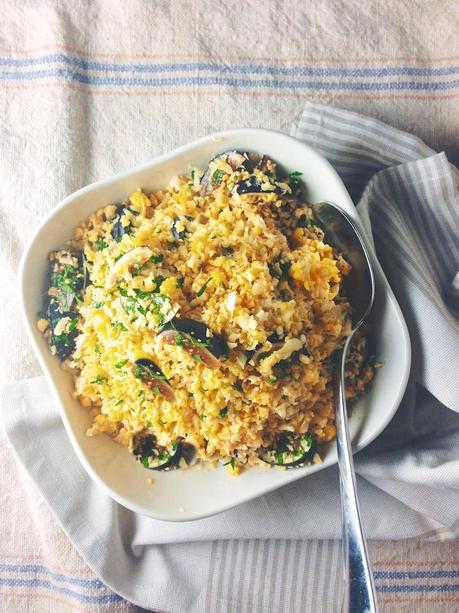
Although it wasn’t the kids favorite dish (not surprising as they weren’t fooled by the cauliflower-in-different-format approach) I loved it and will definitely make it again and test it with different flavor combinations. If you’re already making it at home and have a favorite preparation, do let me know in the comments and I’ll make sure to try it at home.
Now let’s talk about corn. I might have mentioned above that I promise not to show any corn kernels scattered across tomato salads in future posts. The technique of scoring and microwaving the corn (thank you Kasha!) makes preparing corn way too easy. So I’ve been removing the kernels and putting them on everything.
But sometimes it’s nice to leave the corn on the cob, give it a quick (1-minute) blast in the microwave, and then finish it on the grill. Which seemed to call for a Mexican-style preparation.
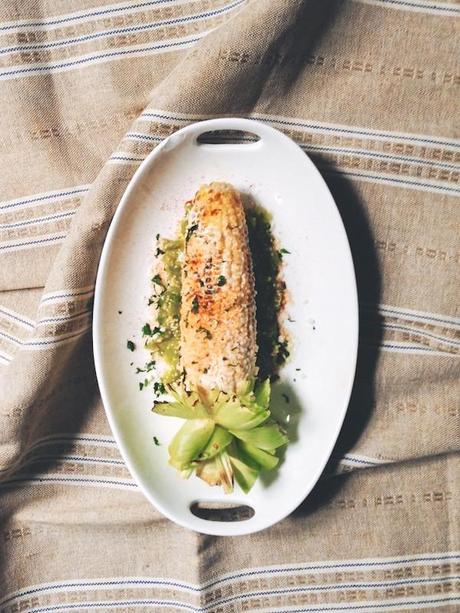
I slathered the whole thing with a mix of equal parts sour cream/mayo (not too much, slathering only takes two tablespoons of the stuff); I covered the corn with a tablespoon or two of grated parm and chopped cilantro, and then dusted the whole thing in smoked Paprika (I know, not very Mexican but what I had on hand – you can alternatively use a Mexican blend spice powder or a touch of cayenne.) The raw tomatillo salsa wasn’t necessary, but it was leftover from last week and added a nice lemony contrast to the richness of the corn/mayo/parm combo. This is one delicious way to prepare corn; it’s no wonder that it’s become a staple of Mexican street food.
Last but not least, let’s talk about sweet potatoes. Although they didn’t come in my CSA box this week, I thought that it would be useful to share because this soup incorporates the best in farm-to-table cooking. You can either use sweet potatoes, or any of the squash that you might be receiving in your boxes. Bialas Farms has been adding squash to our boxes lately and I can’t wait to try this soup with one of our deliveries.

Cooking it couldn’t be easier: Just peel and cube your sweet potatoes (I used 3 medium-sized spuds), and add it to your slow cooker with some chopped onion that’s been sautéed in some olive oil with any spice you’d like (I used smoked paprika). Add a can of coconut milk and a quart of stock (I added chicken stock which was still frozen- literally a big hunk of ice went into this baby). Turn the slow cooker to low and cook for 8-12 hours. Your soup will look slightly curdled from the coconut milk when it’s done – just use the same technique as the one used for the tomato soup last week – give it a quick whiz with your immersion blender and it’ll emulsify and become super smooth and creamy).
That’s when the fun begins – just as I did with the clam chowder last week, you can top this with all kinds of ingredients, making your simple sweet potato soup the fully-loaded version. Think baked potato but healthier. I added some crispy smoked bacon (I know, not vegetarian but you can easily omit), a touch of sour cream, more smoked paprika, cilantro and some beautiful peeled & diced Asian pears. Serve with your favorite IPA, naturally.
That’s a wrap for this week. I picked up some more fun ingredients this weekend in Ringwood so lots more to come next week. Stay tuned….

