Are you looking for how to cut baseboard trim with miter saw? Quickly skim through the information below to find the detailed answer!
Are you wondering if there is an easy and gentle way for how to cut baseboard trim with miter saw? A lot of people are struggling with finding an optimal way to do this.
However, there is a small problem that despite being fully prepared and well manipulated for the cuts, many people still cannot create a perfect baseboard trim.
Related Article: How to choose the best budget miter saw
Don’t worry. The simple steps below will provide you with a perfect guide.
- Preparing instruments
- Ensure safety
- Measure
- Saw angle adjustment
- Carry out sawing
- Clean the cutting surface
- Complete

Detailed Instructions To Cut Baseboard Trim With Miter Saw
In this section, we will go through each step in detail to see what each operation will include.
Preparing Instruments
Starting any project, we must also focus on preparing tools and skills first. Here, the tools we can prepare at least include:
- Pencil and ruler
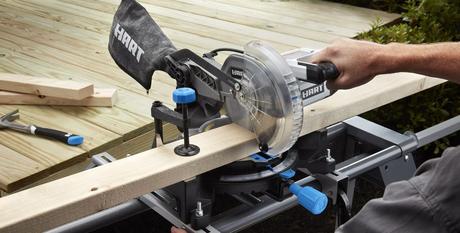
- A mitre saw
- Eye protection glasses
- Ear protection headphones
- Protective gear (if needed)
- Plank (depending on type and purpose of use).
Ensure Safety
We want you to be comfortable and work in a safe environment. Therefore, please check your devices and applications are complete.
Remember to check the saw blade and the power supply of the saw. They play an important role in deciding whether your first cut is perfect.
In addition, do not put your hands into the wood into the saw net without disconnecting the power to protect yourself.
 Measure

Using a ruler to measure is the next important step. The quality of the cut will affect the measurement accuracy.
Therefore, you need to be meticulous about this part to ensure you have the most accurate numbers.
A good trick for us is to use a tape measure to carefully measure the length of the base of the wall and the corner of the wall.
Then, use a pencil to mark on the wooden plank that you are going to cut. Constantly checking back and adjusting is what you should do to perfect your work.
Saw Angle Adjustment
After measuring, you will proceed to adjust the angle of the saw blade. Here, the saw blade is below your adjustment base will determine the shape and quality of the cut. So, you better be very careful.

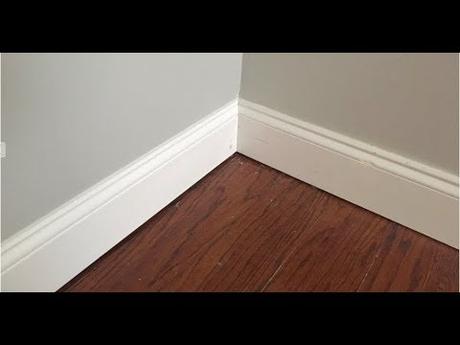
The rule to have a perfect baseboard trim cut is that you have to create two wooden planks with a 45-degree cut base.
In the end, we will put them together to create a 90-degree base that fits the base of the wall. The action is a prerequisite for adjusting the root of the saw blade.
Carry Out Sawing
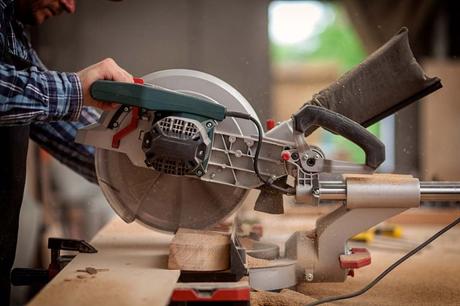
After adjusting the saw blade, it’s time to start the saw and cut. During the sawing process, remember a rule of thumb not to move the saw blade too fast or too slow. If it’s too fast, the cut won’t come out flat. If you’re slow, you’ll put in a lot of power.
Instead, you must adjust your hand force so that the saw blade moves up and down just right.
If you know how to use arm force to control and fix the saw blade force, it will also create a perfect cut. And remember, you need to use both your hands to cut: a wooden handle, a blade adjustment hand.
Clean The Cutting Surface
Once you’ve finished cutting, you won’t be able to get a perfect cut surface. You need to clean the sawdust and sawdust on the surface. Or even, sometimes you need to use a small scraper to clean the surface.
Complete
Now you can join the two boards together to get the perfect cut baseboard trim. If it still doesn’t fit, you can squeeze in some sawdust or add some glue to stick them together.
Tips For Perfecting Cut Baseboard Trim
Handle The Corners
It is very important to make a pencil mark on the wooden bar to match and match the root. Moreover, adjusting the saw blade to the right fit will save you time and give you a good product from the very first cut.
Measure Carefully
Measurement is always an important step in any project. You just need to focus on this step, and you can save a lot of time and effort to avoid having to re-process possible problems.
Handle Wall Nails
When you cut baseboard trim with miter saw, you will encounter wall nails. What should we do?
A good tip is that you can rivet the ends of the wall nails so that they are flat. Then, we can use tape to glue them together to make the wall surface flat.
Clean The Cutting Surface
After cutting the first cut, the cutting surface cannot be completely smooth. Then there will be a lot of sawdust and sawdust making the surface unsightly.
Our task is to use a tool to clean the surface, or we can use a multi-purpose knife to scrape them off.
Focus
A job will more or less depend on your working attitude. Indeed, once you put your work spirit into that job, your work skills will improve, and the quality of work will also be better. So, focus as much as you can when sawing to get a finished product!
Conclusion
It’s easy to cut baseboard trim with a miter saw, right? However, what you need to ensure for the process to go perfectly are good preparation and a focused work ethic. A good spirit with careful preparation will determine your success. Get more information about power tools at Geariz.com
