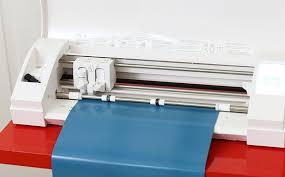
The vinyl cutter is fitted with a small knife that is used for cutting the outline of a paper into a piece of vinyl or sheet. When the plastic moves beneath the blade, the cutter will move side to side before it turns. An image cut into the vinyl is what results from the cutting process. Below are steps for using a vinyl cutter.
Finding an ImageFirst, make or find an image that you want to cut and make into a sticker. You can use Gimp or Open Office Draw to create an image or download pictures online. For the best results, an image should have a white and black background with no grey at all.
Load the VinylAfter creating or downloading an image, load the vinyl into the cutter. In the front and back and on the sides of the cutter there are two sensors, which have inferred receivers and emitters used for sensing the presence of vinyl. That means the machine user has to position the fabric for it to cover the sensors. The pressure roller should lie over the sheet so that it can handle the material. There are several lines on the panel above the rollers, which the rollers must cover for the cutting machine to run. Your vinyl should be running straight so that it doesn't slip out from under the cutter. Hold the fabric between the pressure bar and the rollers to allow the roller to press down. You will have to use the down arrow to notify the cutter that a piece of vinyl or roll has been loaded. The head of the machine will move sideways if you decide to use a piece of fabric, but remember to measure the space between the rollers. The cutter will move the vinyl out, back in, and then to rollers. The cutter will use sensors to measure the height of the sheet so that the user can readout on the display of the fabric.
Using the SoftwareThe software that people bundle with their clutter is known as Open Cut Studio. It is the one that editors use for importing images, and it appears as a grayed out picture. Open the program, right click on the photo, and then adjust the values for the accuracy of the cuts. The outline of your image will appear on the top of the picture.
On the icon bar, there is the Cut button that you press to move the cutter head sideways and the vinyl back and forth. You can then use the arrow keys to move the paper sheets out of the cutter once the design is cut. Then use a razor knife in the front of the cutter head to cut the piece off.

