A first introduction to needle painting | #LRCrafts - DIY Passion: if you can think it, you can make it
I love experimenting with new crafting techniques, anyone browsing this website can notice that. In particular in embroidery I enjoy trying out different stitches and styles. Over time, I’ve grown especially fond of 3D embroidery (stumpwork) and the mindful patterns of German Brick Stitch from the Middle Ages.
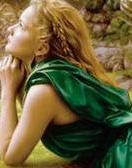
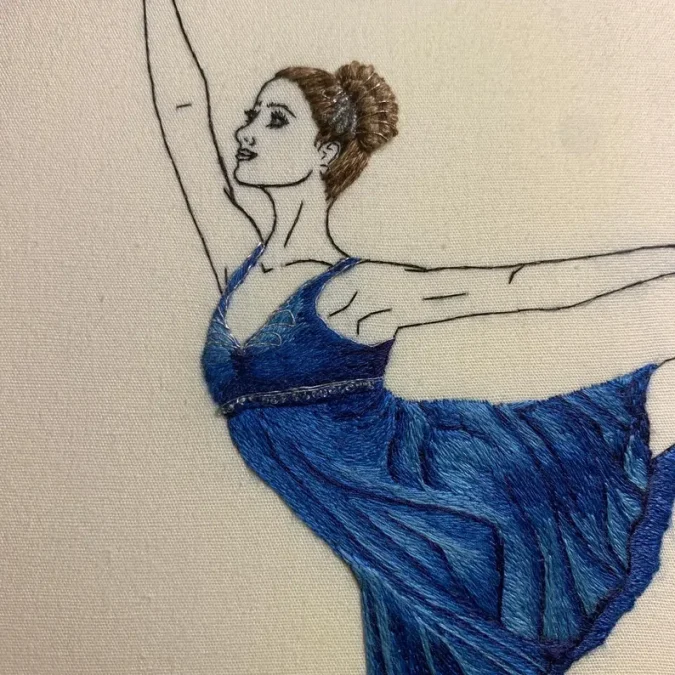
A few years back I met Jessica Devin, a lovely artist who also helped me a lot with my project collecting embroidery shops around the world. Getting to know her work, I got fascinated by her mastery of silk shading or needle painting. She’s a true inspiration for any embroiderer and sparked my own curiosity to explore this technique further.
So here I want to share with you a simple introduction to needle painting: what it is, what it’s for, the basics you should know before you begin, where to get your first supplies or kits, and who can guide you as you discover this art. A first glimpse into this amazing technique, as I try my first steps myself.

A wonderful silk shading embroidery piece by Jessica Devin of JDevinEmbroidery
Table of contents
Embroidery is one of the most rewarding and accessible forms of art.
With only a needle, thread, and fabric, you can create pieces that are expressive, personal, and enduring.
It’s a craft that encourages mindfulness, patience, and creativity
offering a soothing rhythm that calms the mind while sparking imagination.
Jessica Devin
What is needle painting?

Needle painting, also known as silk shading, thread painting, or long and short stitch shading, is a style of embroidery that uses thread like paint. Instead of flat blocks of color, you blend shades together with stitches, creating depth, light and texture, just as you would with a brush on canvas. The effect can be incredibly realistic: flowers with soft petals, feathers with subtle shifts in color, even portraits that almost seem alive.
At the heart of needle painting is the long and short stitch, layered in different colors and directions to build up shading. Other stitches may be added here and there for outlines or details, but long and short stitch does most of the work. The trick is in stitch direction: changing the angle of stitches helps create the curves and movement of the design. Many embroiderers even sketch arrows onto a copy of their pattern to plan out the directions before they begin.
Although it looks advanced, needle painting is not only for expert embroiderers. It’s a technique you can try as a beginner if you start small and keep practicing. The beauty is that mistakes can often be blended or corrected as you go, adding an extra shade here, a few stitches layered there… and no one will ever notice. By contrast, hiding errors in geometric patterns, like with my beloved German Brick Stitch, can be close to impossible: many times I had to redo complete sections because of a too prominent mistake!
This form of embroidery has a long history and can be found in many traditions, from the exquisite silk masterpieces of Suzhou (China) to European floral embroideries that combine shading with goldwork. Today, it’s become popular again thanks to how expressive it is: with just needle and thread, you can turn fabric into a canvas and stitch your own paintings.
Do you need to know how to draw?

At this point, a question arises: do you need to know how to draw, to begin with needle painting?
I found out the answer is no, you don’t! You don’t need to be an artist with pencil and paper before you can try needle painting. Many beginners (myself included) worry about this, but the truth is you can start with ready-made patterns or kits, where the design is already transferred onto the fabric for you.
What helps more than drawing is learning to see shapes and directions. For example, a petal is really just a curved shape, and your stitches follow the curve. Some embroiderers like to make a simple sketch with arrows showing where the stitches should go, almost like a road map for your needle. That’s planning, not drawing..
As you practice, you’ll start to feel how stitch direction and shading create dimension. If you do enjoy sketching, you can certainly design your own patterns, but it’s absolutely not a requirement when you’re starting out.
Many embroiderers use reference photos, trace them, or simplify them into lines and shapes to create a pattern. Drawing skills can definitely enhance your embroidery over time, but you can begin simple: trace, use pre-made patterns, and focus on learning the fundamentals first.
Essential basics before you begin
Alright, if you are ready to give it a try, first things first. Let’s gather the right tools, plan the first design or find a pattern/kit to follow, revisit the basics and also learn some tips from experts.
Tools and materials
For needle painting, you don’t need a huge collection of complicated tools: just a few good-quality basics will make your stitching easy and enjoyable. Many kits come with all you need, such as fabric and thread. If you start from scratch, you’ll need:
- Needles. Any ordinary embroidery needle would be suitable. A size 10 crewel (also called embroidery) needle is most often recommended. It has a sharp tip to pierce the fabric and a long eye that makes threading easier when you’re working with a single strand of floss.
- Fabric. Choose a lighter color fabric, where it’s easier to transfer your design. It should also be a durable fabric, since it will have to bear lots of stitches.
- Thread. Lots of different colors and tones will help you with shading and color gradients, paramount for realism. You are going to mainly use one single strand. Start with cotton embroidery floss (like DMC or Anchor), separating it into single strands for stitching. Later on, you can explore silk threads, which were traditionally used for silk shading and give a luminous effect.
- Embroidery hoop. A good hoop is essential for keeping your fabric taut. Tension is especially important in needle painting so that your stitches lie flat and smooth. Here, there are tons of options to choose from, depending on your comfort and size of your project: hoops, slate frames, scroll frames and more.
- Materials for transferring the design, such as chalk, heat transfer pens, friction pens, tracing paper… You could even choose direct fabric printing methods.
- Basic notions, such as scissors or thread clippers, thimble…

Where can I get what I need?

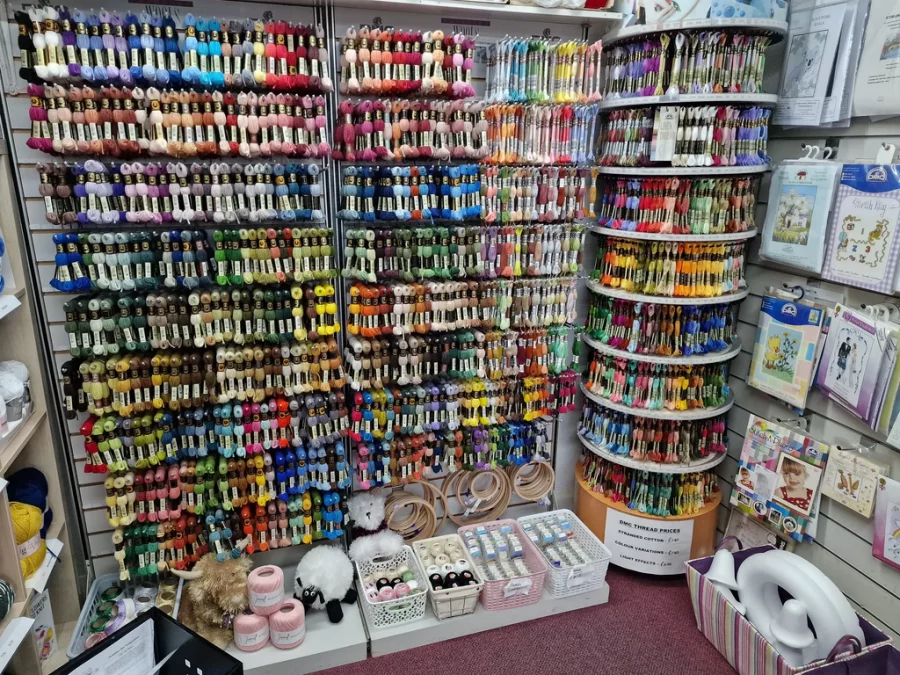
Once you know what tools and materials you need, the next question is: where do you find them? Fortunately, there are plenty of options, whether you prefer to shop online or visit a brick-and-mortar store. And most of the time you can support small, specialized embroidery suppliers (they can be referred to as “LNS – Local Needlepoint Shops“).
To help you find what you need and to help all those small specialized businesses connect with embroiderers, I’ve prepared one resource I think you’ll love: a listing of embroidery-specialized shops around the world.
You’ll find 206 shops across 20 countries, both physical stores and reliable online ones, all reviewed by 100 fellow embroiderers, and counting.
If you’re interested, you can search that list for your location to find the perfect shop near you: one with the quality and selection that will help your needle painting journey from the very first stitch. Most shops also offer classes and workshops, that could be a perfect starting point and a special occasion to meet other fellow embroiderers like you.
Browse the shops listFirst steps in needle painting
When you’re ready to try your hand at needle painting, the most important thing is to start small. Don’t worry about stitching an elaborate piece right away: beginning with simple shapes makes the learning curve much easier. A square, a circle, even a single flower petal is enough to practice how your stitches behave. Once you’ve built some confidence, you can move on to more complex designs.
The stitch you’ll use most often is the long and short stitch. Despite the name, there isn’t a strict rule for how long or how short each stitch should be. In fact, the trick is to keep them varied and slightly irregular, so the stitches blend into one another.

Pay close attention to stitch direction. The angle of your stitches is what gives elements their natural flow. To get a feel for shading, you could try to color a copy of your pattern yourself, using colored pencils: it will help you familiarize with the direction you want your stitches to go. It doesn’t need to be a work of art (remember, you don’t necessarily need to know how to draw), but even a small attempt can be a good help.
Needle painting is usually worked with a single strand of thread and a size 10 crewel (embroidery) needle. This combination gives you precision and makes it easier to layer stitches neatly.
And here’s the best part: needle painting is surprisingly forgiving. If a stitch feels off, you can often hide it by layering another shade over it or blending more stitches in. With practice, your hands will learn the rhythm of shading, and soon you’ll start to see shapes and colors come to life under your needle.
Tips from the experts
The basics to begin
When it comes to learning needle painting, guidance from experienced embroiderers can make all the difference. Here some advice from Jessica Devin for beginners.
- Start with a good-quality kit. Jessica recommends beginning with a kit designed specifically for needle painting. A kit provides everything you need (fabric, threads, pattern, sometimes even a guide for stitch directions). This allows you to focus on learning the technique itself, without worrying about where to begin, choosing materials or colors. Jessica has her own lovely kits for sale.
- Watch expert demonstrations. There’s nothing like watching an expert in action. Sarah Homfray’s videos on silk shading and needle painting are full of practical advice. She demonstrates stitch techniques, color blending and how to approach shading in a way that’s easy to follow. Watching her work can give you a clear idea of how stitches flow and how to achieve smooth transitions in color. She sells her own kits as well.

- Master the stitch basics. Needle painting is mostly done with long and short stitches, as we said before, but about that Jessica points out a few key tricks:
- Keep your stitch length varied. Don’t make every stitch exactly the same: randomizing stitch length helps the shading blend naturally.
- Split stitches. Similar to a split stitch, you should split the thread of the stitch below with your needle as you stitch along a line. This helps create a shaded effect without visible gaps, adding subtle texture and smoothing color transitions.
- Pay close attention to stitch direction. The direction in which your stitches lie is crucial for creating realistic shapes and curves. A handy tip is to print or copy your pattern and draw arrows over it to mark the stitch direction before you even begin. Think of it like making a road map for your needle. You’ll have a useful diagram to follow, ensuring your shading flows naturally with the shapes.
- Start simple and practice. As in all new things, starting small is key. Do not rush into the most intricate patterns. When we tried epoxy resin for the first time, we made a few tiny (and disastrous!) items just to get to know the new material. It’s recommended to begin with basic shapes, before attempting more complex designs. Simple forms allow you to focus on stitch control, layering and blending. Mastering basic forms builds the foundation for more challenging embroideries.
Following these tips will give you a solid foundation and the confidence to start exploring the subtle art of needle painting. With practice, you’ll begin to see how stitch direction, layering and varied lengths combine to make your embroidery come alive.
Going deeper: materials and setup
Once you’ve got the basics down, the next step is making sure your materials and setup are working for you. Here I sum up some deeper tips from Jessica that can save you frustration and help your needle painting look its best.
Fabric matters.
A medium to heavy linen is a great choice for beginners, since it has enough body to support dense stitching. Jessica often backs her linen with muslin or calico for extra stability. High-count cotton or silk fabrics also work well. Whatever fabric you choose, make sure to pre-wash it to avoid shrinkage later, and cut it on the grain: that detail makes all the difference in preventing puckering and warping.
Transferring your pattern.
The best transfer method is prick and pounce, which gives you clean and reliable results. If that feels intimidating, you can also trace using a light box (or even a sunny window). A good water-soluble pen works for lighter fabrics, and water-soluble transfer paper is perfect for dark or heavy fabrics. Just avoid Frixion pens or regular carbon paper: they may look fine at first, but ghost marks and stains can ruin your work down the line. Carbon paper leaves permanent lines. About Frixion pens in particular, they should be heat-erasable, meaning heat would remove their ink, but in reality their ink isn’t archival, it sits inside the fabric even after being erased. I personally experimented once, the ink mark seemed to go away at first, but changes in room temperature made it reappear after a while! Those ghost marks are permanent.

 Example of how to mount the fabric for stitching
Mounting your embroidery.
Your fabric needs to stay drum-tight while you stitch. Jessica swears by slate frames for the best tension, but stretcher bars are a solid, more affordable option. If you’re using tacks, always choose stainless steel: other metals can rust and stain the fabric. A sturdy hoop can also work, especially quilting hoops that grip more securely. Beechwood hoops, in her opinion, are ideal. Your chosen hoop should have a mount you can tighten with a screwdriver or a wingnut. To prevent “hoop burn”, you can bind the hoop with bias tape or hoop tape, and always use a hoop larger than your design so you’ve got room around the edges. If you’re not stitching, take the fabric out of the hoop to avoid permanent marks.
Protecting your work.
When you spend hours layering stitches, the last thing you want is smudges or accidental snags. Jessica suggests placing acid-free tissue paper over your fabric to shield it as you work, moving it around as needed. It’s a simple step that keeps both fabric and stitches in perfect condition.
Of course, these are just a handful of the many tips that can make needle painting easier and more enjoyable. There’s so much more to explore: thread handling, color choices, shading tricks, finishing techniques, even framing your work. I could easily write a whole series just on tips alone!
For now, I’ll point you to Jessica’s blog, where she shares a wealth of knowledge from her own experience. And who knows, if you’d like me to dive deeper into these topics here, let me know in the comments. I’d love to hear if that’s something you’d enjoy.
And if you’re ready for more structured, advanced guidance, why not consider a course? That’s where you’ll really benefit from one-on-one teaching, expert feedback and the kind of practical advice you won’t find in a static tutorial.
Why a course can be a great starting point
While needle painting is a technique anyone can explore at home, starting with a course can make the journey smoother, more inspiring, and far less intimidating. Learning from an experienced teacher gives you guidance, feedback and confidence from the very first stitch, so you don’t feel lost or overwhelmed. Instead of piecing things together from scattered tips and tutorials, you can sit down with an expert who guides you step by step and answers your questions in real time, helping you build confidence from the very beginning.
One teacher I’ve found especially inspiring (I think you know who I’m referring to, by now) is Jessica Devin. A self-taught embroidery artist who has honed her skills with classes at the prestigious Royal School of Needlework, Jessica combines influences from both Western and Eastern embroidery traditions to create her distinctive style. She – of course – specializes in silk shading/needle painting, but her classes cover a variety of free surface embroidery techniques as well.
In her one-on-one Zoom classes, each student begins with a design that speaks to them. Jessica guides you through every step: transforming that inspiration into a workable pattern, choosing the best stitches, blending colors for depth and texture, refining details. You get to watch her stitch the same design in real time, giving you a clear visual guide alongside her instructions.
What makes a live course truly special is that it gives you more than any written tutorial or static YouTube video can offer. Sure, you can learn the technical skills anywhere, but the personal guidance, feedback, and expert insight you receive one-on-one is irreplaceable. A teacher can see your work as you go, correct small mistakes before they become habits, suggest improvements tailored to your style, share subtle tips that simply don’t translate to written instructions.
A course like this gives you confidence, encourages experimentation, and helps you enjoy the process without frustration. Needle painting isn’t just about technique: it’s a way to slow down, connect with your creativity, and enjoy the meditative rhythm of stitching. Each session encourages mindfulness, patience and artistic expression, helping you create pieces that are both personal and enduring.
A guided course is a wonderful way to begin, no matter if you are just looking to relax or make embroidery that tells your story. With support from an expert, you can dive into needle painting with confidence, focusing on the joy of stitching.
More about this course
Find out more about the online needle painting course hosted by Jessica Devin.
Download the presentationSharing the inspiration
I want to be clear: nothing I wrote in this article is sponsored. I’m sharing all of this simply because I met a truly awesome and inspiring embroiderer in Jessica Devin. Her mastery of silk shading, her generosity in teaching, the joy she brings to embroidery, the wonderful lovely person she is: all of this inspired me to dive deeper into the world of needle painting. I felt I just had to share with the stitching community how amazing she is, and how amazing her techniques and guidance are.
Needle painting is a rewarding, artistic, meditative and endlessly creative embroidery technique, and learning from someone like Jessica can make the journey even more enjoyable. The most important thing here is to enjoy the process. It doesn’t matter if you start with a kit, watch tutorials, take a guided course or dive head first into designing your own complex patterns.
I’d also love to hear from you! If you’ve tried needle painting, are thinking about starting or have questions about silk shading, please share your thoughts in the comments below. Let’s keep inspiring each other to explore and enjoy the art of embroidery together.
Resources
Guides, tips and courses
- Long and short stitch shading lesson by NeedleAndThread
- About the long and short stitch from the RNS Stitch Bank
- Tips by Jessica Devin
- Sarah Homfray’s videos on silk shading and needle painting
- Presentation of the course on Needle Painting by Jessica Devin
- All the courses by Jessica Devin
Kits
- Kits by Jessica Devin
- Kits by Sarah Homfray
Suppliers
- Search for an embroidery shop
by Rici86.