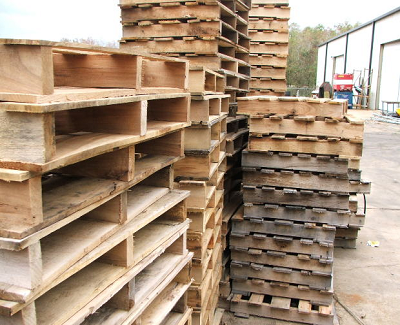
Using pallets is a cheap and easy way to build furniture both inside and outside of your home. I recently moved to the suburbs of a major city, which means access to plenty of pallets. With a bit of legwork, you can probably find pallets for free, or for just a few dollars, on Craigslist or at local businesses. Here’s a great guide for how to pick and disassemble suitable pallets for any projects. Be sure to note if the pallets have been heat- or chemical-treated, which can affect the quality of the wood, and how safe it is to use.
There’s one more step after disassembling before you start cutting and nailing. Whether you have reclaimed wood in the form of a pallet, a local wood seller, or from a tree cut down from your yard, you want to clean and sanitize the wood. Otherwise, the wood could carry germs into your home. This also helps cut down on potential slivers. Once dry, stain or seal the wood, and get your tools ready. We’ll start off easy, and work our way up to the big leagues.

Photo by ronnieb at Morguefile.com
-
Picture frames
If this first project got any easier, you probably wouldn’t be building something. Take four boards. Cut diagonals at each end. Stain if desired, and let dry. Form a rectangle around the photo. Attach wire or hanger (I prefer sawtooth) to the back of the wood panels. Hang your picture frame. Repeat and form an interlocking gallery wall. Pat yourself on the back for a job well done.
-
Patio Couch
Though it sounds complicated, building a full L-shaped couch is merely time-consuming. This won’t look polished until the end of the build. First, form a base by stacking pallets for the seat, and nailing a pallet perpendicular to the base for a backrest. Then, cut slats to size to hide the fact that the base is a pallet. Add cushions or pillows for comfort, and armrests to each end. Marvel at your new outdoor couch – especially if you have a table or fire pit to sit at.
-
Hanging bed
There’s only one thing better than a day bed outside: A pallet swing bed. It’s remarkably simple: Start by screwing together two pallets to make the bed, and adding pallets for a backrest – much like the base of the couch. Hang it from a sturdy tree or porch overhang – I prefer using the four corners rather than just two points of contact at the center of the bed, for added stability and keeping the bed level. Grab a book, or get ready for a nap.
-
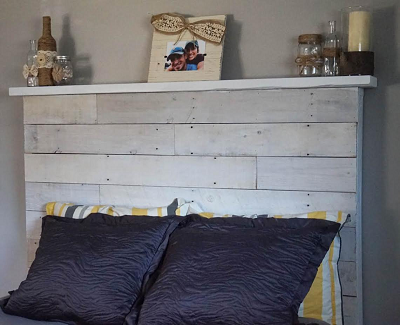
Headboard
While meant for a different kind of bed, a pallet headboard carries the rustic wood theme inside. This is just as simple as the bed, using most of the same skills. Begin by measuring your bed, ripping the pallets apart and sawing to match the size of your bed. Form a box and add supports to attach slats, nail the slats to said supports, and hang the headboard on the wall behind the bed. Simple, but elegant – and you can add photos or trinkets to the top shelf the headboard provides.

Photo courtesy of Life Storage
-
Garden planter
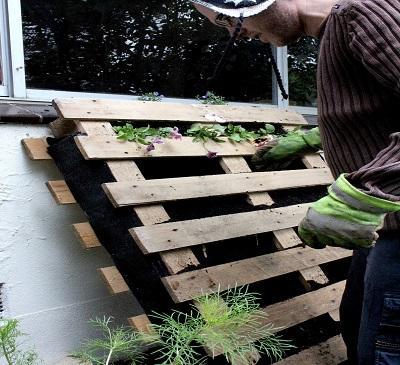
There’s something to be said of just putting a liner on a pallet and calling it a planter, like in the photo below. But for an actual planter – essentially making a box with wood – it’s a few more steps. You can give a planter the pallet look by leaving gaps in between boards that would normally be the planter walls. As with the strawberry planter at the link, you can let bark and the flora fill in the gaps, or use planter lining to stop dirt and soil from spilling out. I’m planning on including edible flowers to keep my wife happy.

Source: Flickr user various brennemans (CC BY-SA 2.0)
-
Dog bed frame
While you nap on the day bed, your pooch can enjoy a cozy spot in a dog bed frame. The frame holds a cushion and some blankets, and is easy to make – even with a few artistic flourishes. Plus, you can move it indoors and it will still add a classic wood touch to any room. I don’t have a dog, but I do have cats – indoor cats. With a metal cage attached to the bed frame, my cats will have a place to enjoy the outdoors with me.
-
Shelving
I’m going to use pallet shelving outside to store gardening tools. I lose my trowel ever other weekend, and there’s no solid place to put gloves in the garage yet. Plus, I can store barbeque utensils or potted plants on the shelves. Inside a home, they fit nicely in a pantry, ready to hold canned goods. Or, they make the perfect place to display art – or collectible figurines, for me.
-
A pool
I finally have grass growing in my backyard after installing a sprinkler system. I’m not keen on ripping up the sprinklers I’ve worked so hard to get working just to satisfy my wife’s desire for a pool. Which is where the above-ground pallet pool comes in. At the link, they use towels to cover any jagged edges from the wood. I’m thinking I can get away with careful, diligent sanding before putting the liner in. I’ll cut the pallets down, too, to save space and not block the sprinkler coverage. Otherwise, it’s not too hard to make a pool for a fraction of what a normal pool costs.
-
Shed
We’re ending with the most ambitious project, that is quite a bit more complex than the others. But, it’s extremely practical, and might even fit some of the previous projects inside. Gaze upon the pallet shed. If you were to buy all of the wood at a hardware store. Pallets, on the other hand, are dirt-cheap-to-free. That leaves you plenty of money for cinder blocks for a base, nails, screws, mortar, shingles, hardware to mount a door, and glass for windows. It might be a good idea to put insulation in the walls, as well. The shed at the link is 20’x8’ shed, made for about $500. A pre-built shed will set you back double that, and for only half the space. Is the money worth not needing to build the shed? For me, I love the thrill of completing a project, and knowing I built it. I’d much rather have a bigger shed, built by my own hand, at a greatly reduced cost.
