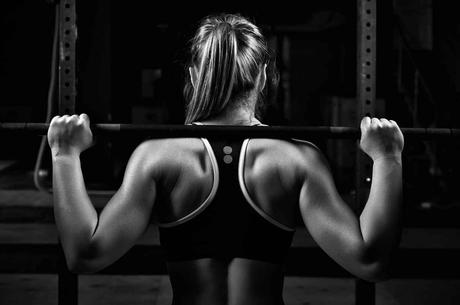
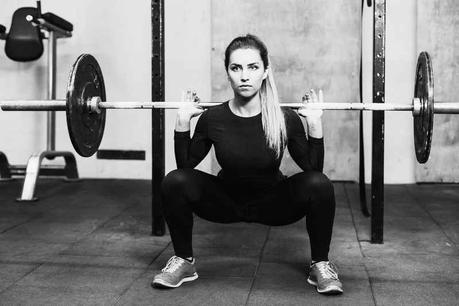
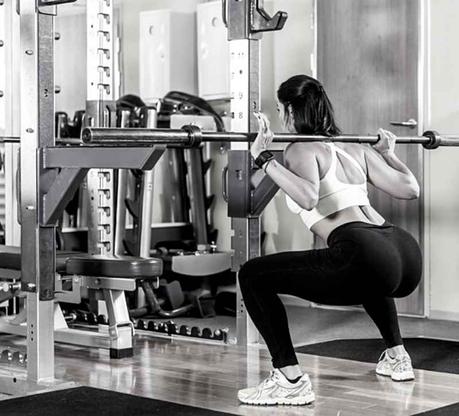
Ready to take your glute workouts to the next level? Here are the best glute exercises you can do using your squat rack.

The squat rack is one of the most useful and versatile pieces of equipment in your gym!
With the squat rack, you’ve got more options for loading up your weights, extra support and stability when you need it, and a rack capable of carrying heavy loads (enough for 1-Rep Max training).
Best of all, with the squat rack, you’ll have an easier time targeting specific muscles—for example, your glutes.
Below, I’ll explain why a squat rack can help you max out Glute Day training sessions, and share a list of my all-time favorite glute exercises you can do specifically with a squat rack.
Read to the end of this post for a few FAQs on how to train your glutes with a squat rack, and you’ll walk away ready to take your next Glute Day workout to the next level.
Next stop–Glutetown!
Benefits of Using a Squat Rack for Glute Day
Why should you use a squat rack—not just for Glute Day, but for every training session?
Welp, the benefits include:
- Squat racks make lifting safer
- Racks allow for customizable height
- Racks offer an almost endless number of exercises
Safer lifting
To start off with, squat racks are built to make your workouts safer, especially when working with heavy loads.
Think about it: if you always had to lift the barbell from the floor for every exercise, you would use a lot of energy just to get it into position.
For example, you’d have to lift it off the ground and over your head to get it onto your shoulders for squats. That’s not just energy expended (needlessly), but it’s also putting your muscles and joints at risk.
Racks allow for a broad range of safety attachments, including J-hooks, safety pins (or even better–safety straps) and safety arms to spot you while you chase down those glute gains.
See also: 14 Best Attachments for Squat Racks (and Where to Buy)
Customizable height
The squat rack is designed to support the bar at exactly the right height, allowing you to load it up with as much weight as you want and get underneath the bar without zero effort expended.
That way, all your energy goes into the actual lift and not the set-up, and you’re safer throughout the entire process.

Set the barbell to the height you want to start your lift from, and you are in business.
Huge range of exercises
Lastly, squat racks are hilariously versatile.
Squat racks are designed for, yes, you guessed it, squats. By their very design, they facilitate the set up and loading process so all you have to do is lift the weight, step back, and get squatting.
But they’re useful for so much more. You can use them for quite literally everything—slide a bench underneath to turn it into a handy bench press, use it as a pull-up bar, or stand up in front of the machine and use it as a shoulder press.
With a squat rack, you’ve got a virtually endless number of exercises you can do to target every muscle in your body, including your glutes.
And that’s just with the squat rack alone.
Once you start adding accessories—including landmine attachments, lat machine pulldowns, dip station, and more—you can turn the squat rack into a truly game-changing piece of equipment.
Really, they’re one of the most useful additions to any home gym, and they’re a station you’ll spend a lot of time when training at your local commercial gym.
Best Glute Exercises You Can Do with a Squat Rack
The whole point of this article is to talk about how you can use a squat rack to facilitate better glute training.
With no further ado, let’s dive in and look at the all-time best exercises you can do with a squat rack:
 Exercise #1: Squats

Squats are a BEAST of a lower body exercise, ideal for training your quads, hamstrings, glutes, and calves to the max.
They are one of the “Big Three” powerlifting moves that let you load up A LOT of weight on your lower body, and because you’ve got the squat rack to elevate the bar to shoulder height, there’s no energy wasted trying to lift it off the ground onto your back.
See also: 6 Best Squat Shoes for Every Kind of Lifter
Best of all, the squat rack offers stability (somewhere to grab onto for balance) if needed. Squats are the whole reason the squat rack was invented, after all!
To perform this exercise:
- Set the squat rack to roughly shoulder height (or slightly below). Load up the barbell with your desired weight.
- Get under the bar so it’s positioned on your shoulders (across the front for front squats, or across the back for back squats) and straighten your legs to lift it off the cradle.
- Step back into squatting position. Stand with your feet spread at or slightly beyond shoulder width apart, with your toes pointed straight forward. Keep your spine straight and head up.
- Bend your knees and inhale as you lower into the squat. Descend under control, keeping your knees tracking straight forward over your toes. Lower until your thighs are parallel to the floor.
- Exhale explosively and brace your core as you push against the weight to stand straight. Rise until your legs are fully extended, but DO NOT lock out your knees.
- Thrust your hips forward at the top to maximize glute engagement. Pause for a 1-count at the top.
- Repeat as desired.

 Exercise #2: Sumo Squats

Sumo squats are a wide-stance variation on the standard squat, which means they engage more your outer quads, hips, and, most important of all, your glutes.
They’re an excellent exercise to work into your routine specifically to target your glutes, but also to increase hip mobility.
It will help to loosen up your hip joints and facilitate easier movement in a lot of squatting and bending positions.
To perform this exercise:
- Set the squat rack to roughly shoulder height (or slightly below). Load up the barbell with your desired weight.
- Get under the bar so it’s positioned across the back of your shoulders and straighten your legs to lift it off the cradle.
- Step back into squatting position. Stand with your feet spread well beyond shoulder width apart—as far apart as feels comfortable for your hips—with your toes pointed slightly outward. Keep your spine straight and head up.
- Bend your knees and inhale as you lower into the squat. Descend under control, keeping your knees tracking straight forward over your toes. Lower until your thighs are parallel to the floor.
- Exhale explosively and brace your core as you push against the weight to stand straight. Rise until your legs are fully extended, but DO NOT lock out your knees.
- Thrust your hips forward at the top to maximize glute engagement. Pause for a 1-count at the top.
- Repeat as desired.
 Exercise #3: Stiff-Legged Deadlifts

Stiff-legged deadlifts are a deadlift variation that reduce the engagement in your lower back and maximize glute and hamstring engagement.
They’re one of the best exercises to train these two lower body posterior chain muscles, and they’re made significantly easier thanks to the squat rack.
To perform this exercise:
- Set the squat rack to roughly waist height. You should be able to grip the bar with your arms fully extended without the need to bend. Load the barbell with your desired weight.
- Grip the bar in both hands, step back from the cradle, and stand with your feet spread roughly shoulder width apart, toes pointed straight forward.
- Keeping your spine in a neutral position and head up, hinge forward at the hips to lower the barbell toward the ground. Keep your legs straight without locking your knees.
- Lower until the weights tap against the ground, then exhale as you stand back up. Feel the squeeze in your hamstrings and glutes, with some minor lower back engagement.
- Thrust your hips forward at the top to maximize glute engagement. Pause at the top for a 1-count, then inhale and lower once more.
- Repeat as desired.
 Exercise #4: Bulgarian Split Squat

The Bulgarian split squat is an amazing unilateral exercise that is incredibly effective but also very difficult.
Because the majority of your weight is being supported by one leg, you’ll find you don’t need much added load to make it a challenge.
But the beauty of the instability is that it forces your secondary stabilizer muscles to engage to keep you steady as you squat in the lunge position.
And because you switch between legs, you get an amazing quad-centric workout that engages your glutes and hamstrings to the max.
To perform this exercise:
- Set the squat rack to roughly shoulder height (or slightly below). Load the barbell with your desired weight.
- Place a box or bench roughly 4 or 5 feet from the bar.
- Get beneath the barbell (across the back of your shoulders), un-rack the weight, and step back. Lift your right foot off the ground and place the top of your foot on the bench, with your knee pointing toward the floor. This will put you in a lunge-like position with your rear foot elevated.
- Bend your left knee and inhale as you descend into the squat. Lower until your right knee nearly touches the floor and your left thigh is parallel to the floor.
- Exhale explosively as you push back up to stand as straight as possible. Extend your left leg fully without locking out your knee.
- Pause at the top for a 1-count, then inhale as you lower once more.
- Repeat as desired on the left leg, then switch legs (right foot forward, left foot elevated) for an equal number of reps.
 Exercise #5: Elevated Hip Thrusters

Elevated hip thrusters are a truly amazing glute-engaging exercise! Already, hip thrusters do an excellent job of working your glutes and hip muscles as you move through the thrusting range of motion.
However, because you’re elevating your feet, it’s more glute and lower back-focused, with a bit of extra ab engagement thrown in for good measure.
See also: 8 Best Hip Thrust Pads for Hip Thrusters
And, thanks to the squat rack, you’ve got an easy way to do this workout in the same place where you’ve spent the rest of your training session.
To perform this exercise:
- Set the squat rack to roughly the height of your shins. Place a Yoga mat or pad in front of the squat rack.
- Lie on your back on the mat/pad, and place your feet on the bar. Bend your knees and use the strength in your hips and glutes to lift your body.
- Brace in your abs and drive through your feet to thrust your hips upward. Thrust until your hips are aligned with your torso, squeeze to contract your glutes, then relax and allow your hips to lower slightly.
- Pause at the bottom for a 1-count, inhale, and thrust again.
- Repeat as desired.
More Hip Thrust Guides
6 Benefits of the Hip Thrust
What Muscles Does the Hip Thrust Work?
How to Master the Hip Thrust (Technique, Reps, and More)
FAQs About Training Glutes with a Squat Rack
Why do I only feel glute exercises in my quads?
Some of the exercises I shared above (such as squats and Bulgarian split squats) will feel more quad-focused than glute-focused, and that’s because the quads are the “prime movers” (the muscles doing the majority of the work) in these exercises.
Your glutes are engaged doing squats, especially those listed above, but it’s still leg work that shreds your quads.
If your goal is to focus exclusively on your glutes (and hamstrings) while excluding your quads completely, you’ll want to focus on exercises like glute bridges, hip thrusters, and glute ham raises that specifically engage the posterior leg muscles without the quads being involved at all.
What’s better for growing glutes – a Smith machine or squat rack?
Both the Smith machine and squat racks offer similar benefits in terms of training your glutes. They both allow you to do similar exercises, typically involving multiple muscles using a barbell.
All of the exercises shared above can be performed on both the Smith machine and squat rack.
However, because the Smith machine features a barbell affixed to a sliding rail, you can do glute-exclusive exercises like donkey kicks that you can’t do using the free weight set on a squat rack.
If you want to get technical about it, the Smith machine is fractionally more effective for growing your glutes than the squat rack.
This article goes deeper on training glutes with a Smith Machine, including the best exercises to do.
The Bottom Line
All the exercises I’ve shared above will help you to target your glutes (along with your quads and hamstrings) using the squat rack.
Whether you’ve got a rack at home or at your gym, it’s always a good idea to use it in order to make your workouts safer and more targeted.
You’ll find that adding squat rack exercises for glutes into your training sessions will go a long way toward helping you grow those all-important glute muscles more effectively.
More Stuff Like This
5 Best Stretches for Tight Glutes (Plus Benefits and How to Do Them). Stretching your tight glutes reduces muscle stiffness, increases range of motion, and can even help you build more muscle. Here are my five favorite glute stretches for unlocking the muscles around your rear end.
6 Tips for Targeting Your Glutes on Leg Press. The leg press is an underrated way to develop stronger glutes. Here are six tips on how to optimize the exercise so that you are primarily targeting the glutes.
Glute Ham Raise: Benefits, Muscles Worked, and How to Do It Like a Pro. The glute ham raise is a killer way to train your hamstrings and glutes. Here’s a detailed look at this powerful exercise, including benefits, muscles worked, tips for doing them properly, and more.
