Repeatable successful cooking and baking results require accurate measuring practices. Here are ten valuable tips on how to measure your recipe ingredients.
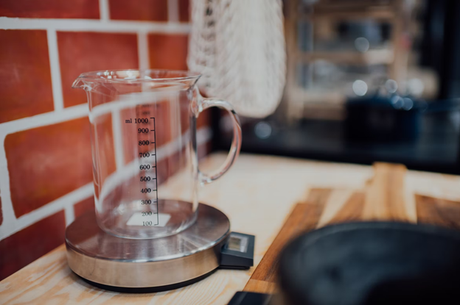
Were you lucky enough to observe your grandma or mom bake and cook? Were you fascinated by watching them use their trusted old measuring cup and pinch of this and dash of that to make the most soul-pleasing comfort foods?
Years of experience led them to have instincts on measuring that yielded successful results for their cakes and sauces.
Thanks to modern technology and kitchen utensils, we don't have to rely on just guesswork or wait to inherit that trusted mug from grandma.
Here are ten useful tips on measuring ingredients in the kitchen.
#1 Invest In High Quality Measuring Tools and Utensils
Thanks to some wonderful kitchen appliance and utensil manufacturers, we don't have to rely on that trusted mug from grandma to measure out the ingredients.
We recommend you invest in high-quality measuring utensils, equipment, and tools.
#2 Use Measuring Cups For Liquids
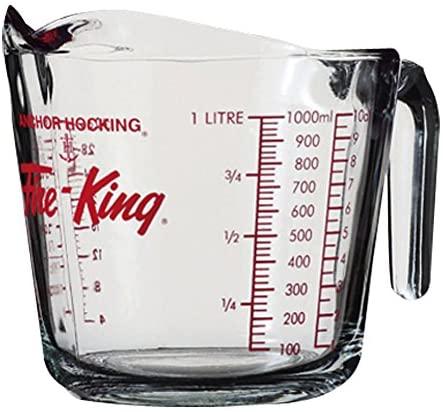
For liquids, we recommend using a liquid measuring cup. They are usually made of plastic or glass, and they have clear demarcation of ounces, cups, and milliliters. It will also be helpful if the cup is microwave-safe. Often you may need to use lukewarm milk or water, and it is best to measure out the cold liquid and zap it in the microwave for a few seconds to make it lukewarm.
It will also be helpful if the plastic or glass is clear to see through the material to gauge the level you poured into it (more on it later). Use a cup that has a pouring spout and a handle.
#3 Use Measuring Cups Made For Larger Volumes of Dry Ingredients
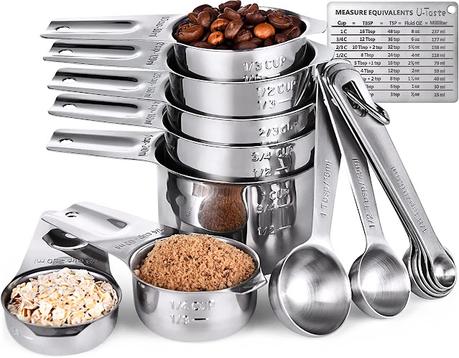
We recommend you use a series of metal or plastic measuring cups with handles for larger volumes of dry ingredients. They usually come in sets of 4 cups with 1 cup, ½ cup, ¼ cup, and ⅛ cup measurements. We recommend you buy the same series of cups to be consistent with your measurement.
These cups are great for measuring flour, grain, rice, pulses, baking powder, etc.
You can also use these to measure out liquids like oils and molasses or honey. However, we still recommend you have a measuring cup for the liquid separate from dry ingredients.
This will make life easier when measuring the liquid and dry ingredients for the same recipe.
#3 Use Measuring Spoons Made For Smaller Volumes of Dry Ingredients
Measuring spoons have more accurate measurements than tablespoons from silverware or tableware. You can use measuring spoons for smaller volumes of dry ingredients instead of using tablespoonsfrom your silverware. Different manufacturers of knives, spoons, and forks can tinker with the exact measurement of the spoons for design and aesthetics.
So, instead, pick a set of measuring spoons. They usually come in a set of several spoons from 1 tablespoon, ½ tablespoon, ⅓ tablespoon, ¼ tablespoon, ⅛ tablespoon, and also in 1 teaspoon, ½ teaspoon, ¼ teaspoon, and ⅓ teaspoon measurements.
Again picking all the measuring spoons from the same set by the same manufacturer will increase your chance of accuracy in your recipemeasurements.
#4 Use a Food Measuring Scale
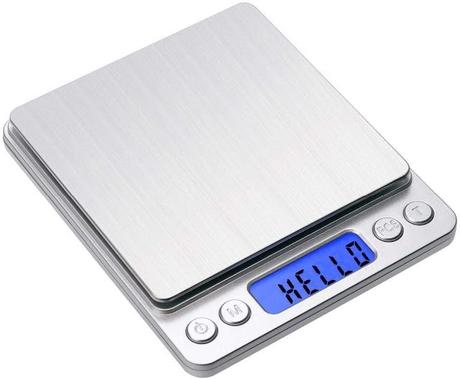
Professional cooks and chefs will always use a food measuring scale to measure out exact volumes of ingredients. This is because depending on the humidity and how tightly the powdered ingredients are packed, simply using measuring cups may not be as accurate as precisely measuring the volume of the powdered ingredient (like flour or sugar, etc.).
We recommend you use the measuring utensils and then weigh them on a food scale to ensure you correctly measure ingredients. This will ensure your chocolate cake is perfect every time.
#5 Pick Either to Scoop-and-Level Or Spoon-and-Level Methods
There is an ongoing debate in the avid baking communities about how exactly to put ingredients in a measuring cup - yes, they can be that fussy about precision when creating delicate desserts and baked goods.
One school of thought uses the measuring cup to scoop out the ingredient and then level it off with a knife to get a cup of powdered or granulated dry ingredient - like flour or sugar.
The other theory is to use a spoon to fill the measuring cup and then level it off with a knife.
What is the difference, you wonder?
Well, the difference is in science. When you scoop up the ingredient with a cup, you can scoop more flour than if you were filling the cup with a tablespoon of flour at a time. It is because of the air trapped between each spec or grain of the ingredient.
Neither methods are right or wrong, as long as you are consistent with your technique.
Our recommendation is to pick one method and stick to it. If you are going to scoop and level, then do that with all the ingredients. If you are going to spoon and level, stick to that technique.
You can always measure out the ingredient on a food scale after scooping or spooning it into your measuring cup for extra accuracy.
#6 Use a Little Oil for Sticky Ingredients
When measuring sticky ingredients like honey, molasses, peanut butter, or maple syrup, we recommend spraying or brushing a little cooking oil on the measuring cup before pouring the sticky stuff into it. This will ensure that you can pour the sticky ingredient into the mixing bowl with little wastage.
Because accuracy is vital in baking, you will not want to waste even a single drop of the sticky ingredient. Using a bit of oil will ensure the sticky ingredient doesn't stick to the surface of the measuring utensil, and you get all of it in your mixing bowl.
#7 Use Silicone Spatulas to Transfer Ingredients
We recommend getting a set of silicone spatulas of different sizes to scoop out the wet and sticky wet ingredients from the measuring cups. You will need to use these spatulas to cleanly take out the wet and sticky ingredients into the mixing bowl.
The same goes for the cake batter you will mix in your bowl.
We recommend you get a set of spatulas of different sizes. We suggest sticking to silicone because of the bendy malleability that makes it super helpful in scooping out the tiniest bit of batter or ingredients from all corners of your cups and bowls.
#8 Line Up All Ingredients
You will need to work with several ingredients when creating a cake recipe. This can get confusing, which may lead you to forget if you added the baking soda or are you yet to add it, for example.
So, we recommend you line up all the ingredients on the counter before you start measuring and mixing. This includes the salt for the pinch of salt or the tiniest dash of nutmeg.
Line them up as they do in cooking videos online. Set the ingredients all on one side of the mixing bowl - e.g., the left side. As you add the ingredient, place the ingredient jar/box on the other side of the bowl - e.g., the right side.
#9 Measure and Pour Away from the Mixing Bowl
Just Like how every online cooking video will tell you to crack the egg away from the bowl into a separate bowl before adding it to the cake batter, you should do the same with other ingredients.
Whether you scoop and level or spoon and level, there is a chance you may spill some extra out of the cup. So, if you are doing this over your mixing bowl, the extra dash of flour or sugar will fall right into the mixing bowl screwing up the accuracy level of the recipe measurement.
#10 Pay Attention to the Recipe
Finally, pay close attention to all the recipe instructions. If the recipe calls for sifted flour, you will need to measure the flour out, sift it, and then measure it again to ensure the measurement is accurate.
For liquids, bend down or lift the cup to ensure the markers are at your eye level so that the volume is accurate.
Conclusion
Cooking is an art, while baking is a science. We like to think both of them are a blend of art and science. Yes, you can experiment with ingredients and add spice or herb to your recipe to make it your own. However, you still have to get measurements of the bulk of the ingredients to ensure the result tastes how it's supposed to.
After all, the play of moisture, vapor, heat, and ingredients melding together will produce your next most delectable dish. Good luck!
