 1. Keep Your Lens Clean – Duh! This may sound like a no brainer, but your smartphone is a workhorse. You take calls, text, and post to social media all the while taking your phone in and out of your pocket or purse. The lens gets gunky without you even realizing it. One good swipe with a soft cloth is usually enough to remove smudges and dust.
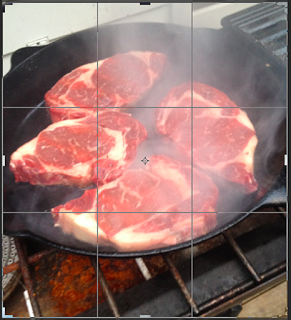
2. Use Basic Composition Rules - Follow the “Rule of Thirds.” No, it is not another "Game of Thrones" variant. This is a tried and true method to ensure your pictures are balanced. Imagine your phone screen divided into a grid of 9 squares (3 by 3); your smartphone may even have an option to display this grid right on your screen. The idea is to place your subjects along those grid lines or at the points where the lines intersect.
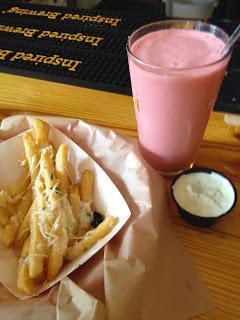
3. Minimize Clutter - If that spoon, napkin or busy background doesn’t add to the photo, it detracts from the photo. If you choose to accessorize your photo, use muted colors and tones that do not distract from the focal point. Plain white plates are the best option for showing off your meal and readers can see what the food actually looks like.
 4. Take Photos Under Natural Light – Okay, so this is not ALWAYS possible, but you should avoid using your camera’s flash unless absolutely necessary. Move around to find the best light source. Don’t feel confined to taking photos in your kitchen. Experiment with using a flashlight to backlight your pictures for a different lighting effect and to reduce shadows.
5. Get Close But Not Too Close - Focus on what is most important in the shot, but don’t zoom in so much that viewers can’t tell what the food is. Getting close is not the same thing as using the zoom. We have never had much success with zooming on a smartphone. Zoom tends to be out of focus It is always better to crop than to zoom.
6. Take Photos From Multiple Angles - Some plates of food look better from above, or from the side, or at a 45-degree angle. Try moving around the plate and taking photos at various angles so you can pick your favorite later. You can also change the angle of a picture when you edit as well to move the focal point or emphasize a point.
7. Edit, Don’t Filter – This will probably not be a popular tip with Instagram-loving millennials, but take some time to actually edit your pictures on your phone before uploading them to your blog post or social media channels. Trust us, it is worth the time and effort. There are dozens of photo editors available for iOS or Android phones. Find one you like and are comfortable with rather than using the over-used preloaded filters available on Twitter and Instagram.
8. When All Else Fails: Quantity Over Quality - When you are trying to take pictures of a dish you are actually preparing for a meal, all of these tricks sound great, but there is little time to shoot photos while pots are boiling over, kids are yelling, dogs are barking, and hubby is losing patience. It is much better to take too many pictures than to miss a shot altogether. This is when you just start shooting and hope to get something usable before everyone has eaten your blog post!
 9. People, Yes People - Pictures of folks actually chowing down on tasty food are a good thing, but always be sure to get their permission before posting on your blog or social media sites. Try including photos of hands when your friends get tired of looking like pigs on your Facebook wall.
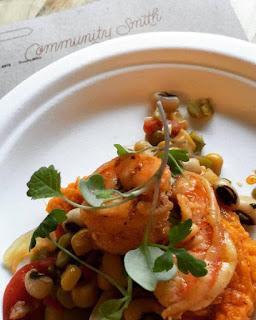
10. *Bonus* Backdrop Tip - At a restaurant, place a napkin or menu under the plate and alter the angle of the shot to get the restaurant name or even the name of the dish in the photo. This is especially helpful if you are at a food festival like Taste of Atlanta where you are photographing dishes from more than one source.
Don't forget to enjoy the view from beyond the camera screen. And, taste the food! You'll need to be able to describe it to your readers!

