Check out part II
Collections
Now that you’ve made a set and a template, you’re ready to start thinking about organizing your sets and favorite items into collections.
A collection allows you to put both sets and items together onto a page. You can have a description for your collection, as well as a slideshow option.
Why should I make a collection?
- Collections are awesome for organizing your sets and favorite items.
- You can label collections by certain themes.
- Both your own sets and items as well as others from the Polyvore community can be included in your collection.
- You could showcase your fan’s sets that includes your products in a collection of yours.
A collection by Polyvore composed of sets
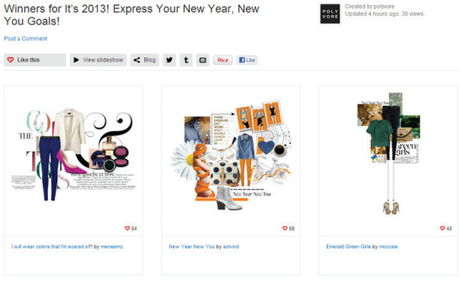
How to create a collection
Step 1 – Move your curser over the “Create link at the top of the homepage of Polyvore.

Step 2 – You will see a drop-down menu. Click “Collection.” You will be directed to the set application.
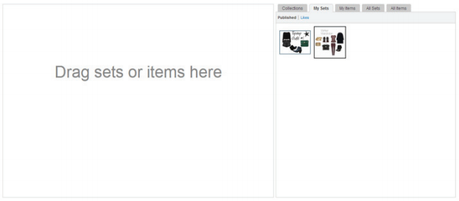
Step 3 – Your sets will appear under the tab “My Sets” as seen above. You can drag them to the collection and drop them as you would on a set.
- The other tabs to choose from are:
- Collections (your collections)
- My Items
- All Sets (other member’s sets)
- All Items
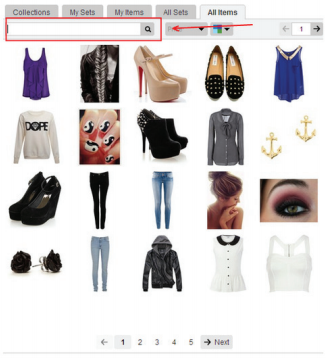
You can browse “All Items” as you would on a set as well, just without the categories. You can browse the items shown initially or do your own search in the search bar.
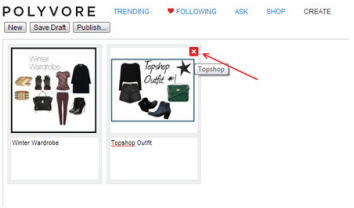
*NOTE: To delete a set or item from your collection, simply highlight the unwanted item and an “x” outlined in a red square will appear in the right hand corner of the image.
Step 4 – If you’re having troubles inserting items or sets into the canvas (see Glossary), refer to Chapter 4.
- You can add descriptions of the images you put on the canvas.
Step 5 – Once you are satisfied with the collection, press “Publish.”

Step 6 – A pop-up box will appear, and you will be prompted to fill in the name of the collection.
The option to making a description and enable sharing is available. Click “Add quick share account” to connect to social networks like with sharing your set.
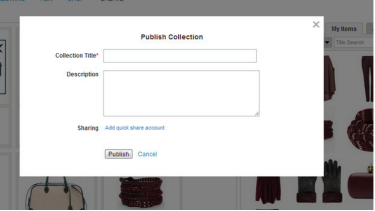
Step 7 – Press “Publish.” You’re done creating your collection!
The Mini Editor
What is the mini editor?
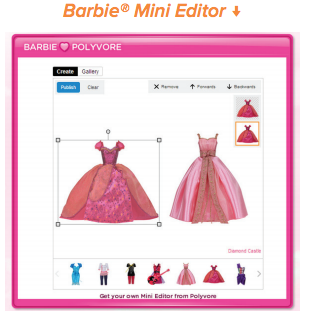
The Mini Editor allows customers and visitors to your website or blog to play around with your products and build outfits. It’s similar to a set – just simpler. It includes only your specific products as opposed to the whole scope of Polyvore.
Barbie® Mini Editor
How does using the mini editor benefit my business?
- Gives insight into how customers want to wear/accessorize your products
- Calculates which items are most popular and least popular
- Increases customer engagement
- Creates loyal readers and potential leads
How should I use the mini editor?
For instance, you could be trying to make customers aware of your spring collection.
You could install a Mini Editor on your homepage equipped with your spring merchandise. Then add a caption along the lines of, “How would you wear our new spring collection?”
People who visit your website (such as customers or potential leads) will be intrigued by making outfits out of your merchandise.
Make sure to update your social networks when you add new items to your Mini Editor. Fans will anticipate the release of new merchandise to play around with.
Installing the mini editor
Step 1 – First, start by clicking here: http://www.polyvore.com/cgi/minieditor.config?nosplash=1
Step 2 – Click the “My Items” tab.
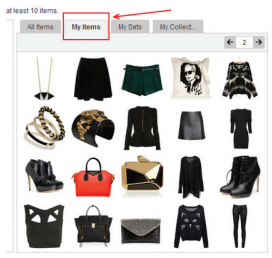
Step 3 – Drag your items onto the canvas as you would with a set, template or collection. You will have to upload at least 10,
and no more than 100.
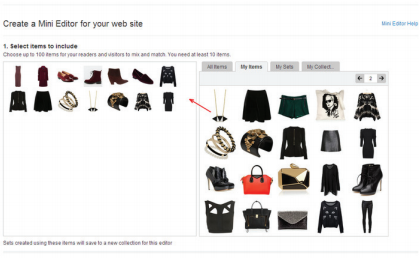
Step 4 – Once you are satisfied with the items in your Mini Editor, scroll down. There will be a current preview of how your
Mini Editor will appear.
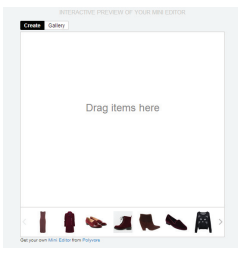
Step 5 – Scroll down again. Now you can customize the look of your Mini Editor.
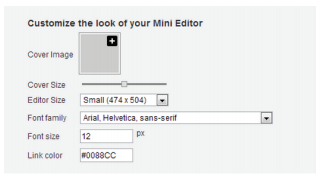
Step 6 – Think of a name for your Mini Editor, and review the Terms of Service.

Then, press “Get code.”
Step 7 – Copy and paste the following HTML code into your website’s template exactly as it appears. You’re finished!
