One of the pains of becoming a “location independent” traveler is figuring out what to do with all your stuff. At some point you’ll have to make some sacrifices and sell off or giveaway pretty much everything you own but what do you do with those remaining things that are either too important or to practical to get rid of? Some travelers have the benefit of a friend or family members house or garage, but in our case the only choice we had was to find a long term self storage unit. We wanted to share our experience with you and share our tips for finding and packing a long term storage unit.

Step 1 Finding Self Storage Units
The first step in the process is to find self storage places in your area that are going to be cost effective for you. In my experience, living in large cities, you are typically best off finding a self storage unit that is both off a major highway (for easy access later when you need it) and as far away from the city center as possible. Being off a major highway will help you in the future when you need to return to your storage unit to either trade out clothing, access supplies, or add a few more items that you’ve collected in your travels. Going outside of the city does one key thing for you; save you money. Property is cheaper in rural areas so the rent for the storage unit will be cheaper as well.
Step 2 Getting Rid of it All
Once you’ve found the location and size of your storage unit you have to get rid of everything that won’t fit in it. For that you need a 3-pronged approach. Firstly sell all your large pieces of furniture and high value items on Craigslist. I don’t personally like Ebay very much as they charge you a lot of fees, and shipping can be difficult and cut down on your profits. Secondly, have a yard sale, a BIG one, and don’t be stingy. Your goal here is to sell everything so don’t be cheap and get what you can for your stuff. Thirdly, donate, donate, donate. Look for a Goodwill or Salvation Army in your area and donate the rest of your stuff. Don’t forget to ask for a receipt to take advantage of the tax write-off.

Step 3 Packing it all up
Once you’ve gotten rid of everything you don’t want it’s time to pack up everything that you have left. The key here is to do a really good job sorting and labeling. That way, when you have to go back into storage later you can quickly and easily find what you need. For us, we packed our clothing and supplies that we would need ( like winter and camping gear) in easy access plastic tubs or suitcases, and put everything else in boxes.

Step 4 Moving it all in
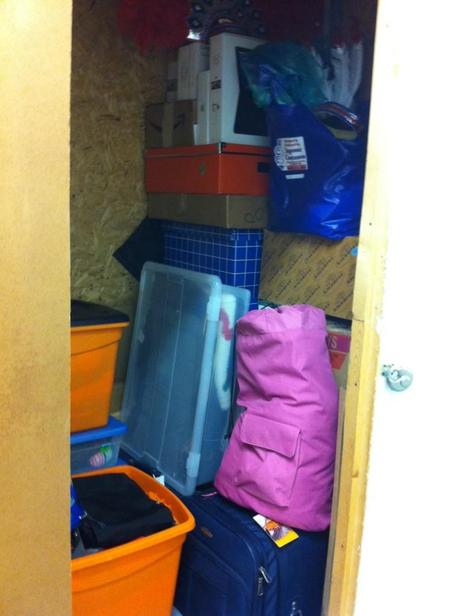
The last step is moving it all into a self storage unit and packing it properly. The key to being able to use all of the space in a unit is to pack boxes all the way to the ceiling. If you don’t, you’ll find that you won’t get the best bang for your buck. Also, make sure to pack the things you wont’t need to access in the back corners of the unit. Put the largest and heaviest boxes on the bottom to form a base, and use the small boxes for stacking. Make sure to leave the space in front for your suitcases and tubs of clothing for easy access. When you’re all done it should look like this picture!

This is what our self storage unit looked like when we were done.
