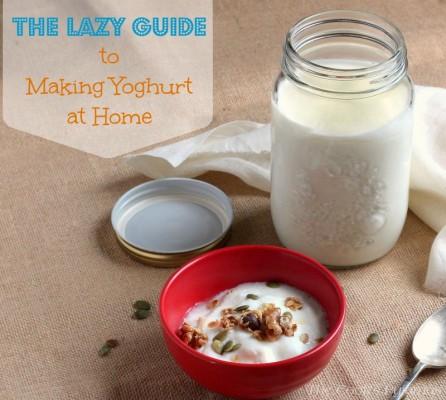
There seem to be as many ways to make yoghurt at home as there are people who make it. A quick search of the internet turns up methods for making yoghurt in thermoses, glass jars, slow cookers, ovens or even your Thermomix. All of them will tell you that a yoghurt maker is not required to successfully make yoghurt at home. Which is absolutely correct. Unless you are lazy, like me. I use a yoghurt maker.
Most yoghurt recipes require milk to be heated to approximately 40C before the yoghurt culture can be added. The milk must then somehow be kept warm (but not too warm) until the milk becomes yoghurt. I have better things to do than hover over a saucepan with my thermometer trying to achieve that temperature sweet spot. I invariably overshoot it, then I have to wait for the milk to cool (but not too much) which requires more hovering. Then I have to find somewhere warm to incubate the yoghurt, which is difficult in a house that is blissfully cool through most of summer and feels like an exposed Antarctic ice sheet in winter.

I bring my milk just to the boil, then allow it to cool to lukewarm before adding the culture. Heating the milk to this higher temperature has a two-fold effect. It denatures (breaks down) the milk proteins, resulting in a thicker yoghurt, and it also destroys any bacteria in the milk that may compete with the yoghurt bacteria during the culturing process. Using this method, I don’t have to hover with my thermometer but rather rely on the visual queue of the barely boiling milk. I often allow the milk to cool completely before adding the culture, but using the yoghurt maker ensures that the milk will be held at the correct temperature. It just takes a little longer if you start with cool milk, but I usually make yoghurt overnight so this is never an issue.
Which brings us to the inevitable question. Why bother? Isn’t it cheap and easy to buy? The answers, as always, are cost and control. I can buy a liter of organic milk for $5, which I can then turn into additive free yoghurt. I cannot buy a liter of organic yoghurt for that price. Most shop-bought yoghurt contains added milk solids (known to the rest of us as milk powder) to give it a creamier texture and to assist with thickening. I consider milk solids to be just one more additive that I don’t want to be eating. By making my own yoghurt I get to control what is in it. Milk powder is added in both commercial and homemade yoghurt to thicken the yoghurt and give a creamier end result. Yet I seem to be able to make thick and creamy yoghurt at home without additives by focusing on the way I heat my milk and selection of my yoghurt culture .

Store bought yoghurt is frequently used as an initial culture, with a small part of each successful batch used to start the next batch. Every commercial yoghurt uses slightly different yoghurt strains. Some are creamier than others, so find one you like and use that as your starter. Just don’t expect the homemade product to be identical to the store bought, particularly if you are not adding milk powder. I use freeze dried cultures from online sources for my starter. Each company offers slightly different cultures, which appeals to my sense of experimentation. I am still to find one my family really loves, but I am currently using this tangy one and am quite happy with it.
Overwhelmed yet? Don’t be, it really is easy. I make yoghurt at least three times a week, with limited effort on my behalf. It should take you no more than five minutes to heat the milk and add the cultures. If you don’t want to invest in another gadget for the kitchen, then there are plenty of other methods online that you can use. But if you want to follow my lead and be particularly lazy about it, you will need a yoghurt maker.
The Lazy Guide to Making Yoghurt at Home

I time making my yoghurt so I can leave it to culture overnight. I boil the milk in the afternoon/evening and then set the yoghurt maker going overnight. Author: Tania @ The Cook's Pyjamas Ingredients
- 1 liter full cream milk
- 3 Tablespoons yoghurt or powdered yoghurt culture.
Instructions
- Put the milk in a small saucepan and put on a medium - high heat.
- Bring the milk slowly to the boil.
- Once it comes to the boil, immediately remove the pot from the heat and set aside to allow the milk to cool.
- When the milk is luke warm (less than 40C if you want to use your thermometer) pour it into your yoghurt container.
- Vigorously whisk in the yoghurt or the powdered culture and then place in your yoghurt maker.
- Allow to culture for 6-8 hours or until the milk has thickened and set. I usually leave mine overnight, for at least 12 hours.
- Remove from the yoghurt maker and allow to cool slightly before storing in the fridge.
Notes The longer you allow your milk to culture, the tangier your yoghurt will be. If you culture it for too long, the yoghurt will start to break apart and separate.
If you want thicker yoghurt, then line a sieve with muslin and drain the yoghurt to remove some of the whey.
I have often boiled the milk and then allowed it to cool completely (because I forgot about it). I just pour the cold milk into the jar, whisk in the yoghurt and put it straight into the yoghurt maker. The appliance raises the milk back up to the correct temperature. It still makes yoghurt this way. 3.2.2499
