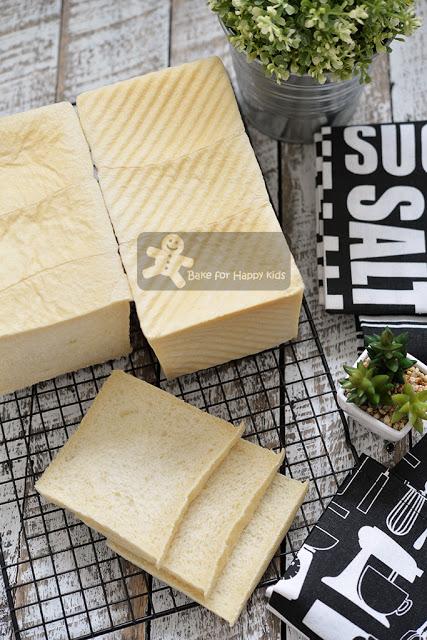
Remember the Super Soft Sandwich Bread that I have baked at here?
Through this bake, I have discovered that these sandwich breads are equally amazingly soft even they are made with or without overnight starter culture. And it makes me wonder... Is the addition of the overnight starter culture really necessary to make bread super soft? Hmmm...
Remember the Super Soft Sourdough or Overnight Starter Sandwich Breads that I have baked at here?
This recipe has been doubly and triply tested and has produced ultra super duper soft breads with either sourdough or overnight starter culture! And I wonder... Can this bread recipe with 40% less butter make super soft sandwich breads without any starter?
Guess what? My answer is YES!!!
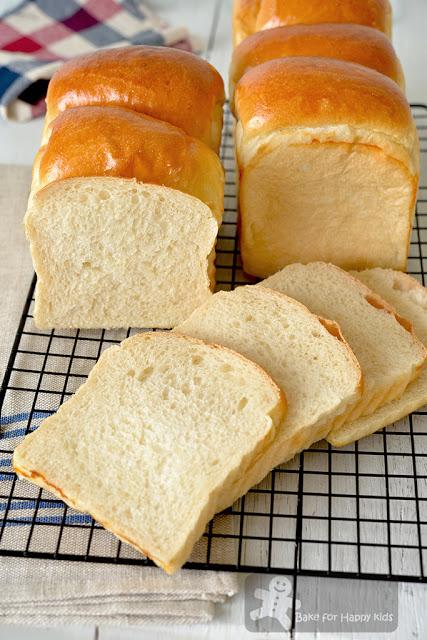
Super Soft Sandwich Bread with NO Overnight Starter Recipe TWO
Once again... I would HIGHLY HIGHLY HIGHLY RECOMMEND this recipe!!! LOL!
Now, I know that I can bake these fuss-free super soft sandwich breads without any starter.
Plus, I have also discovered that this recipe can bake super soft white crusted sandwich breads!!!
This recipe can also bake these super soft white crusted sandwich breads
Apart from these breads, I have baked similar super soft white crusted Japanese-style sandwich breads before using another recipe at here which says that I had to do these:
1) use a combination of bread flour and cake flour, milk and 30g light corn syrup per bread.
2) place the breads on a baking tray that is lined with 4 layers of baking papers.
3) bake the breads at a reduced oven temperature, 160°C.
4) place another baking tray on the bread pans after 15 mins of bake and continue to bake at an even lower oven temperature, 140°C or 120°C fan forced.
5) bake longer for 40-45 in total.
Hey!!! I don't have to do all of these steps to bake white crusted breads anymore!!!
Why? Why are these breads so soft? Why are the crusts so pale white and soft?
Well, it's the recipe!
Compared to recipe One at here, this recipe with 15g more water, 20g less honey and 15g less milk powder makes the bread less likely to brown at their sides... So effective that even less 40g added butter won't make the breads any less softer!!!
Having said that, it is an absolute MUST to use Pullman pans if you want to bake these breads with soft white crusts. Without the lids, your breads will be still soft but the top crust will be golden brown like the sandwich breads shown in my video and the first picture.
Plus, I have to mention that the white crusted sandwich breads aren't perfect square with a little overhang at their top edges! This is because the breads even with a reduced amount of dough will rise excessively during baking and will shrink slightly after cooling.
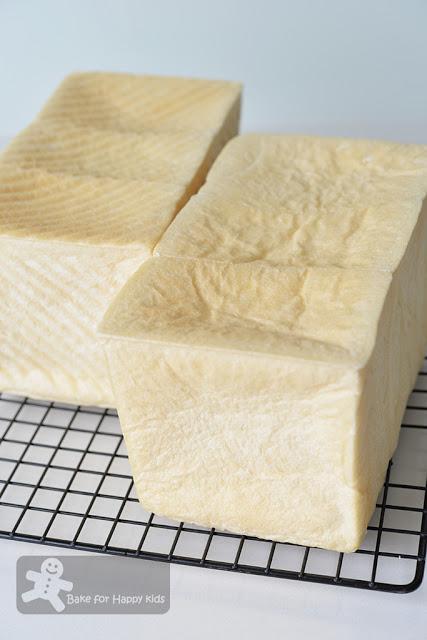
Happy!!!
I have discovered that this fuss free recipe can bake these impressive white crusted sandwich breads!
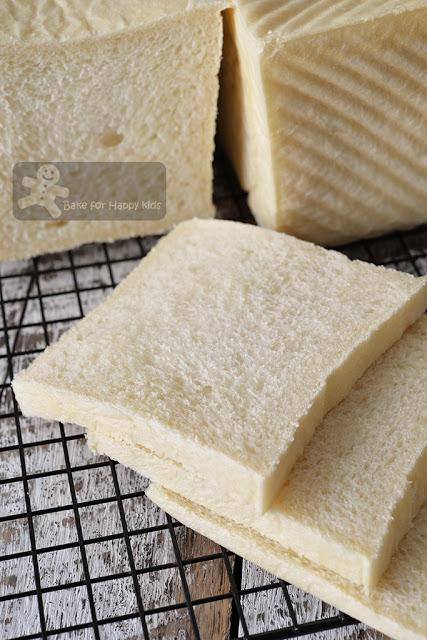
Every part of the bread including the crust is so soft!
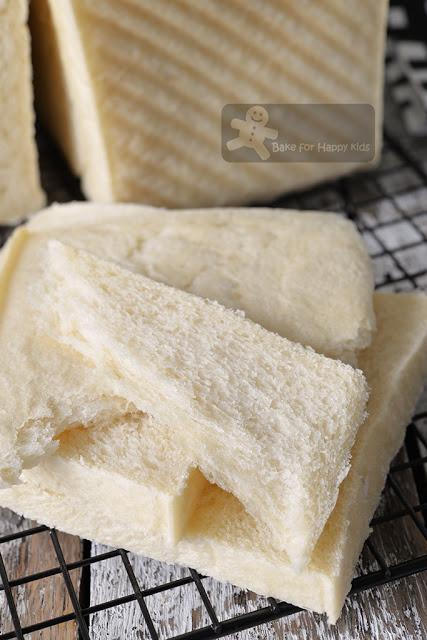
Can you believe that this cottony soft slice is actually the crust of the bread?
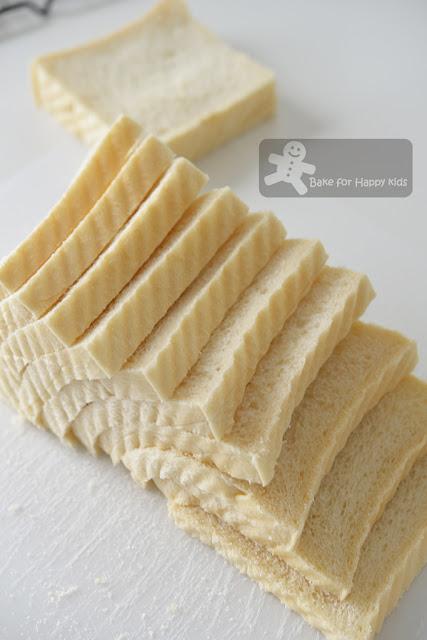
With NO sourdough or overnight starter, this bread is still so super soft!!!
So soft that every slice has to drape over each other!
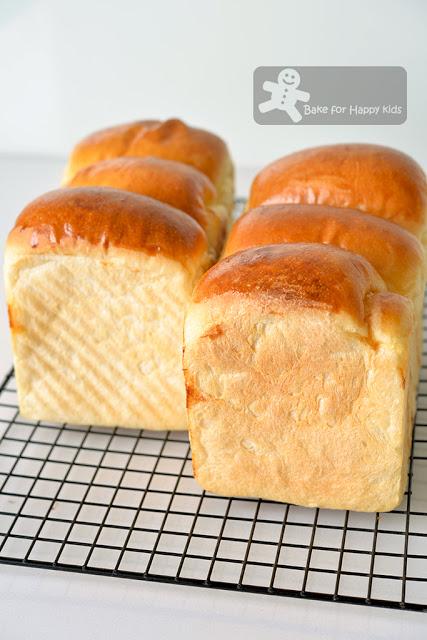
The white crusted breads aren't perfect square and will shrink slightly after cooling...
So this is why the perfectionist me prefer to use this recipe to bake these breads with soft golden tops.
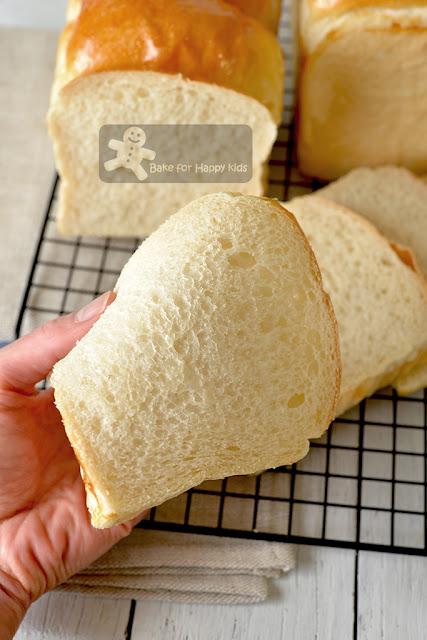
It is still so super soft!!!
So soft that every slice drapes over my hand when I handle it!
From this and my recipe one at here, I have somehow confirmed that the use of starter culture won't make any breads softer but it is necessary to add sourdough or overnight starter culture if you want your breads to be enhanced with a nice fully-fermented sweet sourish taste and fragrance.I have learned that it's actually the composite of the bread and the baking technique that make the breads super soft and tender!
That's good to know!!! ... because making overnight starter culture can sometimes be a hassle!Next, I will apply my NO-overnight-starter theory to other sandwich bread recipes?
Interested to know more?
To get the latest updates, you can follow me at either my Facebook at here or here or my Instagram @zoebakeforhappykids
If you like my recipes and my blog, please LIKE, SHARE and FOLLOW me my Facebook at here or here or my Instagram @zoebakeforhappykids because every LIKE, SHARE and FOLLOW from you will motivate a hardworking working mom like me to bake and share more! Thank you for your support!!!Here's a video showing how I baked these super soft breads and you will see that there is no special steps required. It's the recipe that matters!
Here's the recipe.
Make two 10 x 20 cm or 450g loaves
Note: You can use half of this amount to bake just one loaf.415g water at room temperature about 25°C / 75°F
25g honey650g bread flour with about 12% protein
25g milk powder - please do not replace this ingredient and water with milk.
8g salt
60g unsalted butter, soften at room temperature
2 tsp instant dry yeast
Options:
(1) Super Soft Sandwich Breads with top golden crustsrequire egg wash that contains 1 egg yolk and 1 tbsp milk
(2) Super Soft White Crusted Sandwich Bread
require two 10 x 20 x 10 cm Pullman pans with top lids
IMPORTANT: It is an absolute MUST to use Pullman pans if you want to bake these breads with soft white crusts but the square loaves will not be perfect as they will rise excessively during baking and shrink slightly when they are completely cooled. Without the lids, your breads will be still soft but the top crust will be golden brown and the breads will not shrink significantly less.
extra butter or vegetable oil spray to grease the loaf pans (plus the pullman lids if required)
extra bread flour for dusting and shaping but please use the minimal amountIf you are using a breadmaker to knead and prove, add all ingredients into the breadmaker according to this order. Use "dough" setting to mix and knead dough for 30 mins or until the dough is elastic and allow the dough to prove for 60 mins.
If you are using an electric mixer with an hook attachment to knead, combine all ingredients except butter in the mixing bowl and mix at low speed until a soft dough forms. Then, knead in the butter until incorporated. Continue to knead at low speed for at least 25 mins or until the dough is elastic. It is important that the dough has to be elastic and stretchy. Cover the dough and allow the dough to prove in a warm and humid place for about 60 mins or until doubled in size.
Please do not knead dough by hand as it is very sticky at the first 15 mins of kneading but it will become smooth and stretchy after sufficient kneading.
To shape the dough into bread loaves:
Grease 10 x 20 cm loaf pans (plus their lids if required) with butter or vegetable oil spray.Divide dough into into 6 equal portions. Shape all portions of dough into smooth balls. Allow them to rest at room temperature for about 10 mins.
Using a lightly floured rolling pin, roll each portion into long and flat oval shape (about 20 cm) on a lightly floured non-stick surface. Use your fingers to pick one shorter side of the dough and tuck and roll the dough like a Swiss roll. Use the rolling pin to flatten and roll the dough into a long rod shape. Then, pick one shorter side of the dough and roll it like a Swiss roll again. Repeat this rolling step with the remaining portions of dough.
Place three rolled dough with their seams side down into the each prepared pan. Press the top of the dough lightly to form an even surface. Allow the dough to prove in a warm and humid place for another 60 mins or until the dough is going to reach the maximum height of the loaf pan. Cover loaf pans with lids if required.
If you are baking the breads without the lids, combine egg yolk and milk to form an egg wash. Brush bread dough with egg wash and bake in a preheated 180°C (350°F) oven for 25 mins or until thoroughly baked. If your breads are becoming brown too quickly, cover the breads very loosely with aluminum foil at the last 10-15 mins of bake and continue to bake until thoroughly baked.
If you are baking the breads with the lids, bake at a preheated 180°C (350°F) oven for 25 mins or until the breads are thoroughly baked inside. Remove the lids and the breads from the loaf pans immediately and transfer onto a wire rack to cool completely before slicing and serving.
To store, wrap tightly in plastic wrap and keep at room temperature for 2-3 days or freeze in serving portions for 2-3 months.
Happy BakingPlease support me and like me at Facebook...
