**We’re smack dab in the middle of a fantastic Mother’s Day Giveaway. Quick and easy to enter HERE.**
Abby told you Monday about a Pinterest Challenge hosted by Sherry (from Young House Love) and her blog-pals Katie, Emily and Renee.
Basically it’s an idea to actually do something that you’ve pinned on Pinterest.

Because we had a toddler birthday party a few weeks ago.
And Pinterest saved the day!
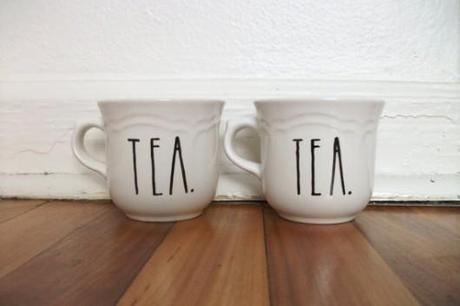
Have you seen these?

I just love them.
I love the simplicity of them.
I love the re-use of thrift store finds of them.
I love how personal they could become.
And I was looking for something that I could use to personalize the place settings for twelve littles.
Which is what sent me scouring thrift stores for white cups.
And then had me spending two hours decorating them after midnight the night before the party.
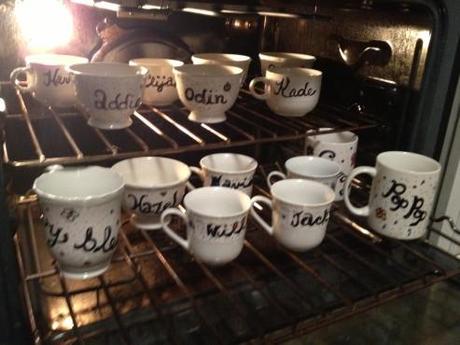
This is what I came up with …

See the mixed and matched sets? I found four different batches of cups. A few tiny ones (for the babies). Four “manly” ones for the boys. Six that reminded me of Alice in Wonderland (which I used for the girls). One “special” one for the birthday girl and two straight-up mugs for Grammy and Pop Pop (drove 18 hours from California to be here for the party). And each cup cost between $0.25-$0.50.
I had read some lame reviews of the “sharpie on a porcelain cup” process so I needed to switch things up a bit to make sure this worked. (Most of the “fail” attempts seemed to include an oven on 350 degrees F and only 30 minutes in the oven.
So this is what I did:
Used a Sharpie and a few colored Ceramic Paint Pens (that I already had) to write the names and create designs on the cups. I found it easier to do the basic design with a Sharpie and then fill in spaces withe the Ceramic pens.
Put all the cups in the oven (don’t pre-heat the oven) … you want the oven to heat up at the same time as the cups so the cups don’t crack.
Turn the oven on 450 degrees F.
When the oven hits 450 degrees, turn on the timer for 45 minutes.
After the timer goes off, turn off the oven and leave the cups in the warm oven to cool overnight.
In the morning, I washed the cups and filled them with popcorn and topped each table-setting with a cup … the cups served as place-holders and popcorn bowls and as the “gift-bag” item for our party.
Did I take a photo of the final table settings?
Um …
Oops …
Anyway … so … for $7 we decorated the birthday table and had cute and personal gifts for our guests.
I love Pinterest!
NOTE: Since the party, our cups have been in the dishwasher and used at least once a day and the designs are still “permanently” etched on the porcelain. No problems here … the only thing I will say is that the ceramic paint pens do change color a little in the initial heating process … the pink that I used turned a sort of “burnt red” … but still pretty and no one (not even the pink-obsessed birthday girl) seemed to notice or care.
- Jeanne
