If you are new to Project Life by Becky Higgins, pls click HERE1. COLLECT APP
I am so grateful for the existence of Collect App. I can store my photos daily and it has a daily reminder for me to do so too. How awesome is that? This app is set up to export a 4"×6" or 3"×4" print. You can also store more than a photo a day. And of course, before I store my photos into Collect app, I will edit my photos at Pic Tap Go and also other photo editing app.

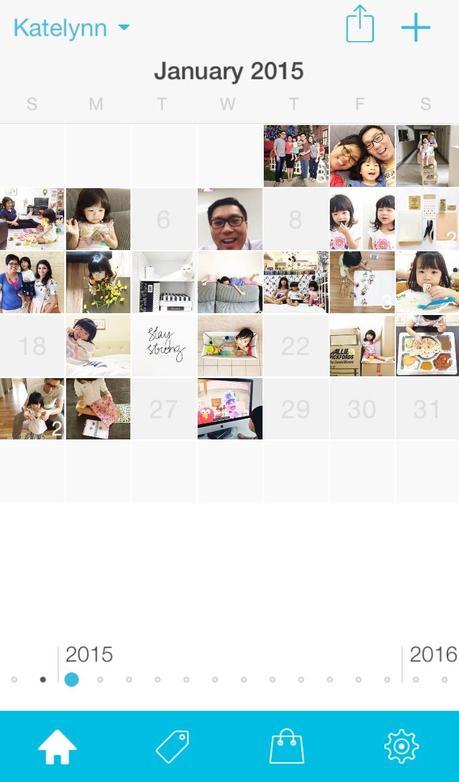
My personal goal is not to input photos daily but to document whenever I can. Well, we all know that staying at home most of the time won't result in taking photos daily. Haha.
TIP > To include the journaling right below your photo, you have to type it at the title column instead in the notes column.
Exporting Photos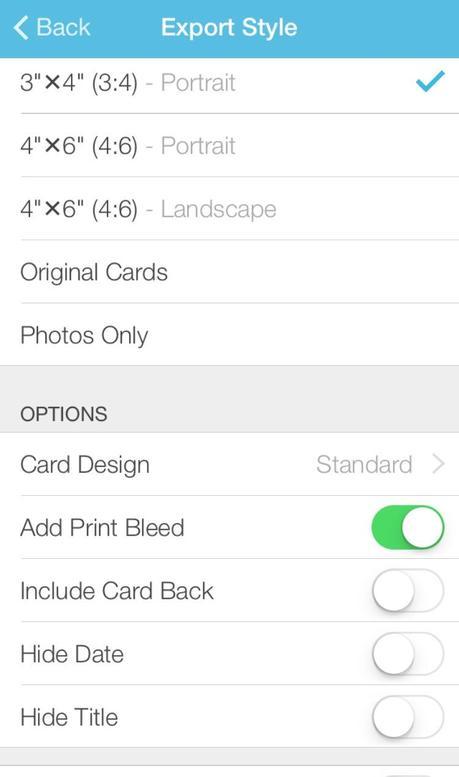 Once you tap on the arrow at the right top of the monthly view, it'll lead you to the Export Style. At the Export style, I'll choose 3"x4" (3:4) - Portrait & on the add print bleed with the Standard card design. Add print bleed so that your photo will not have gray border. I export all my photos (seldom single) to Dropbox simply because I do my printing on the desktop. At the Dropbox, you will find your photos in the folder called Apps. By using Dropbox, it will ease the process especially transferring photos.TIP > To export the proper card from the Collect App, you must use the paid version. It only cost $1.99! You'll never regret it! _______________________________2. CANON SELPHY CP900I bought this printer almost 2.5 years ago. It has a wireless printing option. I absolutely love it because it is so convenient. I can print anytime! Really... it is not too expensive to print photos at home. The best part is the ink + photo papers (4"x6") are sold in a pack. It is also finished with a nice laminating coating. Absolutely worth investing in!You may refer to this link to take a peek on how the printer works : http://instagram.com/p/xWqKQlG6Ic/?modal=true Printing ProcessOnce I download all the photos from Dropbox to my desktop, I'll open up the Canon Selphy Photo print program. The CD program is included in your selphy purchase. Just upload it into your desktop.
At the Selphy Photo print program (be sure your printer is on), I choose layout print with the bordered option. Select bordered x2 and you can input two photos into one photo paper. Basically that's how I got a ticker border for my photos. TIP > For android users, you may want to consider the latest Selphy CP910. ___________________________________3. PROJECT LIFE PAGESIn 2014, I decided to create bi-weekly pages instead of weekly. It was taxing when I first attempted Project Life back in 2013. To be honest, I have yet to complete 2013. Therefore I decided on the bi-weekly system. So happy that it worked very well for me in 2014. Yes, I completed 2014! Will tackle 2013 someday :p
The Creative Process
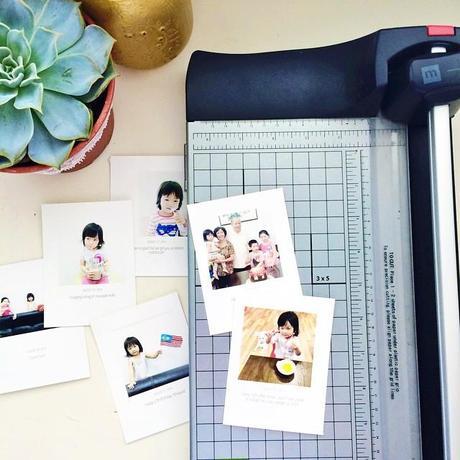
After printing the photos, I will cut them into half with my faithful Making Memories trimmer. Next, I will lay the photos according to the dates on top of the pocket pages. I use the Becky Higgins photo pocket pages Design F. Laying the photos onto the pocket pages will give me a better visualisation on how I would like my photos to be arranged. Once that is done, I will position the base of the cards or project life cards. And once I am happy with the position of photos & cards, I will slot them into the pockets so that I will not forget the position.TIP > Snap the position of your photos & cards by using your camera phone so that you may refer later. I keep each card with a simple + clean concept. That way I do not spend too much time on each page. It's not easy to 'steal' time when you are a stay-at-home-mum with a sticky toddler. It's definitely helpful when you pull out all your supplies before you begin so that you don't have to spend too much time looking for that certain papers & embellishments. You may also want to consider to work with the same collection or certain color scheme, that way will save you time too. This will make your pages look cohesive.
Project Life is never meant to be difficult or super time consuming. All you have to do is to spend some time in one the weekend, get your photos sorted & printed, decorate the cards and you are good! In a month, I'll print my photos in 2 batches since I do bi-weekly. Be in a system that works for you. Most importantly be consistent. Once you lost the momentum, it will be hard to catch up. ________________________________
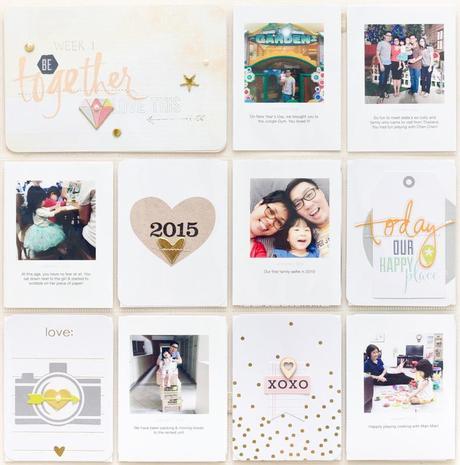
Here are my pages for Week 1, 2 & 3. I used the Project Life Heidi Swapp Gold Foil kit + September Skies ephemera. They matched perfectly & I really had fun decorating my cards.
Project Life Week 1
______________________________
Project Life Week 2 & 3
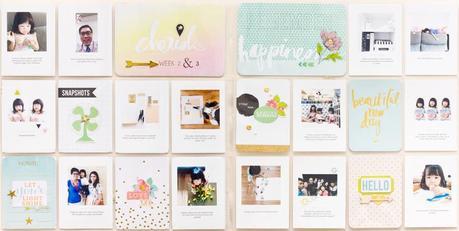
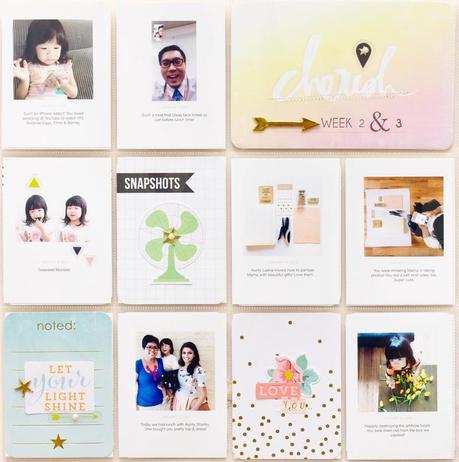
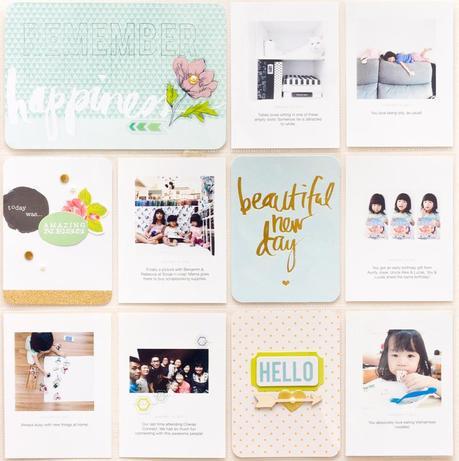
I hope you have a better idea on how I created my project life pages now. I absolutely love the Project Life concept because the thought of sharing this to Katelynn when she is older makes it worthwhile!
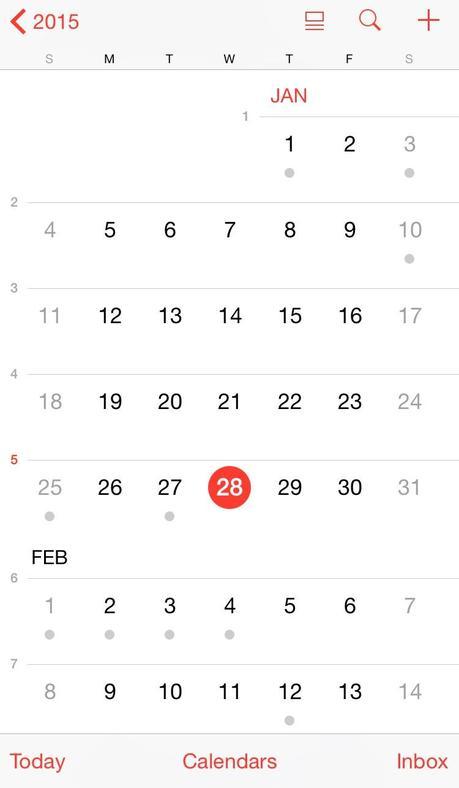
Go to Settings > Mail, Contacts, Calendars > Week Numbers (swipe on)
_________________________________
If you have any questions, please feel free to leave them at the comment section.
Thank you so much for coming by!
Xoxo Jessy
