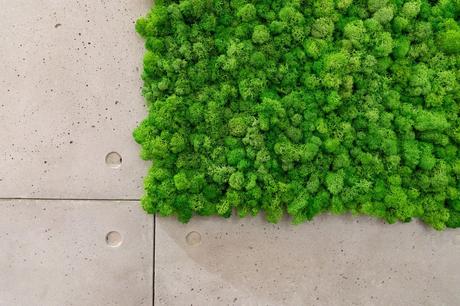
Imagine a piece of nature in homes and offices, where greenery effortlessly meets your space. It may sound like a dream, but we're about to make it real with preserved plant walls. No need for gardening skills or high maintenance - we'll show you how to bring nature indoors. Those creations are part of the increasing trend called " biophilic design ".
You can buy wholesale preserved moss in various textures, colors, and quantities, making it a cost effective choice for your preserved plant wall project. Whether you're working on small or large-scale projects, sourcing your moss in bulk ensures you have an abundant supply to work with and allows you to experiment with different types of moss to achieve the perfect look for your indoor green oasis. You can easily store the unused moss until the next project.

Image by wirestock on Freepik
Before diving into the creation process, let's gather what you'll need. You won't require a green thumb or complex tools for this project; it's surprisingly simple and achievable for anyone.
Here's what you'll need:
Materials:- Preserved moss (in your preferred colors and textures)
- A suitable frame or backing board (We recommend using MDF panels)
- A strong adhesive (more on this later)
- A measuring tape
- A level
- A pencil
- A paintbrush (for cleaning)
- Some creativity and patience
Preserved moss comes in various types and colors, allowing you to customize your plant wall. You can choose from reindeer, flat, ball moss, and more. Each type has its unique texture and appearance. Take your time selecting the right moss that suits your aesthetic preferences.
Choosing a suitable adhesive is crucial to create a preserved plant wall. We recommend using PVC or vinyl floor glue, preferably solvent-free. This ensures that your moss stays firmly attached to the backing board.
Now that you have your supplies ready, it's time to start building your preserved plant wall:
#1 Measure and markUse your measuring tape, level, and pencil to mark the area on your wall where you want to install the plant wall. Ensure it's level and centered.
#2 Design your projectIt is important to work flat and to screw the plates to the wall after having glued the plants. Draft on the board how you want to organize your moss to achieve the desired effect (if you are using different varieties and/or colors). Let your creativity flow.
#3 Apply GlueUsing a paintbrush, evenly apply a generous amount of adhesive to the backing board.
#4 Arrange Your MossStart placing your preserved moss onto the adhesive-covered backing board respecting your draft.
#5 Let It DryWait for a minimum of 12 hours to dry before planting foliage or flowers.
One of the best things about preserved plant walls is that they are maintenance-free. Unlike living plant walls, they don't need water, sunlight, or pruning. However, dust your plant wall occasionally with a soft brush to keep it fresh and vibrant.
Preserved moss walls can last for several years with almost no care. They are an excellent choice for low-maintenance greenery indoors. However, they last longer if they are not exposed to the sun or heat.
Creating a preserved plant wall is a very lucrative project. With suitable materials, a bit of creativity, and a touch of patience, you can transform any space into a green heaven. Don't underestimate the benefits of having indoor plants!
Buying wholesale preserved moss in bulk ensures you have an ample supply for your preserved plant wall but also allows you to save money compared to purchasing smaller quantities.
Create a calming atmosphere in your workspace or home with a stunning plant wall. Get started on your green journey today!
