Whether you want to sell your iPad or give it to a family member, it’s always a good idea to erase all data on your device and restore it to factory settings. This way, no one will have access to your photos, personal information etc.
NB: Before you go through with this, you should definitely back up your data, because once you reset your iPad, everything will be gone. You can make a backup easily by using iTunes: connect your iPad to your computer, click on iTunes and then on the name of your iOS device. In the Summary screen, find and press the Back Up Now button.
Moving on to the resetting process.

It is wise to back up everything before pressing the Reset button.
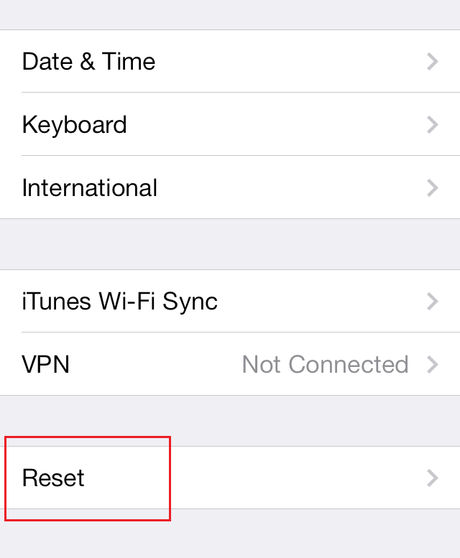
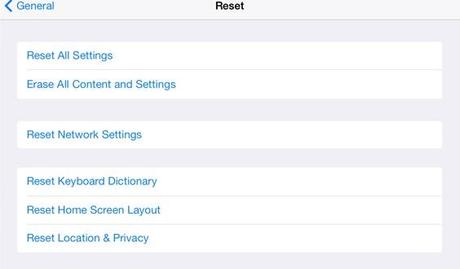
First, go to Settings>General and tap Reset. Six options will appear: reset all settings, erase all content and settings, reset network settings, reset keyboard dictionary, reset home screen layout and reset location and privacy. We’re interested in the first three options.

You can reset your iPad partially or completely and remove all Wi-Fi networks.
1. Reset All Settings – just like the name suggests, this will reset all settings and preferences, but will still keep some of your data (Contacts or dates in your Calendar).
2. Erase All Content and Settings – if you want to take this a step further, you will choose this option. It will delete everything on your iPad and you will end up with zero personal data. If you’ve set a Passcode and/or a Restrictions Passcode, you might be asked to provide that code and/or password in order to reset your iPad.
3. Reset Network Settings – this option will remove all your Wi-Fi networks. It’s also a good way to completely disconnect from any Wi-Fi network.
Your iPad will ask you to confirm the reset, in case you tapped the button by accident. When you press Erase/Reset, the process will start and you will have to wait a few minutes for it to finish. After that, you will have a clean iOS device on your hands.
This process can be applied to iPhones, as well.

