Hello Everyone | I get a lot of questions about my blog design and how I created it. Let me just say it took a lot of time to get my skills to where they are today. I have finally gathered my intelligence and created a blog-post series talking about creating a blog design and hopefully give you skills to carry on your blogging designing career. My skills are only limited to blogger templates, so you will have to do a little more research to get the template to suite your blogging platform. I
What do you want a custom blog design for your blog? // A blog is different from a Youtube, Twitter, Facebook, etc because it is your very own piece of the internet. Right now, you could go into your blog template, wipe it out, and your webpage will be just the color white. A blog design defines your style and catches the attention of the person who comes to your blog. I am assuming you write good content, you deserve to have a nice blog design. There is no reason not to have a good blog design. Now you might be asking yourself 'A nice blog design costs too much money.' That is why I am going to help you create the perfect blog design without spending any money. Once you learn how to do html/css you won't stop, its addicting.
Before moving on let's learn some important lingo we will be referring to in this post (note: these are my definitions, not the actual definitions)..
HTML // This is what gives the basic shape of your blog design. It tells blogger where the blog header should be, where to put the widgets, etc.
CSS // This is known as the style sheet. Its job is to make your blog all pretty by adding colors, fonts, etc.
Inspect Element // Right click anything on your blog and scroll down to inspect element. This will split your screen in half revealing your webpage and codes. This is what were going to use to clean up the blogger templates and remove all the unnecessary extras to the blogger template.------important----------
View Source // Ctrl + U will give you the entire html/css of your web page. A powerful weapon that should only be used for good. ( not used today )
Blog Container // It is the white part that holds your posts, widgets, header, etc. It is not a part of the background or the blogger navbar.
Now that we learned some basic lingo, lets move on to create your perfect base..... *CAUTION* Picture heavy post..get your bandwidth ready.*Note* The images are tiny and I am sorry for that. You can right click an image and click open image in new tab to look at it in more detail.
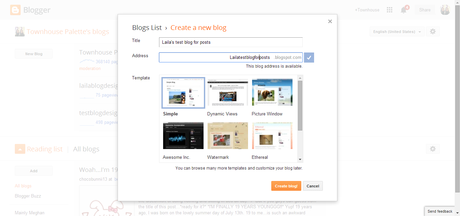
Step One: Create a new blog // We do not want to be messing with your actual blog, so create a new one and name something like..'so and so's test blog.' This comes in so much handy, whenever your in the mood to create a new blog design. I actually have two test blogs that have two different designs.
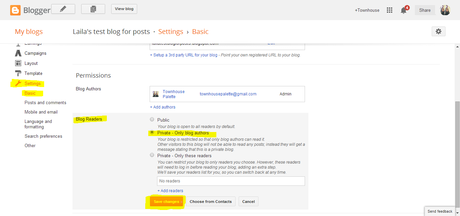
Step Two: Private Your New Test Blog // This way no one will see what your up to.
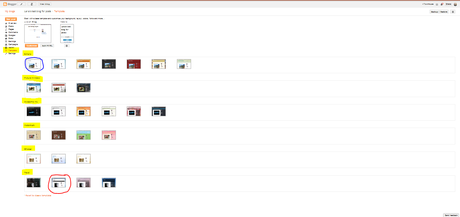
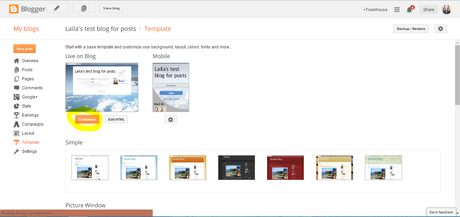
Step Three: Picking Your Base Template // I honestly hate all templates in blogger because they are just weird. So we have to pick a base template to go into and clean up to get that perfect white canvas. Many people choose the Simple Template (circled in blue), but I really like the Travel Template (circled in red). So that is what we will be using today.
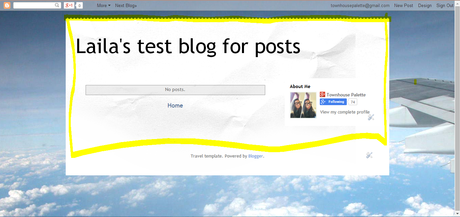
Step Four: Open Your Test Blog in a New Tab // Now let's examine what we are going to fix. The two things that stick out are the paper background in the container and the weird border at the top of the container.
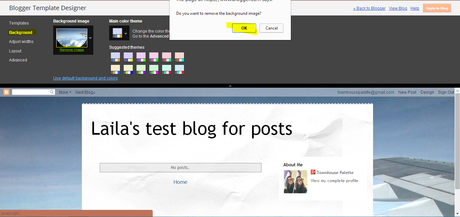
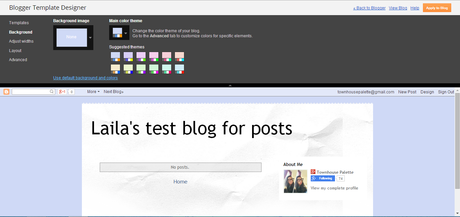
Step Five: Remove the Background // This is easy. Go into template-then customize--background-click remove background- nd you should get the light blue background you see below. Don't do a white background because we want differentiate between the background and container. Make sure to save and refresh the tab with your test blog.
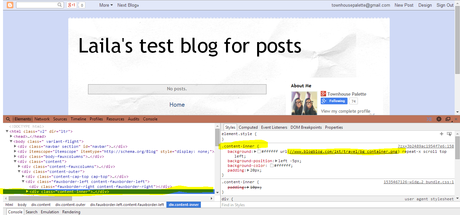
Step Six: Finding the Html/CSS of the Ugly Paper Background in the Container // We will have to use some of our problem solving skills to do this. Right click on the paper background and scroll down to Inspect Element. This is what will help us determine where we can find the picture in the html/css to remove it. As the screen splits (seen directly below) you have the left side which is HTML and the right side which is CSS.
If you hover over the left side you see that different parts of the webpage begin to highlight. We want to find the image. After poking around we find that the content-inner div is where the picture is located because if you go into the css there is a background image. Hover over it and it will show a png of the paper background. Let's remove it. Highlight .content-inner, if you can't highlight it then just remember it or highlight from here.
Step Seven: Starting to Remove the Ugly Paper Background Thing // Open up the html of your blog in a new tab. *Note* You should only have two tabs open regarding your test blog, the actual test blog url and the blogger page which is directly below.
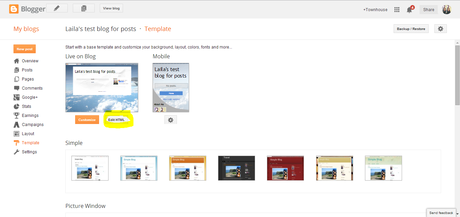
Go to template and click on edit html, which will take to the html of the website. When in the template there will be these three arrows. Start from the bottom/last arrow and click them. This will show all the css we will be tinkering with.
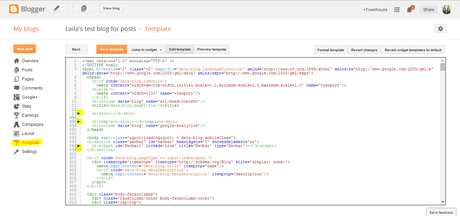
Step Eight: Actually Removing the Ugly Paper Background Thing // Click the text in the template, Ctrl+F in the template box, paste the content-inner code into the find box. Hit enter and it will take you to and highlight the areas that contain that code. We are trying to find the paper image, so we are looking for a url. Lets hit enter again...
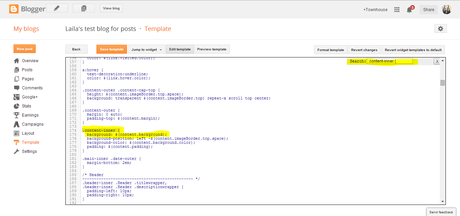
No url, so let's hit enter again.
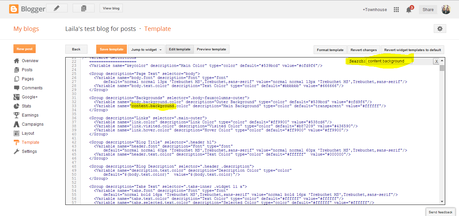
You should land in an area like this (below). The image url is circled in pink.
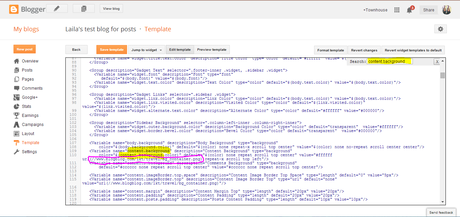
Delete what is in the parentheses, not the parentheses itself. Click preview template, so we can wittiness are hard work.
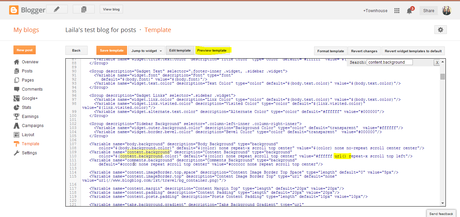
Ta-dah! The paper background is gone. Click save template to save your hard work.
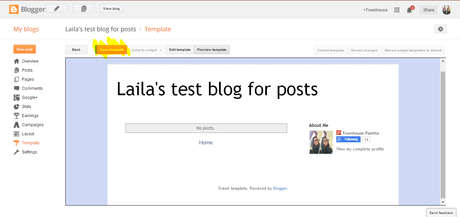
Step Nine: Removing the weird border at the top of the Container // Because we are tearing the entire blog design down, I also want to remove the squiggly-border at the top of the container. If you like it then keep it, it adds a bit of character to your design.
So let's use the same removal method as the paper. Go to your test blog url and right click on the weird border and scroll down to inspect element.
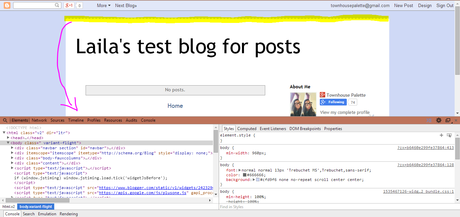
Scroll around the html, until you see the border highlighted.
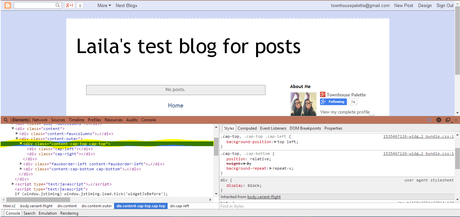
Ok, we have found where the border image is located....content-cap-top. Go into the html and search content-cap-top by using Ctrl + F.
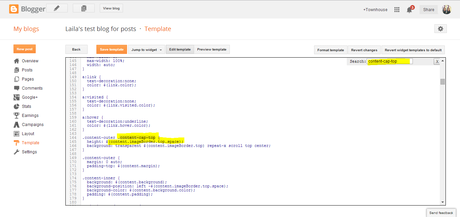
Hit enter a few times to until you find this code and circled in pink is the border image.
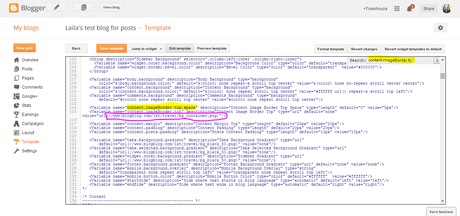
Remove the image code and remember not to remove the parentheses. Click preview template to see if the border is gone.
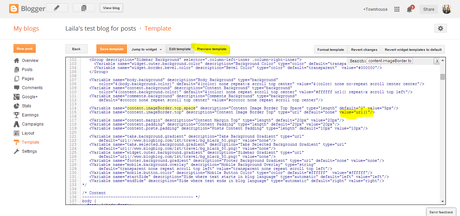
We have officially removed the weird border revealing a clean template.
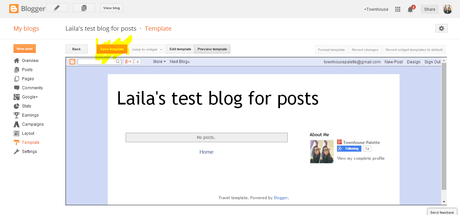
Step Ten: Removing Widgets // Let's go into layout and remove all of the two widgets that appear on the screen. The About Me widget is easy to remove. Just go into the layout and click on the About Me widget. A box will pop-up and at the bottom it will have the remove option.
I am more interested in removing the blog title/header widget because I have had instances where I could not remove it. We are going to take a much easier approach.
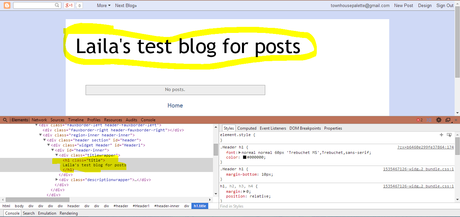
Go into your html and right next to the save button there is the jump to widget button. Click on it and it will reveal a drop down menu. Click Header1 or whatever your blog header is named in the layout page. You will be taken directly to the widget code. The code is in light green, so delete from the b:section all the way to the end /b:section. Then preview your work.
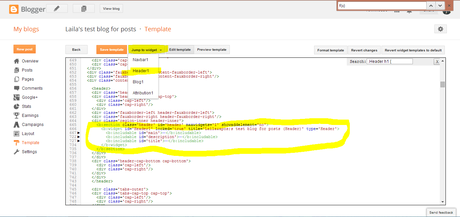
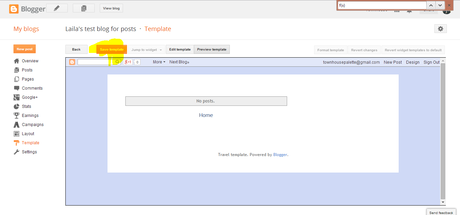
Here you will have a perfectly clean blog design base. Save your hard work ^_^
I hope I did not bore you to death with this extremely long blog post. I hope this post helped you in creating your perfect blog base. From here, we will be working on building the design. If you have a blog design you would like me to look at then hit me up. I am always happy to help, now you never have to pay for a blog design again! Unless if you really want to ^_^
Before, ending this post if your interested in any other templates to strip down. The only two that are not similar to the Travel template are the Awesome Inc. and Picture Window templates which are slightly more tricky to strip down. If you would still like a blog post about that then comment down below.
Please don't get frustrated with html/css because it takes time to learn. I still don't know everything about html/css, but I think I know enough to help you! Tinker around with blog templates and preview it to see what you changed, that is one way I learned.
Tell me what post you would like to see next in this series. Making a blog header, guide to navigation bars, etc. You won't be alone on this blog design journey. Remember if you ever need help, hit me up, its free.
I am having a giveaway and would love it if you entered here!
Thanks for reading-XOXO
Questions? Suggestions?
 Twitter | Instagram | Bloglovin' | Weibo | Google+
