Are you tired of watching your system crash at all times?
Are you tired of losing important files because of the unwarranted crashes?
Do you want to have more than one operating system running on your pc?
Then, the answer is simple – create a new partition on Windows 8.
Creating new partitions in your Windows 8 isn’t such a bad idea, considering the usefulness it brings to with it. It keeps you in a safe corner on the lookout for the rainy days when something inevitable may happen to your computer; it may be a system crash or lose of some important data that may be useful to you.
Below are some of the advantages of creating new partition on Windows 8 –
- Installation of more than one operating system on your system.
- Smooth backup of important computer data.
- Having more than one drive ready in case the current one crashes.
- Raising overall computer performance on your system where smaller file systems are more efficient.
- Having cache and log files separate from other files.
- Having a separate area for operating system.
Having shown how important it is to have more than one partition, I will show you how to install a partition on Windows 8 computer. Below is a detailed tutorial with informative images to guide you in installing a new partition on your PC.
Installing New Partition on Windows 8
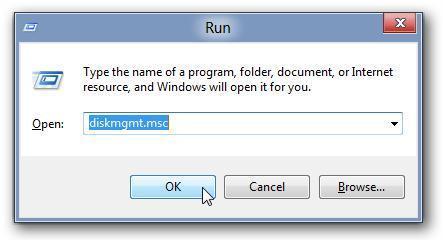
The first thing you’ll do is to activate the “Run utility”. Activate it by holding down (Windows logo + R) which will immediately pop-up the “Run utility” as shown below. Type in “diskmgmt.msc” in the search bar and Click “OK”
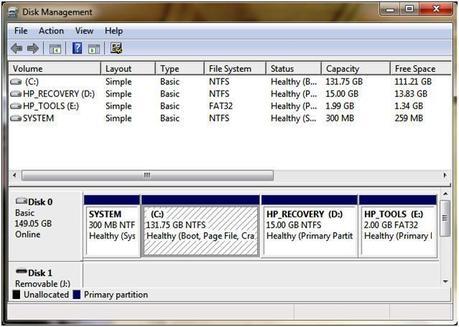
Immediately you click “OK”, Windows Disk Management will come up. It is basically used for creating, removing or formatting partitions.
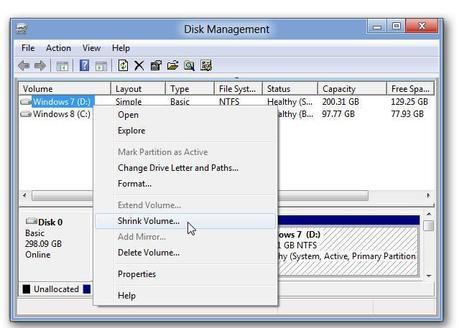
To shrink – Right click on your hard drive and select “Shrink Volume”
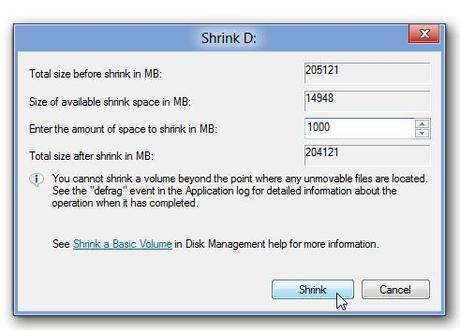
After clicking “Shrink Volume”, a new window will come up which will require you to input some basic information before it begins shrinking. You’ll need to enter “the amount of space to shrink in MB”.
No matter how large the Gigabyte or Megabyte you plan on partitioning, what you’ll input in that space must be in Megabyte. Assuming you want a 2GB space, just enter 2,000 MB which is an equivalent to 2GB.
If you want a 1GB partition – input 1,000 MB into the field etc.
It’s your choice on the amount of GB or MB you want to partition, I’ll be using 1GB for this tutorial. Input your amount in MB and click on “SHRINK”.
Below, Disk Management will show the amount of unallocated space available at present; which basically can not be used. It will also show you the maximum space that you can possibly allot to the new partition you are creating.
Having seen the amount of allocated space available from the black bar below, you’ll need to make the unallocated space usable by formatting, so that the creation of the partition can continue.
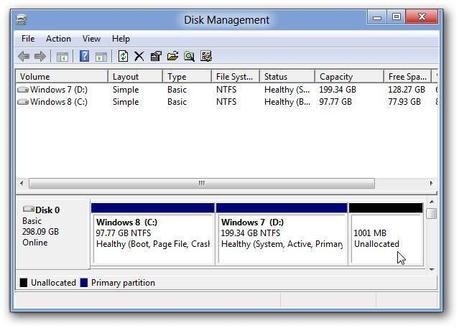
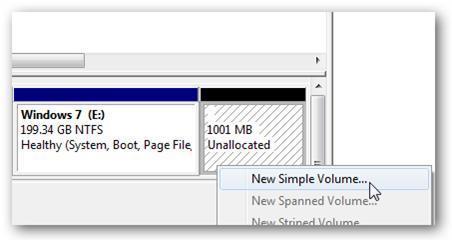
Right-click on the unallocated space and choose “New Simple Volume” from the list.
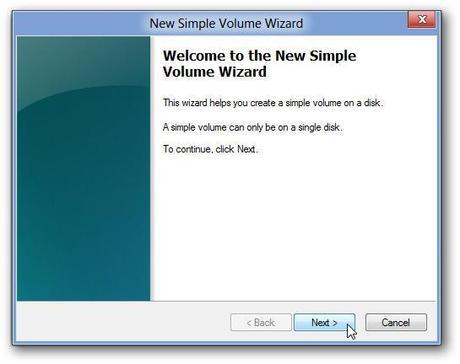
The Windows 8 computer will bring up an installation page like the one below; just click on “Next” to start creating your Disk.
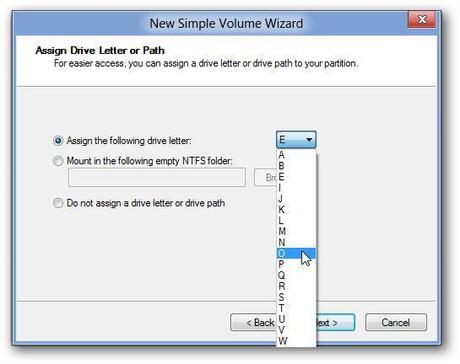
Choose any letter that isn’t associated with any of your hard drives. I have 4 hard drives namely – LOCAL DISK(C:), HP_RECOVERY(D:), HP_TOOLS(E: ) and DVD RW DRIVE(F:).
Since, I already have from letter C to F; I will select another letter that doesn’t clash with any of them; so that I won’t run into problems with my new disk. I’ll choose letter”O”.
Choose yours and click on “Next>”
Choosing a storage type may sometimes be confusing. But, if you will install Windows Operating System in the near future to this partition – it’s a good advice to select “NFTS” file type. Once the “Volume Label” comes up, just enter the name you want your partition to be called.
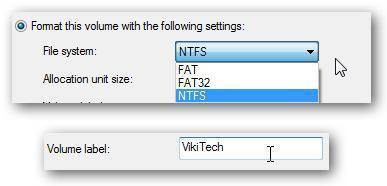
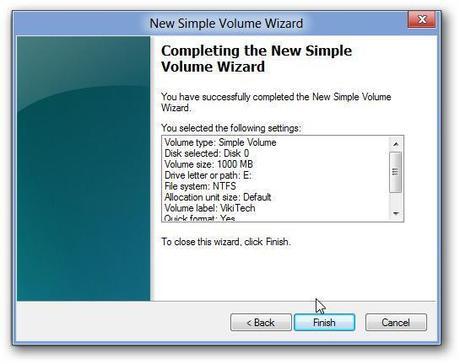
Then click on “Finish” to make your partition.
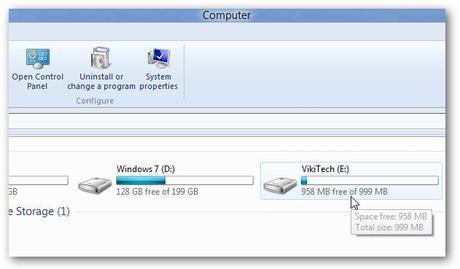
Your Windows 8 partition has been created; you’ll see the new hard drive with the name you assigned it and the number of space you allotted to it in your “Computer” folder as shown below.
Following the above tutorial as explained above will help you in creating new partition on Windows 8 computer. Disk partitioning done in the right way will reduce the chances of you losing your important files unnecessarily, due to computer crashes.
