I am still wading through my Christmas chocolates. This is not much of a hardship but I can feel myself beginning to flag. Apart from the orange in my Christmas stocking, no other piece of fruit has since passed my lips; I hang my head in shame. I was craving the healthy goodness of a crisp, juicy apple and this tart fitted the bill perfectly. I realize that this tart can't be considered to be healthy....BUT..... maybe it would help wean me off the choccies. All of those apples had to be good for me – I hope you can agree with my admittedly questionable reasoning!
Pastry is not a friend of mine; each time we meet we part on bad terms, so I wasn't overly keen to make a start on this tart! To spur myself on I took another lingering look at the photograph in the Baking Bible. Mary's apple tart is perfection personified. Succulent apple slices neatly nestled in a beautiful pastry case, my mouth was soon watering!
With regained enthusiasm I grabbed a bag of plain flour from the kitchen cupboard and weighed it into a bowl. I reached into the fridge and took hold of the cold butter. Chilled butter is the key to a good pastry, so at least I'd managed to do one thing right! As instructed, I cut the butter up into cubes and rubbed it into the flour. This took a little longer than usual as I only used one hand. This wasn't to show off, but simply to keep the other hand clean. Hopefully I would avoid getting sticky pastry all over the kitchen units and drawer handles! The last ingredient needed was a solitary egg yolk. This didn't seem to be enough liquid to bring the dough together and it came as no surprise when I had to add some water. I was worried about adding too much, so tried to be sparing and use the bare minimum. I wrapped the dry dough in cling film and placed it in the fridge for half an hour. Although the pastry was allowed some relaxation time I was not, as I needed to press on with the apple filling.
I had a fair quantity of cooking apples to work my way through but Mary says that they don't need to be peeled – hallelujah! I cut them up into chunks and placed them into a large saucepan along with some butter and a little water. I popped the lid on top and left it to cook until all lovely and mushy. This only took about fifteen minutes. Although I was grateful not to have to peel the apples, I was a bit resentful when it came to sieving the cooked apples as this added to the pile of washing up. The next instruction was to place the apple purée into a clean pan. I disobeyed instructions and returned it to the pan it had just come from; as far as I was concerned it was perfectly usable! I suspect Mary has a dishwasher!! I mixed a generous amount of apricot jam into the mushy apple, and this was swiftly followed by a modest amount of sugar. When it came to grating the lemon rind I managed to also grate my knuckle. I had to stop what I was doing to administer first aid! Injured, I struggled on and cooked the appley mixture over a high heat, stirring all the time. It took the suggested fifteen minutes before all the excess liquid had evaporated; my feet were beginning to ache at this point!
While the sweet smelling apple mixture cooled down I turned my attention back to the pastry. I felt a sense of foreboding as I took it from the fridge; it seemed so dry. When I pressed down on the ball of pastry with the rolling pin it crumbled beneath the pressure! I rinsed my hands under the tap and gathered the pastry into a ball once more. The moisture from my hands did seem to help and it became much more manageable to work with. Unfortunately bits of pastry broke off when I tried to line my tin; it appeared that I'd rolled it too thin. I was feeling weary by now so I couldn't be bothered to start again!
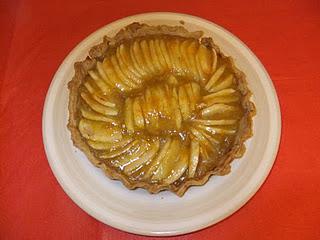
I had to bake the pastry case blind for about 15 minutes and then take out the baking beans and put the case back in the oven for a few more minutes to make sure it was really dry and cooked through. Now it was time to add the cold apple filling. I didn't escape peeling altogether as I still needed to peel the eating apples. Luckily only a few were required so it wasn't too bad and I was soon cutting them into very thin slices. I was supposed to arrange the slices on top of the apple purée in neat circles but something went wrong along the way as my attempt was nowhere near as neat as the photograph in the Baking Bible! Eventually I was ready to brush over a little lemon juice and sprinkle over a tiny amount of sugar and then pop the tart into the oven.
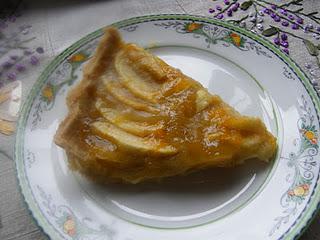
While the tart cooked I ate my way through several chocolate tree decorations! Feeling vaguely sick, I retrieved the apple tart from the oven. I gathered up my jar of apricot jam again, sieved some into a saucepan and warmed it through. Oh wonderful, more to wash up! For the finishing touch I brushed the apricot glaze over the tart. It certainly wasn't anywhere near as good as Mary’s but thankfully looks are not everything! I greedily helped myself to a large mouthful; I thought the pastry was lovely - thin and crisp. I was delighted to have avoided the dreaded soggy bottom! The apples were unfortunately too sharp; my taste-buds were all a tingle! It was a perfectly tasty tart but after all of the effort required I couldn't help but feel a little disappointed. On a happier note at least I'd managed to achieve some of my five a day!

Bit of a bodged job!!

A yummy but sharp slice of apple tart!

