Overdyeing Act II : How To Dye And What You Need
By Ms MakeitOver – Bernadette Lis
In response to the many inquiries as to how I actually dye items following this blog post – check it out so you can see the kinds of results. This is the exact way in which I dye in my home and what I use.
Please take the time to read, not skim, as the answers to many frequent questions are included.
 Overview

This contains my instructions for using Procion Fiber Reactive Dye for cotton, rayon, bamboo, linen, and modal. Dyeing silk and other fibers is not dealt with here since that is a different technique and possibly a different type of dye. Cotton blends, especially with elastane, usually dye well. Be aware that if your garment is sewn with polyester thread that the thread will not dye. If you are overdyeing a garment just to change the color slightly, it should not be noticeable. I stick to dyeing light colours on white garments which are “store bought” for this reason. Dharma Trading does have a ton of dyeables on their website and they inform you if the thread is questionable.
This is how I actually dye at home, using a slightly different practice than advised (I always remove my item from the dyebath when adding any more ingredients) and because most people don’t have a separate workroom where they don’t have to worry about making a mess!
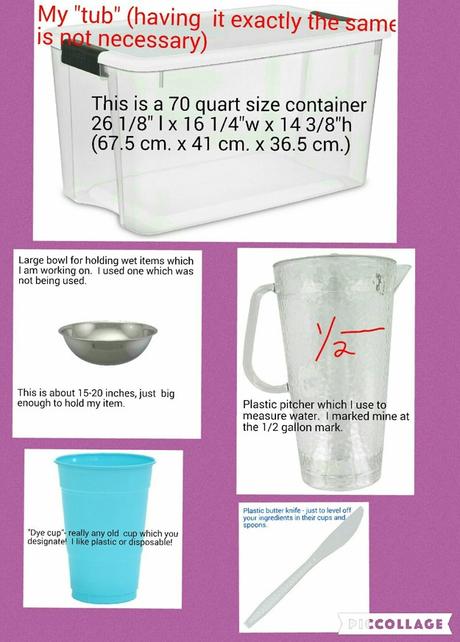
Firstly, I use a plastic storage container as a bucket or sink and place it in my bathtub when I am dyeing with Procion Fiber Reactive Dye. It is large enough to manipulate my item for even results and has no plug that can potentially leak my dyebath down the drain (I real-ly hate that!) When I am finished, I just pour the dyebath down the drain and wash my bathtub and container. It serves as storage for the tools and chemicals I use when I am finished too. If you don’t have too many (unlike me), you can also store the dye itself within the container (I have many so have a separate cabinet!).
Secondly, the other item which is crucial to keeping any mess contained is a large mixing bowl, (mine is stainless steel), just to have a place to put your “wet-with-dye” item down or to take to your washer without staining or leaving a trail behind you.
In selecting your actual dye colours when you are buying them, do keep in mind that it may need to be muted, toasted, or warmed to suit your taste or your personal color palette (if you have one).
I buy:
- Blue-Grey for muting,
- Lemon Yellow for warming,
- Golden Brown for toasting.
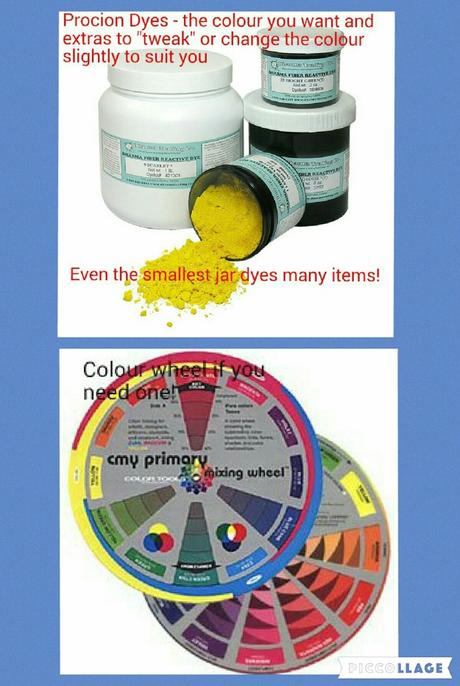
If you really want to get into mixing your own colours purchase:
- Lemon Yellow
- Fuchsia Red
- Turquoise
are the primary colours and you would need a Black to use a wee bit of to mute. I’m not that interested in doing things from scratch so prefer to “tweak” the colours I like from the chart! If you are unsure of how colours mix, do get a colour wheel too.
Some dyes have certain abbreviations next to them:
- “T” next to a dye means that you use Glauber’s Salt instead of regular non-iodized salt.
- “*” means that you measure twice the amount of dye to obtain the chart colour,
- “**” means that the color requires four times the regular amount of dye. (For most, one tablespoon is used for one pound/450g of fabric in three gallons/11 litres of water). You can halve the amount of water, dye, etc., but I have found that it is too difficult to maneuver clothing in that small amount of water to get even results.
If you are overdyeing or just tweaking a color slightly, only use a small amount of dye unless you are making a serious change in colour!
Cooling a medium pink, for instance, start with 1/2 teaspoon or less of Blue-Grey and if you need more, you can add more. You don’t want the full color on, just enough to cool it!
Something like changing a cool royal blue to a teal would require a full tablespoon of Lemon Yellow or even possibly more.
Do use some common sense. You can always add more, so it is better to start with less dye if you are unsure and add more if you need to gradually!
The List Of Things You Need to Overdye at Home
Ingredients
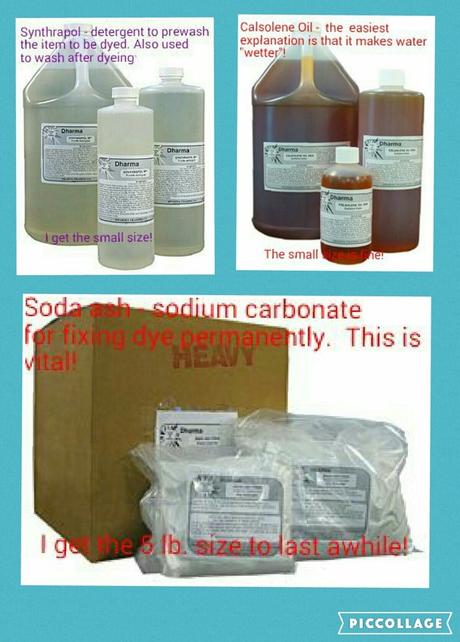
- Synthrapol (optional)
- Calsolene Oil (optional)
- Soda Ash
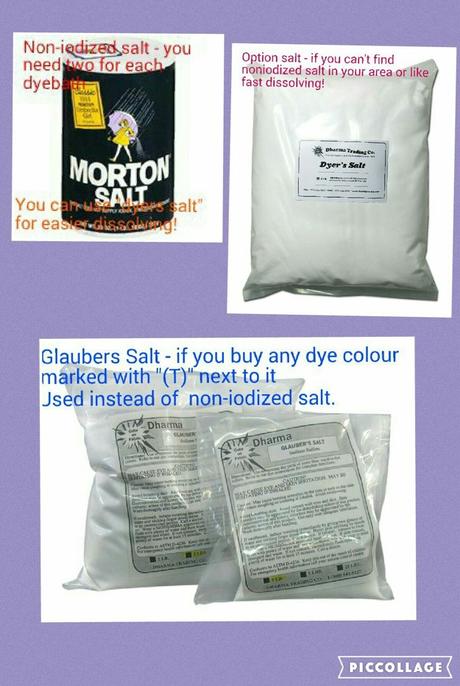
- Non-iodized Salt or Dyer’s Salt
- Glauber’s Salt (if needed)
- Procion Fiber Reactive Dyes
- Colour Wheel (optional)
Tools
- Tub
- Pitcher for measuring water
- Dye Cup
- Plastic knife for levelling
- Large bowl for your item
- Measuring cups
- Measuring spoons
- Timer
- Paper towels
- Rubber gloves
 What’s all the “Strange Stuff”?

SYNTHRAPOL – this is not strictly necessary if you can’t get it in Europe or in certain other areas but it is a great prewash for making sure your item is free of residue before dyeing. If you can’t get it, a heavy duty detergent with some soda ash (no added fabric softener or bleach in the detergent) is fine. It is also a great afterwash to get all the excess dye (called the “run-off”) out.
CALSOLENE OIL – the best way of saying this is that it makes water “wetter”. This is optional but recommended and I like it. It encourages even dyeing.
SODA ASH – this sets your dye permanently in the fabric fibers and is VITAL. It is “sodium carbonate”. The alkalinity of the soda ash with the dye reacts with the fibers dyeing them permanently. In a pinch, I have also used washing soda from the supermarket but I prefer the finer grade from Dharma which is easier to dissolve. If shipping is a lot to your area, you may want to consider finding it in your supermarket under “washing soda” (Arm & Hammer brand in the USA, but look in other areas for the “sodium carbonate” ingredient in washing soda).
GLAUBER’S SALT – this is used with dyes marked with a “T” instead of regular non-iodized salt. The “T” stands for Turquoise. Dyes with this color within it use Glauber’s Salt (an anhydrous form of “sodium sulfate”) to improve how the dye yields.
I have given the chemical names to assist some of my overseas styling sisters in avoiding spending too much money for shipping and/or import fees.
The Steps to Getting a Great Result when Overdying
Editors Note: Measurments here are in US gallons (which is different from UK gallon), also US cup is different from Australian cup. So if in US use these measurements. Australian cup is 250ml so I will make equivalencies here using the “cup” as your measurement guide. To avoid confusion – use your standard cup as your guide.
Beforehand, mark your pitcher at the half-gallon (2 litre) point with a sharpie type pen or nail polish. There are 8 cups in a half gallon (2 litres), 16 cups in a gallon (4 liter equivalent). Measure water into it and mark at that waterline so you don’t have to do it ever again!
1. Wash your item in Synthrapol (1/4 cup) or detergent in hot water and rinse it twice to get any residue out of your item. Put it in the salad bowl.
2. Measure into your container:
- 3 gallons of warm water (6 marked pitcherfuls)
- 3 cups of salt (or glauber’s salt )
- 2 teaspoons Calsolene oil (optional)
3. Using your gloved hand, stir and feel to dissolve every last grain of salt. This is VERY important. I use my bare hand so that I can make sure all salt is dissolved completely (especially if you are cheating and using the sink, check around the sink plug and corners). The water should be silky! Using your pitcher, grab some of this water out (about half a pitcher, exact amount not important ) and put it aside.
4. Put your item into this clear bath and get it sopping wet in the water from the container. Put it back in the salad bowl. (Do NOT wring it out!)
5. Pour a little water in your “dye cup”from the pitcher and add your dye to the CUP (1 tablespoon to match the chart colour, but start with 1/2 teaspoon if you are just tweaking a color slightly, you can add more later if you need to). Stir with the plastic knife and make sure there are no dye crumbs in the cup before you pour it into the big container. Pour into the container, which is now officially a dyebath, and stir with your gloved hand to mix thoroughly. Put both gloves on.
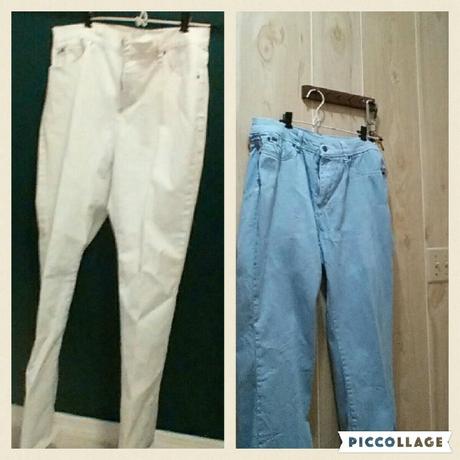
White jeans overdyed to a pale blue
6. Put the item in the dyebath (including any water in the bowl) and maneuver the fabric to make sure every fold and crease is getting dyed. You will be doing this for at least 20 minutes (set the timer). If you need to add dye or tweak, put your item back in the bowl before adding more dye, add the dye after dissolving in the cup to the dyebath, and stir the dyebath before putting your item back in (with any run-off water from the bowl). Yes, start the twenty minutes again and maneuver your item; do 30 minutes for dark colours.
7. Take your item out and put it into the bowl. Take 1/3 cup of soda ash and mix it thoroughly into the pitcher water with no crumbs. If some crumbs won’t dissolve, remove them or crush them between your fingers until they dissolve. Pour it into the dyebath and stir the dyebath thoroughly with your gloved hand.
8. Put the item back in and maneuver for 30 minutes for light colours and up to an hour for dark colours. (At this point, just maneuver every few minutes with one hand and read a book with the other).
9. All done! Put the item in the salad bowl, wipe the outside of the bowl, and carry it off to your washer. Fill your washer with water and Synthrapol or detergent and give your item wash and at least two rinses.
10. Cleanup is easy. Dump the container(you can mix a little vinegar in right before you dump your dyebath to neutralize the alkalinity and be environmentally correct)
and give a wash to your tools and the container in the bathtub, dry off, put your tools and ingredients in the storage container. Procion will not dye anything synthetic, so a good day to wear polyester! It will dye wood, so be careful if that is in your work area!


