Summary:
- Create a specific post type with CPT UI plugin
- Add specific fields, to the new post-types using the Advanced Custom Fields plugin
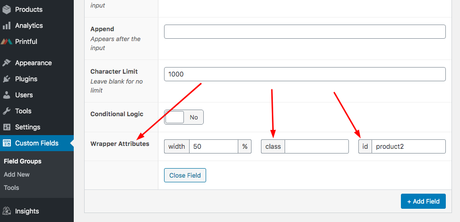
- Give new fields an id – so that you can then edit the styling with CSS
See our WordPress for CSS blog post for more information on customising CSS – this will be the next post to be published
Custom fields is probably the easiest way to implement significant layout changes to a WordPress theme.
It is also a great way to provide a client with specific pages, that they can populate and publish themselves.
It obvisouly helps, a lot, to know HTML and CSS, and ideally PHP and Javascript, but you should be able to effectively customise designs to your own, and to your clients’ needs by using plugins instead (along with the Customize features now available on WordPress sites.
If a client is very specific about a design, it can a be a bit of a nightmare if you are not savvy with editing WordPress CSS, HTML and JS – Advanced Custom Fields makes it easy – and easier for both you and your clients to update when required – by changing the visual editor in wp-admin to make it as simple as possible.
In fact, I first came across Advanced Custom Fields, when I worked for a UK Tourism company, and the Web Agency amended pages using the plugin.
Step by Step
- Sort your hosting and domain out. Hostgator is decent (not an affiliate link)
- Backup your website (you should do this before installing new plugins – ironically, you made need a plugin to do this!)
- Install the CPT UI WordPress plugin – so you can create custom post types
- Install Advanced Custom Fields WordPress plugin – so you can create, well, custom fields etc on your pages and posts.
- Activate both the CPT UI WordPress plugin and the Advanced Custom Fields Plugin
Creating Fields with Advanced Custom Fields
Once you have installed – and activated the Advanced Custom Fields plugin, you should see a menu item on the left hand side; called “Custom Fields”
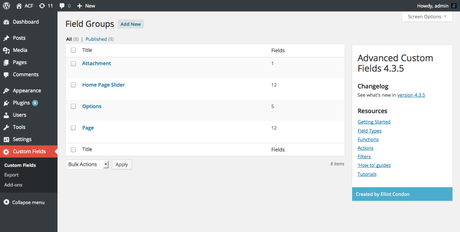
To create a new field:
- Click the “Add New” button next to “Field Groups” at the top of the page on the Custom Fields tab/menu item
- Give the Field a Name e.g. “Product Description 2”
- Now click the blue “+Add Field” button (near the top, to the right)
- Now fill in the items required:
– Field Name – give it a descriptive name – e.g. Product Description 2
– Field Type – for text entry/a text box – choose Text - Most items are quite straight forward – the Location part is very important thought – as this dictates on which pages or posts, this field will appear.
For my wooCommerce store, I have chosen:
Post Type – is equal to – product
so that I get the text field on all my product posts.
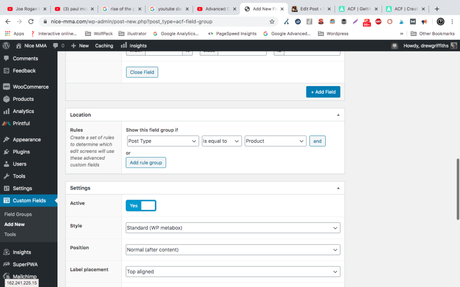
- when you are happy – click the “Publish” button on the right hand side.
- Now when I create a new Product Post/Page – I have the option to add a second description via a text box:
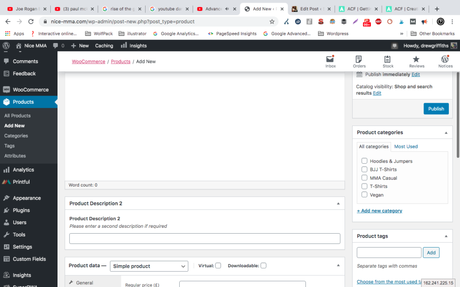
Other Text Fields that might be appropriate for a Product could be things like:
- Manufacturer
- Year
- Price
- Condition
You could also set the fields to “Required” – so that a product could not be posted to the website without all of the above details. This is particularly helpful if you have multiple people working on the same site.
Remember that Year and Price would be a “number” and not a text field.
Add A Rating Box Using Advanced Custom Fields
- Click “Add Field” button
- Give the Field a name in Field Label & an actual Field Name
- Add Instructions for the admin-user
- Add a min and max value, e.g. 0 and 10
- Step size – 1 (means can’t give 1.5 etc. has to be a whole number)
Combining Advanced Custom Fields with Custom Post Type Plugin
- Install CPT UI plugin and activate it
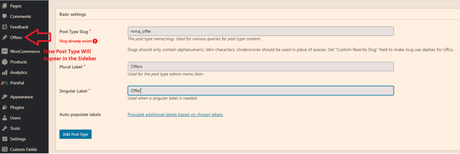
- Add a new post type by clicking on the relevant part of the side menu to bring up the CPT UI options
- Fill in the basic settings:
Slug – what will appear in the URL of these posts
Singular – e.g. “Offer”
Plural – e.g. “Offers” - Add Post Type – it should appear on the left hand menu/nav
Go Back to CPT UI – this time click on !Edit Post Types”
Minimize or just skip over the “Additional Labels” section
Under “Settings”
– Has Archive – change to “True”
– Menu Position – Change to “6” so it appears below normal posts
– Menu Icon – Change this to a relevant icon – 50 x 20 pxls
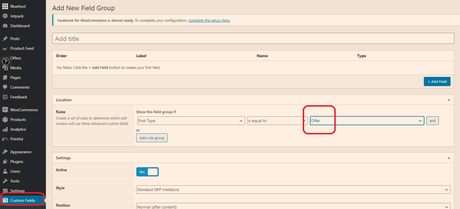
Now – when you go back to the Advanced Custom Fields section of the menu/backend – you can add specific fields to the “Offer” post type:
Positioning Fields on the Page
Simply use the options (in Settings) that custom fields gives you for positioning the field:
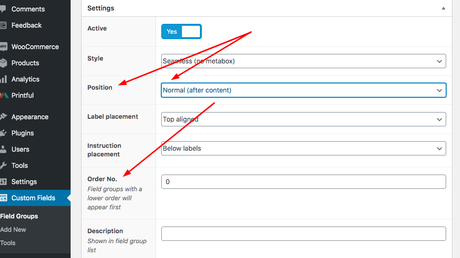
You can also add a class and id, so that you can edit the fields using CSS (see our next post about WordPress and CSS!)
