There is a photograph of Mary's Chocolatines in the Baking Bible; every time I stumble across it a shudder runs though me. The reason for this violent shudder is not revulsion but rather a deep fear. The photograph is gorgeous but the perfect Chocolatines look way beyond my baking capabilities! The fact that Mary says they are fiddly to make does little to quell my fear. It also doesn't help that the instructions spread over TWO pages, eeeeek!
I thought it wise to start baking at lunchtime when my little boy was in bed. This way I hoped I would be free from distractions. After a deep intake of breath, I reluctantly cracked on with the first task of making the Genoese sponge. The first thing I needed to do was melt a small amount of butter in a saucepan. Once this was done, I left it to cool whilst I got on with whisking a few eggs with some sugar. I felt as though I was on familiar ground at this point as I was using the same method as for a Swiss roll. I had to whisk the mixture on full speed until it was pale and thick enough to leave a trail when the whisk was lifted from the bowl. Next, I sifted some flour along with a little cornflour into another bowl. I then folded half of the flours into the eggy mixture. I did worry at this stage as it was hard to mix the flours in thoroughly and the last thing that I wanted to do was over work it. The next instruction seemed a little odd. I had to pour half of the cooled butter around the edge of the mixture and fold it in. I was no longer on familiar ground, as I've never added butter this way before! I repeated this process with the remaining flour and butter and poured it into a tin. I had to use a deep square tin instead of a shallow one; I very much hoped this wouldn't matter!
While the cake was cooking I got on with making the crème au beurre chocolat or, to you and me, chocolate butter cream! I separated a couple of eggs and put the yolks into yet another mixing bowl. The whites were not required, so I may have to make some meringues to use them up! I had to heat some water and sugar together in a saucepan. Mary doesn't mention using a sugar thermometer, so I didn't reach for mine. I followed her advice and let the sugar melt before bringing it to the boil. Apparently it's ready when the syrup forms a thread when pulled apart between two teaspoons. Once the syrup was at this stage, I slowly poured it on top of the egg yolks whilst whisking all the time. Obviously the sugar was too hot, as it cooked a small amount of egg and went rock hard!! I pressed on regardless, even though I sensed that this butter cream was doomed! I kept whisking until the mixture was cold.
In yet ANOTHER bowl I creamed a lot of butter until it was really soft and then gradually beat in the lumpy eggy mixture. At this point I realised that I had forgotten to melt the plain chocolate. I searched for a clean bowl; it was a difficult find as there was barely anything left in the cupboards! I added the chocolate to the bowl and set it over a pan of hot water. Once it had melted and cooled, I stirred it into the buttery mixture. I thought I'd better have a taste of the butter cream as I was worried I'd over cooked it. Thankfully my prayers were answered as it tasted divine, so rich and chocolaty.
By this time the cake was cooked. I was pleased to see that it had risen well and was a lovely golden brown. I tipped it out of the tin and left it to cool on a wire rack. I was so scared by the thought of slicing the cake in half. Although it had risen it was still quite thin. I am ashamed to admit I chickened out and got Neil to do it for me! I sandwiched the two slices of cake together with a little of the butter cream. I bravely faced the next challenge and gingerly cut the cake into nine two inch squares. Next came the VERY messy job of spreading more of the butter cream over the top and all four sides of each square of cake. I was soon completely smothered. I'd always thought that being covered in chocolate would be wonderful but now I'm not so sure! Next, I weighed out a lot of already chopped and toasted mixed nuts and stuck them over the sides of each chocolaty square. Unbelievably, I still hadn't finished as I had yet to pipe tiny rosettes over the top of each cake with the remaining butter cream! I'd been dreading this part the most as I'm not very neat!
When I stood back to look at my Chocolatines, I was amazed that they had turned out looking vaguely similar to those in the Baking Bible! I was looking forward to having a taste to see if they tasted as good as they looked. There was no one in sight, so I used my fingers rather than a fork to eat the cake. This was a misjudged idea, as I soon had chocolate all around my mouth and hands. Later I even found some behind my ear!
The sponge wasn't as light as I think it should have been. I wonder if I went wrong using a deep tin rather than the recommended shallow one. The butter cream, as already established was delicious; I could have eaten it straight from the bowl. The nuts on the side gave a great nutty crunch. Combined with the butter cream it reminded me of the outside layer of a Ferroro Rocher!
I don't think my Genoese sponge was quite up to scratch. However, apart from that, I am pleased with how these Chocolatines turned out, although it was rather a lot of effort. It took hours to make and created two lots of washing up! They did taste nice, but for all that time and the aching legs, I want it to be AMAZING!

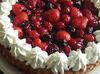
My attempt at Chocolatines!