Had it not of been for the photograph in the Baking Bible, I wouldn't have had a clue what Almond Tuiles should look like! In fact I'd never even heard of them before. Surveying the photograph, I thought them to be very similar in appearance to a brandy snap due to their thin lacy appearance. Several months ago I had been terrified at the prospect of doing brandy snaps; I was a nervous wreck when I came to make them! As it turned out, I really enjoyed the challenge and they were a success! This triumphant memory helped boost my confidence; I was hoping that the almond tuiles would also turn out well.
Before I made a start on the baking, I took my little boy on our morning trip to the park. Despite the chill in the air we spent ages playing on the swings and slides and we had great fun making footprints in the mud. On the way home we popped to the shops to buy some eggs for the almond tuiles and also some bread and soup for lunch. Other items must have leapt from the shelves into my basket as I ended up buying a lot of things that I didn't really need! I pushed Isaac home in his squeaky pushchair and carried the bulging carrier bags on my wrists; my hands were almost blue when we finally reached our front door!
By the time I was ready to make a start on the almond tuiles we'd enjoyed our lunch and Isaac was tucked up in bed. I laid my Baking Bible on the kitchen worktop, turned on the oven and greased two baking trays. I absent-mindedly left the buttered trays on top of the hot oven and, within a minute or two, the butter had melted. I thought it best to wipe them off and start again. This time I left them somewhere a little cooler! I decided my first job would be to chop the blanched almonds. Of course, chopping my way through almost a whole packet of almonds was a fairly boring task; it seemed to take an eternity. Mary says to chop finely. However, mine kept crumbling into a powder. I was worried that I was going to end up with ground almonds! This meant that the nuts ended up a bit chunkier than perhaps they should have been.
The next step was to measure butter and sugar into a bowl in equal quantities. I was to beat them together until light and fluffy. As the quantity was so small, my electric beaters had trouble gathering up enough mixture to be able to give it a good old mix. This was a little frustrating but I eventually had what appeared to be a light and fluffy mixture. The next instruction seemed rather odd to me! Firstly I separated an egg and discarded the yolk. Nothing wrong with that, I hear you say! However, the next part of the instruction was to sift a small amount of plain flour over the egg white and mix together. It was difficult to combine the two ingredients together and, once they had combined, I was left with what I can only describe as bread dough!! Due to the elastic nature of the 'dough', it wasn't easy combining it with the creamed butter and sugar. I very nearly forgot to mix in the chopped blanched almonds. Now that would have been annoying after all the time I had spent slicing them up!
By now the mixture resembled a thick cake mixture. It did not look biscuity at all. Mary says to place four teaspoonfuls of the thick mixture onto a tray at a time. It seemed such a tiny amount but I felt sure it would spread a great deal in the oven, so I restrained myself from adding more. Once the mixture was in the oven I watched the tuiles like a hawk. I didn't leave the oven’s side for all of the six or seven minutes cooking time. The biscuits should brown around the edges but not in the middle .This was certainly true of mine. However, I couldn't help noticing that, in the photograph, they are brown all over!
Once each tray of tuiles came out from the hot oven, I left them to cool a little on the tray but only for a second or two as instructed. I didn't find them easy to remove from the trays. In fact they were a bit of a nightmare. Some shattered instantly, some squidged into a lumpy mass of soft biscuit and most of the others welded to the tray. During this time I think it's fair to say the room turned a deep shade of blue!! A small handful behaved and successfully made the journey across to my awaiting rolling pin. I gingerly moulded them as best I could around the curve of the rolling pin and left them to set. I tried making tuiles of various sizes to see if it helped the situation, but it made little difference. One thing I found helpful was slightly flattening the mixture before it went into the oven. This helped to stop the tuiles from having a fat middle!!
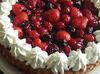
As I worked my way through the many batches of almond tuiles I nibbled on the broken relics to keep my strength up. Despite the difficulty I was having cooking these fragile biscuits; they certainly made up for it in taste. They were so lovely and sweet and, of course, light and crisp. The almond flavor really shone through and also gave an added bit of bite to the biscuits. I thought they were a cross between a brandy snap and a florentine. I must have eaten my way through the equivalent of six almond tuiles in about ten minutes; they are dangerously moreish! Unfortunately I can't say I was particularly happy with the appearance of any of my biscuits, but I had to choose the best for a photo. As instructed, I sprinkled some icing sugar over the biscuits but it didn't help to hide the imperfections!
Mary says almond tuiles are particularly good with fruit salad, ice cream or a light mousse. I intended to save the remaining biscuits for the following day as I liked the idea of the ice cream! Sadly I can't tell you if they really did go well with a large bowl of ice cream (I'm sure they would) as Neil went and ate the lot in one sitting!! Oink Oink!! He absolutely loved them! So, yes, my almond tuiles may not look anywhere near as dainty as in the Baking Bible photograph. However, looks aren't everything! It matters more that they were enjoyed. That makes me happy!!!

Please don't laugh!!!!!!!