 (This is part two of a two-part series. To see part one, click {here}.)
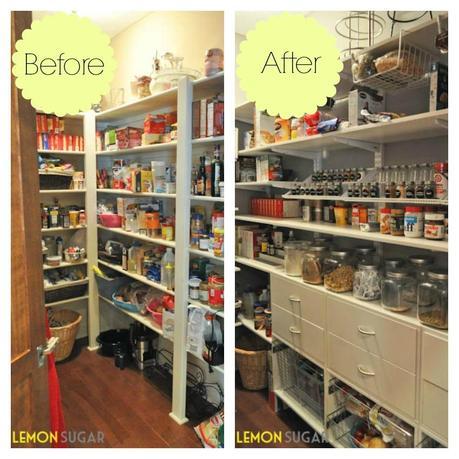
 This post has been so long in the making that I really can't believe I'm actually finally typing it. I've been working with the folks at Organized Living for a few months now, working out the details of this project, getting it installed and working out a giveaway for you guys, and now it's all done - and I am in LOVE with my new pantry.
In. Love.
Over the past few weeks, I can't even count how many times I've heard my girls ask their Dad, "Where's Mommy?" The answer? "She's in the pantry again." I like to go in there and just look around....you know, just kind of stand there and gawk at my clean, fresh, ORGANIZED pantry!
You know, my pantry really wasn't that bad when we started. Lots of room, tons of sturdy shelving and perfectly adequate for our needs, but something about it just wasn't cutting it. First of all, my original shelving wasn't adjustable. I couldn't even fit a cereal box on the shelves. Everything was out in the open - there was absolutely no way to hide my cluttered baking items aside from shoving them all in big baskets. As much time as I spend in the kitchen, I just don't have time to dig through a big basket sprinkles, or chocolate chips, or whatever it may be that was inevitably hidden in the depths of the overfilled containers.
After contacting Organized Living and providing my pantry dimensions, they immediately drew up a plan and walked me through my layout options. After a quick phone call, we were ready to move forward and the product showed up in my driveway just a few days later.
In the meantime, my husband and I were busy emptying our old pantry, clearing out the old shelving and repainting.
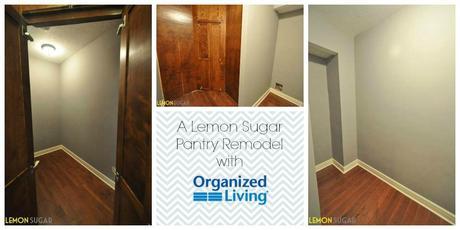
Admittedly, even though I was assured by the Organized Living team that it would be a piece of cake, I was still nervous about taking on this big installation. I mean, I had a perfectly adequate pantry, so why was I even messing with this? I was nervous that the installation would be more difficult than anticipated. But you know what? It wasn't. It was easier. And I'm happier with the final product that I could have ever imagined.
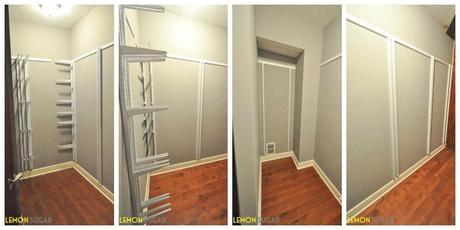
The installation was the easiest part of this whole ordeal. Taking pictures of my small space was more difficult! It is really just a matter of leveling and screwing in a top horizontal rail, and then hanging the vertical bars from that rail. Then, you install the shelving racks and lay out your shelves.
It took us less than two hours. While my husband installed the shelving, I assembled the drawers and unpacked my new spice jars. I can't emphasize enough how easily this all went together!
As I mentioned, my biggest issue was storage for all of my baking supplies. The six, fully-extendable drawers provide the perfect "hiding place" for things like sprinkles, chocolate chips, tea and coffee, the kids "treat-drawer" and powdered sugar bags. The tiered shelving is perfect for my new spice jars, and the pull-out wire drawers contain our bread, vegetables and other miscellaneous, bigger items.
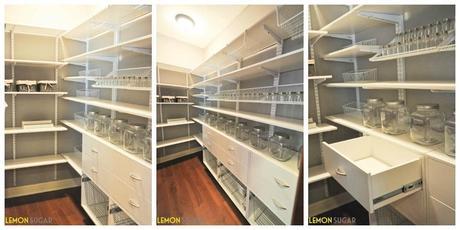
Since I do have an irregularly-shaped pantry, we've never been able to use all of the available space. Organized Living had a solution for that, too. Custom-cut shelving fit perfectly into the nook on the back wall, which is the perfect spot for all of my kitchen appliances. Oversized wire baskets fit right inside the door, above our garbage can. They're slim enough that they don't impede the doorway, but make the perfect use of previously unusable space. I ordered plenty of hooks for aprons, towels and pot holder storage, too.
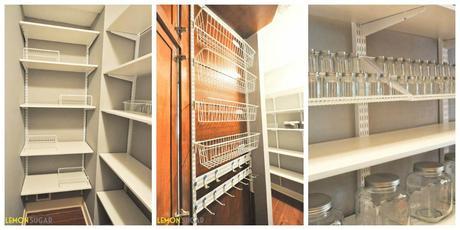
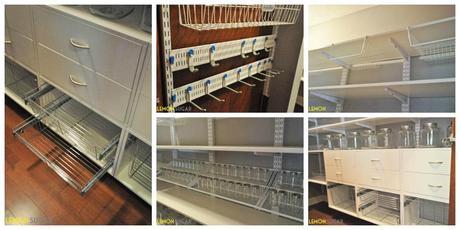
I could barely stand having this big, fresh new pantry sit empty while I took pictures for you guys. After a few hours of slowly re-organizing my kitchen items, food and my own habits, I finally had everything back where it belonged.
Why didn't I do this earlier?
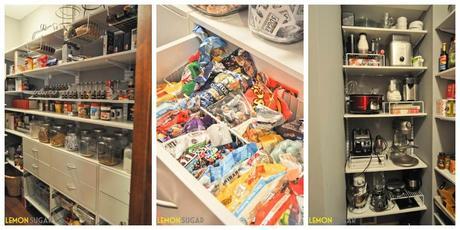
An ENORMOUS thank-you to Organized Living for sponsoring this series of posts. I highly recommend their products to anyone who needs a bit of organization in their own homes. The process was painless, fun and has given us a space that is clean, bright and efficient. In fact, we are so in love with Freedom Rail that we are already planning our next project - we are eyeing all of their garage products and making big plans for some of our closets.
If you have any questions about the Freedom Rail products, please don't hesitate to ask. If I can't answer, I will send you to someone who can. Be sure to check out Organized Living on their Facebook page, on Twitter and on Pinterest to stay on top of their latest and greatest deals and products.
Thank you so much to everyone out there who entered the giveaway! I'm excited to announce that the winner of the 5t KitchenAid Mixer is...
Hannah B!!And, the winner of the $100 gift card from Organized Living is...
Notification emails have now been sent to both. If I don't hear from them within 24 hours, a new winner will be chosen. Congrats to the winners!
I'll be back with a new recipe tomorrow. Thanks for following along with my "pantry adventures" and be sure to leave a note below to let me know what you think.
♥erin
