Have you been repeatedly failing to make your mark in the middle of increasing competition at work space? If you have an affirmative answer, then Ezvid Wikimaker can come to your immediate rescue. Gone are the days when you had the backing of just documents and dry presentations to place your case ahead of potential investors and other stakeholders. The modern era of digitalisation is all about getting your word across the table in an audio-visual manner to keep boredom at bay and increase productivity at the same time. Today we are going to discuss in detail about this versatile video creator and how it can help you stand out
from the queue.

Unique Aspects Of Ezvid Wikimaker
- Voice Synthesis
Wikimaker can create speech for its users by linking the words typed in along with videos and images through artificial intelligence. The online tool starts with a piece of written text and keeps on adding narration by pairing the worlds with content which match the most.
- Image Adjustment
Wikimaker finds images which are most relevant to your text and labels it with symbols looking like dual vertical bars. This indicates that multiple images have been discovered for your text. You can easily switch to another image by hovering your mouse over the same and choosing the replacement image. If you are not happy with the images, then you can simply click the X button appearing next to the same.
- Video & Image Capturing
Wikimaker can find images which are a perfect match with your text. However, you can capture both images and videos directly from the web using its chrome extension. This can serve as your ideal tool while trying to make great videos. You can capture graphics by firstly downloading the chrome extension in your system. It will next review all the tools provided by the extension as well as the keyboard shortcuts associated with each one of them. You will have to press the “save and return to wikimaker” button after capturing a screenshot. The media will next appear under the Wikimaker’s ‘captured’ section. Users can enjoy a preview of the same and even upload it by clicking the green icon.
- Multi Tasker
You can trust Ezvid Wikimaker to keep your back with multiple operations at once. Suppose you submit a particular text. You can proceed working on another paragraph immediately following the same without having to spend much time for the first operation to complete.

- Optimization
Every time users proceed with screen capturing, the web browser window gets automatically resized in accordance with the correct aspect ratio. This in turn helps in proceeding with highly optimized recording.
- Hassle-free zooming
For best results, you should refrain from resizing the window once the recording action initiates. However, the zoom level can be altered in your browser using keyboard commands of Control-Minus and Control-Plus. Users can alter the zoom level of their browser text without making any changes to the images by using the keyboard shortcuts of Alt-Equal, and Alt-Minus.
How To Use Ezvid Wikimaker
- Firstly, you will have to open Chrome browser from your device and navigate to wikimaker.ezvid.com.
- Next you will have to sign up for creating your account. You might be required to confirm your mail address and click on the confirmation link which will be sent to your registered mail address.
- Now you will have to navigate to the home page of Wikimaker and clickc on the ‘Make A New Wiki’ button.
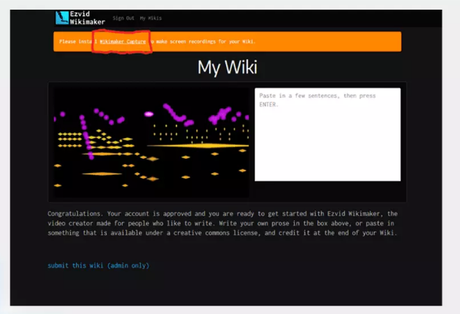
- You will now have to fill in the requisite text at the top portion of the page. Here it is imperative to make sure that your grammar and spelling is correct. After writing some sentences, you need to press the enter key. Doing this shall automatically create your speech as Ezvid Wikimaker matches the text with accompanying images and sound files.
- Captured media can be used by clicking on the green icon embedded in the image. In the case of a screenshot, you need to select the word you wish to start the image on. If it is a screen recording, then you can select the beginning and end frame for revealing just a limited part of your recording.
Wrapping It Up
After you have typed in enough contents, you can publish it to Ezvid Wiki. However, prior to publishing, you need to ensure that the content is grammatically correct and devoid of any spelling errors. The main reason behind the same is that the wiki cannot be edited once you have published the same. You just have to click on the “submit this wiki” link appearing at the bottom portion of your screen. This will cause your wiki to be available online so that you can share its link with your friends and colleagues.
