Life has been a whirlwind lately. Between kids and husband, work, renovating the house, and starting up my own small cake business, I seem to always be busy. Not just that, but the flow of work is never even, which leaves me in exhausted spurts. There’s weeks where I’m lucky to get 12 hours at the shop, and then there’s weeks like this one, where I’m working full days at the bakery, and then coming home and caking (yes, caking is a word, I made it up). I absolutely love it, but it’s really hard to keep up with everything that’s going on!
On top of everything I have going on in my real life, my blogging life has been picking up, also. You may have noticed that when you clicked over to my blog, the url is different. That’s right, after 3+ years of blogging here, I have FINALLY bought my domain! And I changed the name! Well, sort of. Over the last 3 years, my blog has changed so much. When I first started up, I crafted a lot. When I baked, it was out of the love of baking, in a poorly lit kitchen, with nothing but a cell phone camera to take photos with. I was going to school to become a pastry chef, but certainly still learning. Fast forward to now, I have my handy little DSLR which I’m becoming more familiar with, and I’m more into the photography aspect of it. I’ve quickly learned how to incorporate blogging into my every day life without it seeming like a chore. I no longer go out of my way to find things to blog about, but rather blog about what’s in my life. And lucky for me, I bake on a regular basis! Baking is my life. I really felt like I needed to incorporate my baking into my blog title a bit more. Crafty Mama was a great name when I started up, and I’ve earned a following under this name, but it was time for a change! And here it is, Crafty Mama Bakes! Honestly, it was the best I could think of without confusing my readers, still keeping the name of the blog, and incorporating my foodie side. I’m quite happy with how things have turned out, and I’m SO excited to start making changes to the blog. I’m looking to revamp my blog (when I can find time, which most likely will NOT be this week!)
So, some things you’ll be seeing on my blog a little more:
Better photography. Yes, you may remember my instagram phase a few months back. Instagram made it easy for me to blog and upload photos directly to my blog when life was too busy to keep it up and running. But oh dear, those photos were so terrible. I’m learning more about how to use my camera, and moreso, how to compose a photo. I was actually lucky enough to recently get one of my photos on Food Gawker! All you other food bloggers know what a struggle this is in the beginning when you’re just learning how to do food photography. Hopefully I’ll be seeing more of my photos on their site!
New design. When I have more time, I’m planning to go through and revamp everything, and give it a little makeover. I can’t wait!
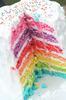
Cake. Yes, cake! I have started doing cakes at home, and I’m excited to start posting photos of them. For right now, I’m not doing many, since I’ve just started up, and it’s taking a little while to get my name out. But I’m quite certain that once people start seeing my work, the orders will come! So keep watching for updates and photos.
So, on to the recipe! I made this a couple weekends ago for a Memorial Day cookout.

The S’mores cheesecake is one of my favorites to make. The toasted marshmallow paired with the Hershey’s chocolate and graham cracker crust makes it taste so much like a real s’more. It’s the perfect dessert for a summertime cook out. The marshmallow gets perfectly toasted on top, and even once it’s been chilled, stays perfectly gooey. Here’s how to make it!
Crust:
- 1 1/2 cups graham cracker crumbs (made from 9 whole crackers finely ground in processor; 1 packet)
- 3 tablespoons sugar
- 6 tablespoons (3/4 stick) butter, melted
Filling:
- 9 ounces milk chocolate (I like to use Hershey’s Milk Chocolate Chips)
- 2 8-ounce packages cream cheese, room temperature
- 3/4 cup sugar
- 1/8 teaspoon salt
- 3/4 cup heavy whipping cream
- 3 eggs
Topping:
- 1 cup sugar
- 2 large egg whites
- 3 tablespoons water
- 1 teaspoon cream of tartar
- 1/8 teaspoon salt
- 12 large marshmallows
- 1/2 teaspoon vanilla extract
Preheat oven to 350.
For the crust:
In a food processor, blend your graham crackers and sugar. Once it’s a fine crumb, add the melted butter and pulse until it comes together.
Press the graham cracker mixture into your pan (you can use a spring form pan, or just a cake pan lined with wax paper). Bake for 10 minutes and then set aside.
Cheesecake:
In your mixer, cream together the cream cheese and sugar. Add the eggs, one at a time, scraping the bowl well in between. Mix in the chocolate, salt, and whipping cream, scraping in between, until everything is incorporated. Pour the batter into your baked crust, and bake for 50-60 minutes, or until almost set in the middle. Chill fully before topping. Most cheesecakes are baked in a water bath, but I choose not to do that with this one. The water bath keeps the cheesecake from cracking on top, but since this one is topped with marshmallow topping, you won’t be able to see any cracks, so it’s not as important.
Topping:
Set a pot of water on the stove to boil. In a metal bowl, mix sugar, egg whites, water, cream of tarter, and salt. Set the bowl on top of the boiling water (make sure it doesn’t touch the water), and beat until the mixture is almost hot to touch, roughly 3 minutes. Add your marshmallows to the hot mixture, and let it sit for about a minute (this will get the marshmallows softened before beating).
Place your mixture back on top of your boiling water, and beat for another 3-4 minutes, or until you get stiff peaks. Add the vanilla, and mix in.
Spoon the warm marshmallow topping onto your chilled cheesecake. Spread to the edges of the cheesecake, making creative swoops and peaks.
Turn on your broiler, and wait for it to warm up. Once the broiler is ready, set your cheesecake under the broiler, and let it sit until the marshmallow topping has browned. Watch it closely, it will brown quickly once it starts! You may need to rotate it during this process to ensure even browning.
You can also use a torch to brown the top, if you’ve got one handy. In the words of Julia Child,
“every woman should have a blow torch”.