It's been a while since I created a DIY video and since we're all stuck inside exercising, baking, I thought why not let's add crafting to the mix. In this DIY tutorial series, I will be showing you 5 ways that you can use washi tapes. These 5 ways include using washi tape in art, in a card and in journals.
Sticky Rice Sisters
Sticky Rice Sisters is a pair of half Taiwanese and half California sisters that operates a kawaii stationery store. I'll be collaborating with them for this washi tape craft. You can check out more washi tape crafts on their blog. They will be creating 3 washi tape crafts:
- Washi Tape Photo Frame decoration
- Differentiating wires
- Differentiating cups/straws
5 ways to use Washi Tape
- Washi Tape Sliding Art Card
- Washi Tape Suncatcher card
- 3 ways to decorate your journals
Jumping back to my washi tape crafts. I'm presenting 5 different ways you can use washi tape. :
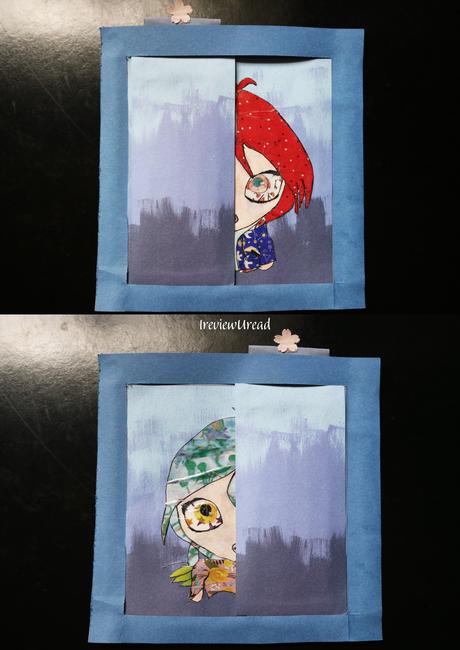
Washi Tape Sliding Art Card
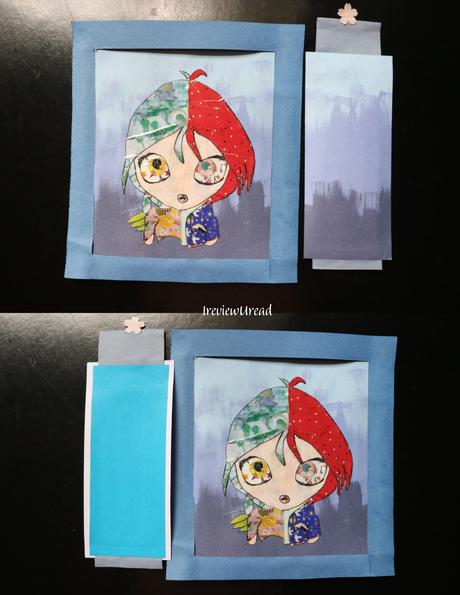
The character in the frame is Will Vandom from W.i.t.c.h. I was inspired by my recent W.i.t.c.h. Journal with me collaboration spread. On one side, I feature her as a normal teenager and on the other side, I feature her as a guardian. I drew her in pigtails instead of her usual guardian form for I want her to look more spectacular than normal. However, this does kind of remind me of Haylin's hairstyle. I will be featuring the full time-lapse of me creating this washi art piece in another video (will update this link once it's out).
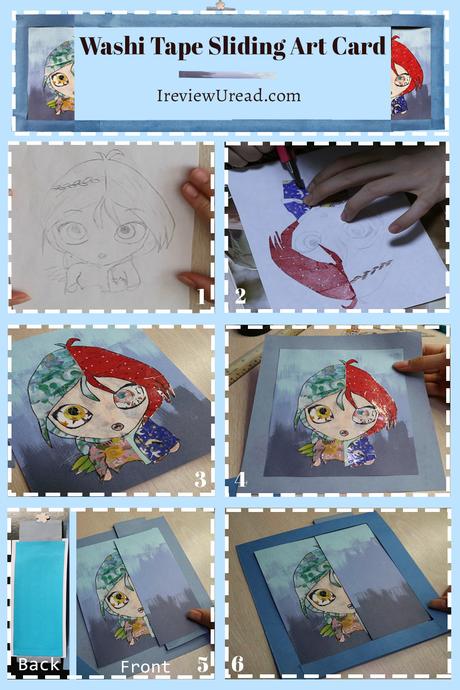
- Draw the picture you want. You can print a picture or get a photo if you don't want to draw
- Use washi to colour the drawing if you chose to draw
- Paste your picture on a background. Cut an extra portion half the size of the background to make the slider
- Create the frame's base and stick the background onto the middle of the base. Create the frame as well. The frame should be as big as the base but with the middle square cut out.
- Paste a holder on the top for you to hold when sliding the slider and a little foot roller piece at the bottom so that the slider won't fly out when sliding the slider
- Paste the sides of the frame and the bottom half of the bottom frame. Leave space at the bottom frame for the slider to move. Insert the slider from the top to reach the bottom.
The slider is removable and you are able to journal or write a hidden note at the inside of the slider. This is a versatile piece that you can turn it into a card, a journal page or leave it as an art piece. You can change the internal design, the frame and the background. All you need is the basic mechanism to create it.
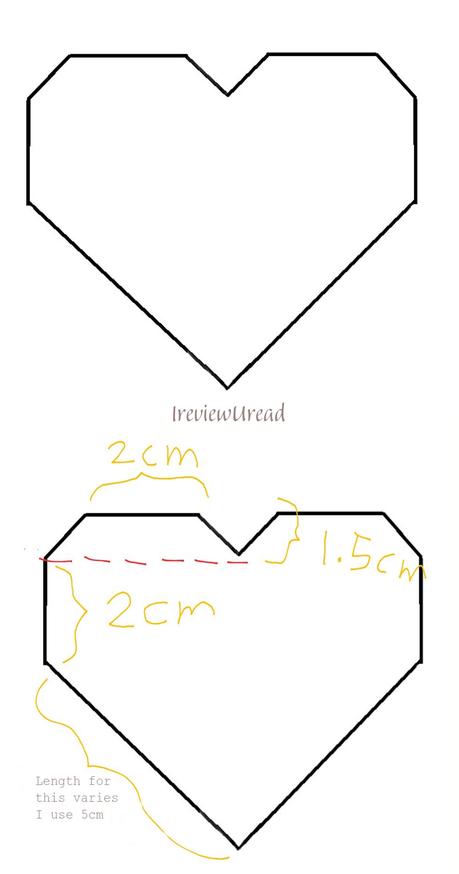
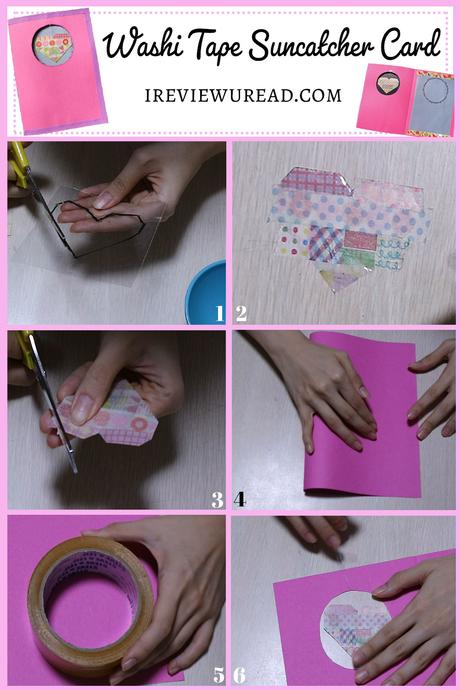
- Draw half a heart using the template with a whiteboard marker on the plastic waste. Fold the plastic in half and cut it to create the perfect heart. Wipe off the marker traces.
- Paste different washi tapes on both sides of the heart.
- Trim off the excess washi tapes
- Fold the A4 sized construction paper in half. This will be your card.
- Measure the heart and draw a circle on the first page of the construction paper. Ensure the circle is able to fit the heart. Cut out the circle.
- Sew the thread to the top of the heart and the top of the circle. Tie a knot in both of them and secure the knots with a small piece of washi tape.
- You can decorate the internal of the card however you like.
- Washi Tape Feathers
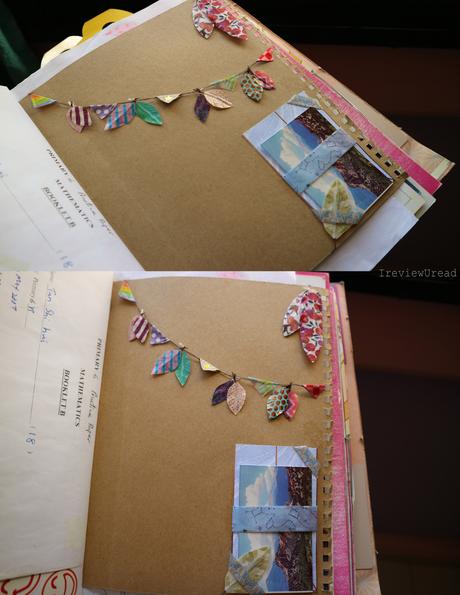
- Washi Tape Flag
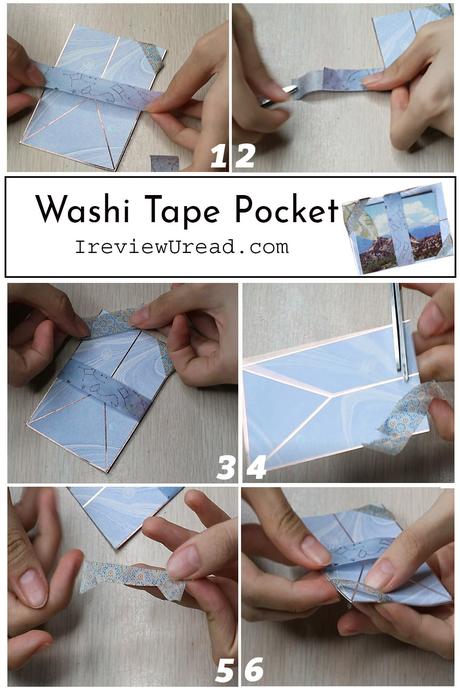
- Washi Pockets
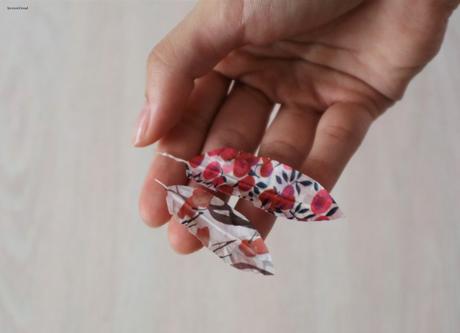
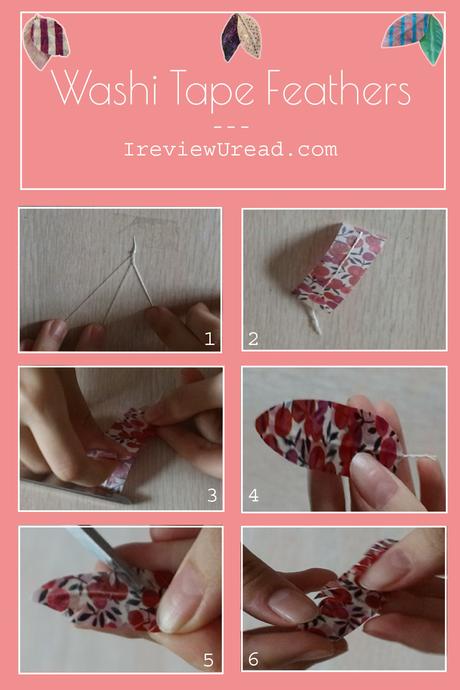
- Cut 3 pieces of threads of the same length and braid them together. Tie the ends. you can use 2 pieces of thread as well but 3 pieces will give the stem more thickness.
- Tape 1 side of the braid with washi tape, leave an end out.
- Tape the other side in the same area.
- Cut the tape into a shape of the feather.
- Cut diagonal lines downwards throughout the leaf.
- Push the feathers in opposite directions for them to look more natural.
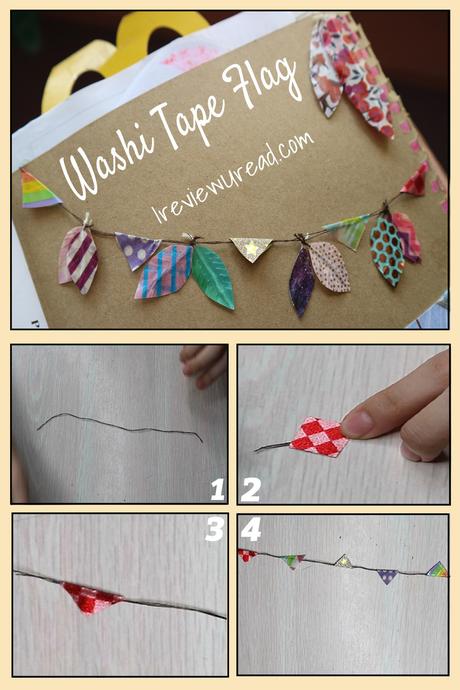
- Cut 2 threads of the same length and tie the ends together.
- Cut washi tapes in square
- Paste them diagonally on the threads and fold the ends of the square together to make a triangle
- Continue until you've reached the end of the thread.
- For the middle holder, cut 2 pieces of washi tape. One-piece the same length as your base and another piece slightly longer than the base.
- Paste the shorter piece on the middle of the longer piece. Sticky sides facing each other. Pull the washi tape over and adhere them to the back of the base.
- Measure the corners of the base with the washi tape
- Aligning the scissors to the sides of the base, cut half of the sides of the washi tape.
- Fold the half that was cut downwards to meet the other half.
- Adhere the washi tape to the back of the base. Create as many corners as you want.
Washi Tape Sliding Art Card Steps
Washi Tape Suncatcher card
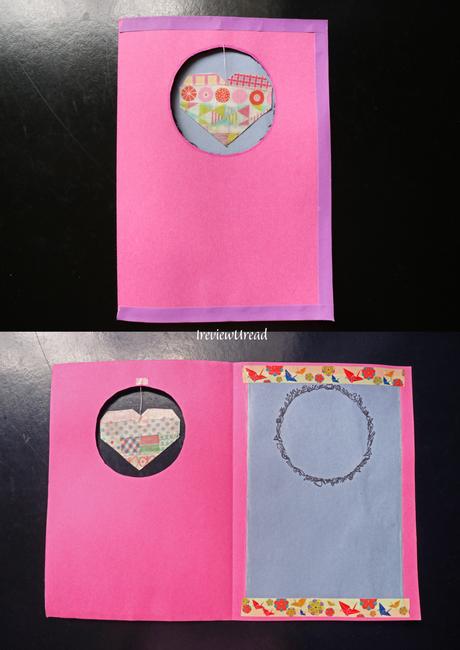
In the darkness, there is light. By raising this card up towards the sun you are able to see two sides of this washi suncatcher. The stronger patterns from the front show up more in the back while the lighter patterns in the back act as the background. Like a bass to a band. Like the previous DIY, this piece is also very versatile. You can change the suncatcher and the card's patterns and design as you wish. I've included the template and the measurements of the heart I feature in the video for your reference. Do remember you can change the suncatcher shape and design featured int he video.
Washi Tape Suncatcher Card Steps
We're moving on to the journal portion of the tutorial. In this journal, I feature 3 ways to decorate your journal. You can use these 3 ways in separate journal spreads or in the same spread.
3 ways to decorate your journals
Washi Tape Feathers
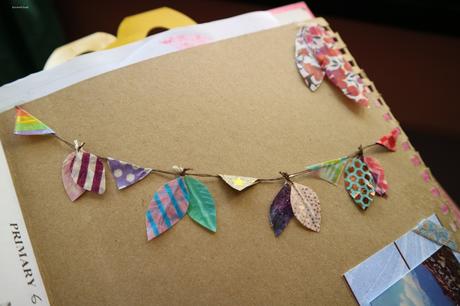
I've added the feathers to the flags for I feel that it helps give them depth and fills the space in between the flags.
Washi Tape Flag
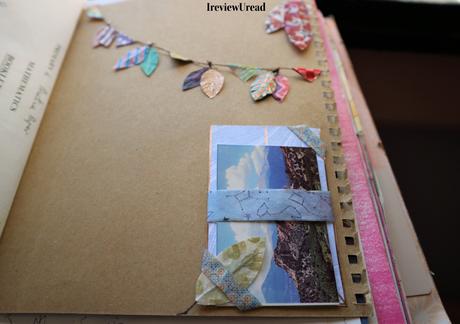
This pocket is a see-through pocket so that you can see what's inside the pocket without the clear glare from a clear plastic pocket.
Washi Tape Pocket
That's the end of the 5 ways you can use your washi tape. You can head over to Sticky rice sisters for more ways to use washi tapes or over to my DIY collection to learn other DIY crafts.

