– contributed by Amy Freels.
Because genealogy and family history are popular topics, most people are aware of the need to digitize and label family photos. But did you realize that even if you do this, you could still be losing a part of your family story? In honor of National Organize Your Files Week, let’s talk about ways to organize your family photos to preserve family stories.
Family photos are a time capsule of your family’s life and illustrate what was important to them. Before you start the project, it is helpful to keep in mind four things:
- What do you want your family to know or remember about you and your family?
- What is important to you that it not be forgotten?
- What doesn’t your family know that they should?
- What about your family history would surprise them?
Start by organizing your photos. You’ll want to weed out the ones you know are extraneous, like duplicates and photos of nonfamily members. If working on all of your photos is overwhelming, pick a few favorites to focus on, keeping the above four points in mind. Group the photos by year or subject. If the photos are already in an album, don’t attempt to remove them—you could irreparably damage them.
Next, label your photos. If you are working with originals, instead of photos that have been digitized, write lightly on the back with a pencil. Don’t push too hard. Be sure to include everyone in the photo, with full names and dates of birth and death, if known. Give the name of the photographer, the date the image was taken (estimates are okay), and the location pictured.
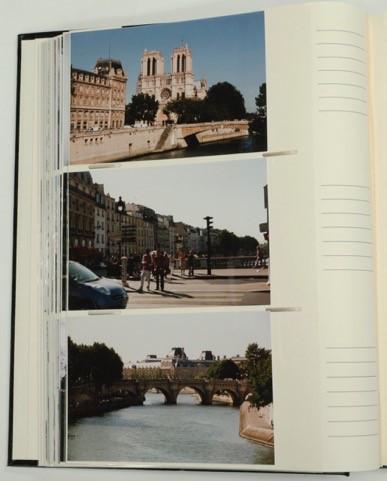
Consider investing in a photo album that has space to record more detailed information. In the album, you’ll record the same information as above, so that you don’t inadvertently damage the photo by taking it in and out of the album. You’ll be able to include extra information in the album, like the relationship between the people pictured (cousins? siblings?), what is happening in the photo and why, as well as the original owner of the photo or where it was found.

Sample album with space for recording notes
Remember, don’t assume what is going on in the photo will be as obvious to future generations. Wedding photos from a century ago, for example, don’t look anything like what our wedding photos do today. You can do photo research to further the story for photos where you don’t know any information. If the name of the photographer is on the photo, this can help narrow down city and timeframe. Learning how to identify the type of photo can tell you a date range.
Don’t forget to ask other family members for information. They may have further knowledge about the photos or may have photos to share that fill in gaps in your photo collection.
If you are working with digitized photos, consider storing a digital file with the photos that includes all of the above information for each file.
If you follow the above steps, you’ll not only have organized files, but will be well on your way to helping preserve your family stories.
Amy Freels recently completed her certificate in Museums and Archives from The Institute for Human Science and Culture (IHSC) at The Cummings Center for the History of Psychology at The University of Akron.
